Step-by-step guide to laying paving slabs. Technology for laying paving slabs
For craftsmen who lay paving slabs with their own hands step by step instructions will help save the budget for arranging pedestrian paths and parking lots near the cottage. The technology is the same for concrete tiles and polymer materials. Work should be carried out in summer in the absence of precipitation.
Features of installation of paving slabs (TP)
This coating allows you to completely avoid concreting and other “wet” finishing processes, but only on soils with normal bearing capacity. If the site is located on a fresh embankment, undermining and problematic soils (for example, silty sand or pure clay), or has a complex topography, it is necessary to concrete the base to ensure a rigid underlying layer and uniform distribution of loads on the soil.
On sand, gravelly, rocky soil, sandy loam and loam, it is enough to remove the topsoil and replace it with non-metallic material:
- paths - sand;
- parking – crushed stone 5/40.

Crushed stone base of the parking lot.
To prevent mutual mixing of soil with inert materials, you should line the bottom of the pit with geotextiles and start this non-woven material on side walls. It is necessary to compact layers with a vibrating plate with a maximum thickness of 10–15 cm, as in the photo below.

Geotextile layer.
A vibrating plate with an electric or gasoline drive will be needed in further stages in any case. Therefore, they either rent it or make it themselves. You will also need the following tool:
- rule - special, made of boards, ordinary plaster 1.5 - 2 m;
- rubber mallet - for laying paving slabs (TP) and installing curbs;
- level - a laser level is preferable, but a bubble level will also work, for difficult terrain– hydraulic;
- a hard brush – needed for filling the seams at the last stage;
- Angle grinder (“grinder”) – used for cutting cladding elements;
- cord – marking the route, slopes;
- trowel and shovel – adding and leveling sand.

Tool for paving TP.
Important! The crushed stone is laid in its natural state, the sand is abundantly moistened, there is no need to spill it from a hose/bucket so as not to create with my own hands perched water in this technogenic layer.
On complex terrain, terracing is first done with retaining walls made of gabions or monolithic reinforced concrete. Otherwise, lateral soil movements will disrupt the geometry of the paths after just a couple of years of operation.

Even on flat areas, a slope of paving slabs is necessary, since the material is waterproof, and the gaps between the paving elements are not enough to quickly drain storm and flood runoff. It is advisable to install storm drainage trays between the curbs and tiles, and integrate rainwater inlets into the roofing under the vertical drains of roof gutters.

Paving technology
It is important for the home craftsman to understand that the quality and durability of the coating garden paths completely depend on ground conditions:
- clay soils swell unevenly, disrupting the geometry of sidewalks and parking lots;
- problematic soils settle over time;
- on slopes and without a curb edge, the tiles spread out.

To fix the base, the tiles will have to be completely removed.
When purchasing non-metallic materials, it is worth considering:
- in parking lots, a crushed stone fraction of 20/40 is preferable, depending on the intensity of traffic and operational loads, with a layer thickness of 30 cm or more;
- for paths, crushed stone 5/20 in a layer of 10 - 15 cm is sufficient;
- It is better to choose river or washed quarry sand with a minimum percentage of clay;
- when compacting with a vibrating plate, the compaction coefficients are 1.7 for sand, 1.3 for crushed stone, so when purchasing, the volume of the pit must be multiplied by these numbers, otherwise there will not be enough material.
Paving slabs must provide required quality the exterior of the paths and the durability of the coating. Therefore, cladding is chosen according to the following characteristics:


Hyperpressed paving slabs.
Important! Vibration-cast products are cheaper because they are easier to manufacture, have an original configuration, and reduce the finishing budget. Hyper-pressed tiles are difficult to split or damage; this option is optimal for parking lots that are serviced by snowplows in winter.

Vibrocast TP.
Marking and planning
Unlike load-bearing structures, the marking of personal space is most often combined:
- Curvilinear and radius shapes are used to increase artistic value;
- straight routes are marked with cords using cast-offs;
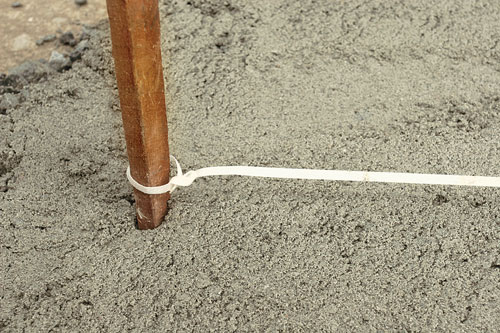
- the roundings are outlined directly on the ground using patterns or large-sized compasses (a rod tied with a cord to the central peg).

When marking, the following factors should be taken into account:

Chernozem contains organic matter, which rots under the tiles and shrinks. Therefore, the loose topsoil needs to be removed, used in beds, in landscape design, or removed from the site. The resulting layout is called by professionals a “trough”, in which further TP paving operations are carried out.

Important! The roots of mature bushes and trees are dangerous for paving slabs, so they are either uprooted or pedestrian traffic routes are laid at a distance of 3 m from them.
Drainage and sub-base
The TP should be laid on a rigid base that has drainage properties, since part of the storm water is drained through the cracks between the tiles. However, natural drainage is not enough to cope with the entire volume of water in heavy rain and to drain the roof drainage when a path is built near the house or a blind area is lined with this material. Therefore, several conditions must be met:


If a topsoil layer of more than 40 cm is removed and a 6–8 cm thick TP is selected for lining, the thickness of the underlying layer increases sharply so that the paths rise slightly above the adjacent soil. To save budget in this case, you can use cheaper materials in the lower level of the underlying layer than crushed stone, river sand - sandy loam or loam. They also need to be compacted with a vibrating plate to a similar surface condition.
The curbs (border stones) are much higher than the tiles (20 cm), so along the paving contour it is necessary to make a trench of the same width, 25 - 30 cm deep, in order to place the curb on the mortar layer.
![]()
Trench for curb
Important! Where the storm drains pass, another trench will be required, since the height of these elements varies from 13 to 41 cm depending on the design and material.
Installation of curb stones
Without curbs, sidewalks will lose their shape, as the tiles on the sides will “creep.” The curb stone must be laid along a cord, taking into account the longitudinal and perpendicular slopes of the decorated areas on a cement-sand mortar. The ratio of ingredients is 1/4 (cement/sand, respectively. The technology looks like:
- the mortar is placed into the trench with a trowel;
- the curb is installed on it and pressed down with a mallet along the cord;
- outside and inside in 2 - 3 places the solution is placed in a slide on side surfaces border just below the sand layer on which the tiles will be mounted, as in the photo below.

Paving is possible within a day or two, after the cement stone has gained strength.
Advice! Regardless of the size of the storm drains, it is better to install them along the curbs along with them at the same stage. These elements are also installed on a solution that requires time to harden.

Tile paving
There are methods for laying TP on cement-sand mortar (for use in difficult conditions), dry mixture (1/5 cement, sand, respectively) and on clean river sand. Practice has proven that when adding cement to a dry mixture, the developer additional benefits does not receive, but the maintainability of the coating sharply decreases and the finishing budget increases. Therefore, in 80% of cases, paving slabs are installed on dry sand using the following technology:

Advice! Installing curbstones at the ends of paths is not always possible. To prevent the spreading of paving elements in such an area, the last two rows are mounted on a cement-sand mortar.

Methods for connecting TP to the ground and screeds.
The nuances of laying paving slabs
Problems with paving usually arise when designing curved areas. The simplest option on radius paths is to lay rectangular elements, as in the bottom photo:
- the tile is oriented with the long side in the direction of travel;
- work starts from a smaller radius;
- each element is shifted relative to its neighbor;
- transverse and vertical seams are arranged in a wedge.

Rectangular TP on turns.
If the developer has chosen a collection of tiles with a complex configuration (for example, “clover”), the paving technique changes radically:
- the seams are shifted at 45 - 60 degrees along the length of the tortuous section;
- the surface is filled with solid elements;
- pieces are laid near the curbs.

Less commonly used is the “Beam” technology, when a rectangular-format TP is oriented perpendicular to the curbs.

At complex radial intersections and large areas, the direction of the seams can be changed to increase the artistic value of the composition.

Decorating a complex radius intersection.
Thus, it is easiest and cheapest to pave paths, recreation areas and parking lots on the site on sand with cast or vibropressed paving slabs along straight routes. On radius sections, the above recommendations should be taken into account. For problematic soils, a rigid concrete base layer should be made.
Advice! If you need repairmen, there are very convenient service by their selection. Just submit in the form below detailed description work that needs to be done and you will receive offers with prices from construction teams and companies by email. You can see reviews about each of them and photographs with examples of work. It's FREE and there's no obligation.
Arrangement of the area near the house is not only elegant flower beds and a bright lawn. These are also convenient paths, high-quality blind areas, practical and durable parking, and an “indestructible” children’s playground. They will require a special coating - paving slabs - which serves both an aesthetic and functional role.
It is possible to prevent erosion of the soil during rains, avoid flooding of the foundation and create a moderately durable coating. various technologies. Let's conduct a small comparative study.
| Method of site arrangement | Material costs | Level of professionalism to perform the work | Duration of saving initial properties | Resistance to precipitation and household influences | Other operating features |
|---|---|---|---|---|---|
| Soil compaction | None | Not required for manual compaction, the process occurs automatically with constant movement around the territory | Minimum | Absent | Not advisable if you have a car or other vehicles |
| Backfilling with sand or gravel | Minimum | Not required, can be performed without equipment, with minimal auxiliary devices | Depending on climate and operating activity | Medium/low | Restricted use of transport |
| Installation of slabs/tiles from natural stone | Quite high, depending on the type and quality of the stone, the size of the slabs | Medium/low, depending on installation technology | Long-term correct installation and average intensity of use | Depends on the size and shape of the slabs, technology and quality of installation | The use of transport is limited (except for professionally laid paving stones) |
| Laying paving slabs | Average, when choosing budget brands | 10…15 years | High | The presence of heavy equipment on the site is limited | |
| Concreting | Average | Medium, requires a concrete mixer and forms/formwork for pouring the mixture | 5…50 years depending on the quality of the coating and materials | ||
| Asphalting | Average | Medium, requires a homemade or professional roller and compaction device |
As can be seen from the comparative table, with relatively low costs and opportunities self-installation paving slabs are the most suitable option for landscaping the site. Moreover, the variety of shapes, colors and performance characteristics allows you to create individual coverings that match in style for parking lots, pedestrian paths, barbecue areas and other actively used areas, but in different modes.
Important: paving slabs do not have to be the only material used to decorate the estate. Sand and crushed stone, concrete, clinker bricks, natural stone different shapes.
Main stages of the installation process
Depending on what is planned to be used as a base for installation, different methods of laying paving slabs are used. different reasons. The most popular base layer is sand, granite screening(granotsev), cement and geotextiles. However, the basic steps remain the same, regardless of which “cushion” is used.
Work begins with marking and preparing the site:
- choice of direction, size and height of the path (above the general soil level - flush, with the rise). At the same stage, the laying pattern is determined and calculated required quantity materials;
- determination of soil type for rational selection of underlying materials;
- clarification of the composition and thickness of the “cushion”;
- marking the future “trough” (a hole in the ground to fit the size of the future path) for laying tiles;
- excavation by hand or mechanized way. Be sure to remove plant roots, treat the soil with herbicides, check for animal burrows and possible voids under the top layer of soil;
- leveling the bottom and sides of the “trough”;
- rolling and tamping "trough".
After this, depending on the chosen composition, a pillow is arranged with obligatory layer-by-layer tamping. Next, the tiles are mounted on the prepared base. For it, water drainage (rain, snow) and an acceptable slope of the coating as a whole are planned in advance, taking into account the purpose and geometry of the site (path).
Crushed stone (gravel) acts as a drainage and strengthening layer, both for installation on a sand base and for a concrete base.
According to regulatory requirements(GOST 17608-91, SNiPs Sh-8-76 and Sh-10-75), depending on the expected load on the site or roadway (vehicle parking), the thickness of the layers and the fraction of sand and stone chips varies.
The question of what kind of sand is needed for laying paving slabs is decided depending on the size of the installed coating (dimensions of the tiles) and the load on the site.

The presence of geotextiles between the layers at the base reduces the likelihood of blurring of the layers and increases their mutual support.

Important: among other things, geotextiles reduce the likelihood of the laid tiles swelling and interfere with root germination.
The question of what geotextiles are needed for laying paving slabs is decided depending on the type of soil and the planned load.
Installation of tiles on different bases
With the general unity of the basic process, the use of different bases - deformable and non-deformable - makes its own adjustments to the course of installation work.
With the “trough” prepared process quite simple and fast. A load-bearing layer (crushed stone, gravel) is laid on the compacted soil, with a layer of sand on top. It is optimal to alternate coarse and fine-grained sand, with the larger fraction placed downwards and the finer fraction serving as direct support for the tiles.

Stages of work:
- curb stones or curbs are installed. If their use is not planned, the edges of the site are clearly defined with the obligatory alignment of the contour along the cord and level;
- backfilling the bed (“trough”) with gravel or crushed stone, followed by sand with obligatory tamping. It can be done manually, mechanized or using water. For the last option, the sand is generously moistened (with a spray) and left for 2...12 hours (depending on the weather) to partially dry;
- the tiles are laid and compacted one at a time, compaction is carried out rubber mallet over the entire surface using a level to maintain a uniform height of the coating and prevent distortions and disruption of the pattern;
- The joints of the paving slabs are “grouted” with fine quartz sand (optional).
As the top layer of the base under the tiles, you can use sand cement - a mechanical mixture, the sand-cement ratio for laying paving slabs is 1:5.

Laying paving slabs on a concrete base
Installation on concrete is performed when increased strength and wear resistance are required. paving. This installation option is suitable for car parking, sports and children's playgrounds, and parking areas for equipment weighing up to 3 tons.
Important: unlike installation on sand, installation on concrete requires mandatory provision of water drainage from the tile covering. This is due to the fact that when moisture accumulates under the tiles, the coating can gradually collapse under the influence of temperature changes.
The initial stage of installation - preparing the bed for the path or platform - is carried out in the same way as for the option of laying on sand. The total thickness of the cushion is 25...35 cm. The first layer of gravel (10...15 cm) is laid, then a cement-sand-gravel mixture, proportions 1:3:2 to a height of 3...5 cm. After its initial hardening, a reinforcing mesh is installed and a second layer of mixture with the same ratio of components is poured on top of it to a thickness of 10...15 cm. To maintain the correct geometry and keep the mixture within the required boundaries, before filling with gravel and concreting, formwork is installed - boards or laminated plywood - to a height of at least 40 cm from the bottom of the bed .
After hardening concrete base arrange curbs and, preferably, gutters. For them, a trench is dug along the edge of the concrete area, and a cushion of cement-sand mixture in a ratio of 1:3 is poured at the bottom of the trench. After hardening, the mixture forms a concrete “castle” for the curb. The curb stones placed on the cushion are leveled using a rubber hammer along a stretched cord.
Important: the distance from the curb to the concrete base must be at least 1 cm. This gap acts as an expansion joint for possible thermal expansion of the material. After the cement-sand cushion under the curb has hardened, the gap is filled with sand and compacted.
Direct laying of the tiles is carried out on a surface - a layer of sand-cement (6:1) anhydrous mixture. Gartsovka is poured onto a prepared concrete base with a thickness of 5...6 cm and is leveled as a rule and compacted. The tiles are installed with obligatory compaction with a rubber hammer. After laying the entire paving area, the surface is spilled with water, which leads to hardening of the paving.
The final stage is grouting the joints between the tiles with the same grout, with pouring until the mixture completely hardens and shrinks.

As an alternative to prancing, special adhesive for paving slabs is used on a concrete base.
When laying, it is important to organize the slope of the paved area towards the drain. The accepted angle of inclination is 1 cm of level decrease per 1 m of length. Installation of a hidden drain with a grate is carried out according to the same principle as the installation of a curb for paving slabs. When the drain is located not on the edge, but in the middle of the site, the slope is made on both sides.

A blind area near the building is also made with paving slabs. The slope in this case is 2...5 degrees.
Technology for laying paving slabs on asphalt
It is worth considering paving with tiles on asphalt in two cases:
- repair of a sidewalk or site must be completed quickly with a limited budget;
- it is necessary to raise the level of the sidewalk (site), using the existing asphalt surface as a strong and durable base for paving.
Regardless of the motives, laying is permissible only when it is relatively level and quality asphalt. It is advisable to dismantle crumbling, severely damaged, bumpy asphalt pavement and install the tiles on a new concrete screed.
Sequence of work:
- checking the condition of the asphalt surface;
- removing debris and dirt from it, repairing cracks and potholes;
- marking under paving slabs taking into account the installation of curb stones and gutters;
- backfilling with cement-sand mixture (gartzovka) or sand, installation of concrete locks for curbs and gutters;
- installation of tiles with mandatory observance of the slope towards the drain.
Important: if the device is not waterproof, there is no storm sewer It is advisable to make holes in the asphalt surface before installation to allow water to drain. They are carried out evenly over the entire paving area. The edges of the holes are treated with var (heated resin) to prevent destruction of the coating.
When deciding how to choose paving slabs for installation on asphalt, you should give preference to products small size. For large slabs, there is a high probability of inaccurate installation and misalignment under the influence of precipitation.
Installation nuances
When figuring out how to lay paving slabs correctly, many novice builders ask themselves the question: how to lay it, away from you or toward you? Here it is necessary to remember: it is impossible to disturb the uniform sand or sand-cement cushion. Therefore the only convenient option is the installation “from one’s own” so that the worker during the paving process rests on the already laid tiles.

It is better to install the tiles not in even rows, but diagonally - this will simplify leveling the surface.
Even if you plan to lay paving slabs in a dacha with minimal loads and aesthetic requirements, you should not forget about the basic principles of installation technology, the mandatory installation of a drainage pad and a slope towards the edges of the path or drain.

You can further increase the durability of paving and make it more attractive with the help of special protective and decorative coatings. Among valid options processing, the most popular is the “wet stone” effect for paving slabs. The desired result is achieved by covering the already paved area with varnish in two or three layers.

Conclusion
Despite the relatively large number stages of preparation and the apparent complexity of installation, laying paving slabs is one of best options design of paths and platforms on the site. At correct execution paving work for at least 10...15 years will delight the owners of the estate with convenience, beauty and practicality.
Any landscaping involves the use of paving slabs. Let's consider the main rules and procedure for laying paving slabs on the site of a country house.
Properly installed paving slabs will last you long term. However, you should know that you won’t be able to save money here either on the tile itself or on the materials for the base underneath it. The most important thing is to take into account every little detail (marking the path, preparing the base) and only then start laying.
Track markings
The first step is to draw a drawing of the laying of the future path. It is also necessary to mark the boundaries using pegs and twine and think about gutters. Having done this, you should test the resulting path by simply walking along it. Is the path comfortable? Does it match the surrounding design? Having received answers to these questions, you can continue.
Preparing the base
This stage is the most important in the entire process of laying paving slabs. He demands special attention, since the correct foundation will not allow the path to “sag” or “creep” over time. The base for the tile is layer cake, the same as during the construction of any other road. The first layer is 15 cm of crushed stone, after which there is geotextile, followed by a further 10 cm layer of sand. Geotextiles will prevent sand from spilling into the crushed stone and strengthen the foundation. The next layer is laid dry mixture and paving slabs on top of it. The excavated profile should be approximately 30-35 centimeters deep.
Laying paving slabs
Paving slabs are laid on cement mortar or dry mix.
Laying on cement mortar
This method involves laying tiles on a concrete base and a thin two-centimeter layer of cement mortar. You can place no more than one at a time square meter, while constantly checking the surface with a level and adjusting if necessary. The cement mortar should harden in a few hours, and the path can be used in just two days.
Laying on dry mix
To prepare the mixture you will need sand and cement in a ratio of 4:1. It should be prepared immediately before installation. The thickness of the dry mixture layer usually does not exceed 3 cm. After laying the tiles, you must constantly check for a slope using a level. After laying, you need to pour sand into the seams between the tiles, sweep away the excess and pour water over the surface. You can walk along the path after two to three days.
Additional information:
- Laying paving slabs on concrete provides a reliable and permanent result, which is not achievable for gravel and sand. This installation method...
- The mixture for laying paving slabs is selected depending on the type of soil. The most common mixtures for laying tiles are: sand; dry...
- Paving slabs look practical and attractive compared to asphalt pavement. Laying paving slabs with your own hands can be done without…
- To improve the area summer cottage often laying paving slabs under car parking. Let's look at how paving slabs are laid under...
Tiles are often used to construct paths and entrances to buildings on individual development sites, which is easily explained by its availability, excellent appearance and high performance indicators. The technique of laying paving slabs is not particularly complicated, and therefore such work can be done on your own, at home, so to speak.
Today manufacturers building materials release large number types of paving slabs, differing in color, shape, raw materials from which they are made, as well as their technical characteristics. It's easy to get confused in this diversity.
The question of choice is most often based only on the financial capabilities of the owner of the site, since good paving slabs are expensive, and cheap ones are short-lived and not very beautiful. Modern market building materials offers I classify its main types according to the raw materials, that is, made from:
- natural natural stone hard rocks;
- natural stone of soft rocks such as sandstone or flagstone;
- artificial stone;
- ceramics and other firing materials;
- colored and monochrome concrete;
Most often, individual developers purchase tiles made from colored concrete mixtures. This material is affordable and sold in almost any hardware store.
High-quality colored concrete tiles are made by vibration casting or vibration pressing. Piece products made by , are different bright color and more smooth surface. Vibration-pressed material is more durable and frost-resistant, but not as bright.
Stamped tiles are also sometimes offered. Be very careful when purchasing it, as it is most likely the material low quality, made in a handicraft way.
A very important issue is the thickness of the material, which you must decide on before laying paving slabs with your own hands. For pedestrian paths personal plot a thickness of 40 mm is recommended, and for a car park - at least 60 mm.
If you decide to pave the sidewalk on the street along your site, then use 60 mm tiles, and for the road (but this will be too noble on your part) you need to take 80 mm thick products.
Materials required for installation
Before laying paving slabs with your own hands, in addition to it, you need to purchase such materials as:
- stone or plastic border;
- cement grade PC400;
- crushed stone, fractions no more than 40 mm;
- sand, preferably river or washed;
- geotextiles.
The required amount of these building materials is determined separately and directly depends on the base design, type of soil and expected operating conditions.

Marking future paths
It is recommended to take a copy of the site plan with buildings, trees, flower beds and other landscaping elements marked on it. Draw a diagram on it. This will be the instructions for laying paving slabs, which you will continue to work on. When drawing up such a scheme, the direction of the slopes should be taken into account for the free flow of water from the paths.
When deciding on the width of the paths, it is necessary to ensure that 2 people can easily separate on it. Typically this value is 1.0 – 1.2 meters.
In the case of a car passing, the possibility of a person being present is also taken into account, who should not be forced to leave the paved surface.
 Marking and excavation of soil.
 The marking is carried out according to the drawn up plan using a tape measure and a cord, which is pulled along the pegs hammered along the planned path. When pulling the cord, it is necessary to add 10 cm to the width of the path on each side, with a gap for the subsequent installation of curbs.
Excavation and protective layer
The volume of work performed depends on the density of the top layer. In the event that the surface is dense clay or any other similar soil, and therefore it is planned to import bulk soil, then preparing the path for laying tiles comes down to simple alignment surfaces.
In all other cases, it is necessary to remove 30-35 cm of the surface layer along the entire marked perimeter.
It is necessary to add a thin leveling layer of sand to the bottom of the trench and compact it well along with the soil. This underlying layer will then be needed, which will prevent the germination of weeds, allow water to be drained from the drainage layer and prevent the penetration of groundwater rising in the spring.

The geotextile strips are laid out in such a way that adjacent sheets overlap by 15-20 cm, and at the edges of the trench there is an upward turn of at least 20 cm. In this case, the technology for laying paving slabs with your own hands will be fully followed, and the result of your work will be incomparably better quality .
Drainage device
A layer of crushed stone 15-18 cm thick is poured onto the compacted bottom of the trench, lined with geotextiles. It will serve as drainage for collecting and removing melted and surface waters. The presence of a drainage layer will prevent possible accumulation of moisture at the base of the path and subsequent swelling if the soil freezes.
The crushed stone should be compacted well and sprinkled with a thin layer of sand. A second layer of geotextile should be laid over the drainage. It will allow moisture to pass down, preventing it from returning.
 Stone products are fixed with mortar, and plastic ones are fixed using the wedges included in their delivery.
 Placement of boundary borders
At the next stage of work, curbs are installed. For this you can use almost any materials. External fencing of paths is made of stone, concrete, plastic, brick, wood, slate and any other flat materials.
The traditional option is a ready-made concrete curb. IN lately Manufacturers have offered several types of plastic borders on the market, which are characterized by durability, low cost and ease of installation.
The border is installed after the installation of the drainage layer.
Types of bases used
To install pedestrian paths on the site, use one of three possible types support base:
- concrete;
- cement-sand;
- from compacted sand.
Concrete foundation is the most expensive, and therefore it is advisable to use it only in case of expected large loads on the surface. The cement-sand base is the most common and versatile. A sandy base can be used with low surface loads and the absence of heaving soils and their movements.
 Schematic illustration of a concrete base.
 Pouring the concrete base
Work on concreting the base, before laying paving slabs, begins with reinforcement. For this, it is best to use a ready-made welded metal mesh with a cell size of 100x100 mm. If you have leftover old ones metal pipes, wire, rod with a thickness of more than 5 mm or other similar metal residues, then reinforcement can be performed with their help.
To do this, lay out the metal in the form of a lattice and tie its individual parts at the intersections with wire. It is advisable to raise the reinforcing mesh above the surface by 3-5 cm, placing it on metal or stone stands.
The concrete layer should be 10-12 cm thick, and its surface should be below the surface of the earth by the thickness of the tile minus 3 cm, since we will then have to lay paving slabs here with our own hands.
If after installing the drainage layer the depth of the working trench remains quite large, then the excess is covered with sand, which is then compacted. Concrete mixture using PC400 cement is prepared in cement, sand and crushed stone as 1:3:5.
Concrete is poured in one go. In the case when the volume of concrete to be poured is very large, it is advisable to order concrete mixture with delivery to your place. The cost of concrete in this case is slightly higher, but you will save a lot of time and effort. Paving slabs are laid within 3-5 days, after the initial setting of the concrete.
 Step by step process installation of FEM.
 Sand and cement base
 Cement-sand base.
 This type of base involves laying tiles on a dry cement-sand mixture prepared in a ratio of 1:5. The thickness of such a layer is 12-15 cm. To reach the desired level, add clean sand under the cement-sand layer and compact it thoroughly.
It is important that at the time of laying the tiles, the base material is dry. Therefore, before laying paving slabs, you need to make sure that there will be no precipitation in the next couple of days. The poured mixture must be compacted well and leveled.
To construct a sandy base, washed river or quarry sand is used. The presence of lime or clay elements in the sand is not allowed. After filling the sand, it, again, must be spilled with water, compacted and leveled. Next, paving slabs are laid.
Treating tiles before laying
Before laying paving slabs yourself, it is recommended to treat them hydrophobic composition, which will further protect the material from moisture, increase its frost resistance and durability. In addition, they give the tiles a more attractive appearance and prevent the appearance of fungus, mold and salt stains on the surface.
To process the tile, it is dipped into a hydrophobic solution, dried and this operation is repeated. During pre-processing, the tiles must be carefully inspected and all products containing defects must be put aside, since we will then lay them out in other, inconspicuous areas.
Laying paving slabs
 Laying paving slabs: photo of the process.
 The technology for laying paving slabs on a concrete base involves fixing them to a layer cement mortar. It is necessary to lay paving slabs on your own mortar so that it fills the seams as much as possible, and the thickness of the seams is not more than 3 mm.
Leveling is done with a rubber hammer and checked building level. Progress during laying occurs “on yourself”, that is, you are always on the already laid tiles, and you lay the mortar in front of you. Upon completion of the masonry, all seams must be sealed with mortar to obtain a continuous monolithic coating.
The stages of laying paving slabs on cement-sand and pure sand bases are the same. The paving slab layer works using the push method, which means you move along the sand and lay the material in front of you. If it is necessary to level the surface, sand or mixture is added or, conversely, removed.
Each stone should be tapped with a rubber mallet to ensure it fits securely into place.
 After installation is completed, a small amount of cement-sand mixture is poured onto the surface, which is then brushed to fill the seams.
 Then the surface of the newly made path must be watered and this procedure repeated after another 2-3 days.
Below is a video tutorial on the topic “Laying paving slabs with your own hands: step-by-step instructions.” The process of laying paving slabs, discussed in it step by step, will tell you about the procedure for laying paving slabs, the features of this process and methods for further care of the coating.
Paths leading from the house to other buildings or gazebos, a blind area around the house, a platform for a car are an integral part landscape design the entire estate. When choosing what to cover them with, you should follow several rules. The coating must be strong, durable, environmentally friendly, wear-resistant, and most importantly - beautiful. Paving slabs have all these advantages. I can’t even believe that just recently, country residents had no choice but to lay asphalt paths and platforms. But in the heat it softens, releasing volatile oil products into the air, and deforms under heavy loads. Water accumulates on its surface, and under the influence of temperature changes, the asphalt cracks and deforms. All this is difficult to fix: either form patches that will stand out against the general background, or completely replace the entire coating. There are no such problems with paving slabs. In addition, an accidentally damaged area can be easily replaced.
Paving slabs: production and price
The production of paving slabs is carried out in two ways: vibration casting and vibration pressing.

Different molds for paving slabs allow you to produce tiles in a variety of shapes, sizes and colors. The vibration casting method involves the use of special forms, various cement mixtures and plasticizers, as well as color pigments. In a similar way, paving slabs are produced both in factories and in private enterprises on an individual order.

To produce paving slabs using the vibrocompression method, you will need a vibropress for paving slabs. It can be mechanized, electric driven or manual mechanical. It consists of a matrix mold into which a working mixture consisting of cement, clove and sand with a small amount of water is poured. Then the matrix must be pressed and vibrations created that will help compress the working mixture. There are matrices various forms, sizes and designs, they can be used many times. This production method is an order of magnitude cheaper than vibration casting due to savings on consumables and available means, but at the same time there are only a few (9-15) types of matrices for a vibropress, and there can be hundreds and thousands of forms for vibrocasting - for every taste.
For finished factory products labeled “paving slabs” the price ranges from 10 USD. up to 16 USD per 1 m2. Moreover, the cost directly depends on the complexity of the tile shape and its color, as well as on the manufacturing plant. For example, some types of tiles can reach 25 - 30 USD. for 1 m2.
Paving stones - the simplest paving slabs rectangular shape, resembling a brick. It got its name from the words “paving stone”, meaning a stone in the form of a bar (rectangular). Today, paving stones are the most popular and inexpensive paving slabs.
General rules for laying paving slabs
When choosing a material for paving paths, you can try to save on tiles. But you shouldn’t skimp on its installation. If you do not have such experience, but have the financial opportunity, it is better to turn to professionals. Firstly, they have invaluable experience and knowledge. Secondly, masters have probably encountered non-standard situations and know how to get out of them.
If you still decide to lay paving slabs yourself, then the information below will be useful to you.
Before we move directly to the installation technology, you should familiarize yourself with the general rules:
- Work on laying paving slabs cannot be carried out in rainy weather. Otherwise, it is imperative to use a protective awning.
- If the tiles are small, they must be laid on concrete or tile adhesive.
- The sand used for the pillow should not contain impurities (clay, black soil, organic matter, etc.)
- Upon completion of work, the tiles should not be sprinkled with sawdust.
- Partial tiles are laid at the very end.
- You need to purchase tiles with a 10% reserve in case they are damaged.
- The border can be laid both before and after paving the tiles.
It is also worth noting that the size of the load-bearing cushion depends on the purpose of the path or platform. If it is planned that a car will drive onto the site, then the thickness of the crushed stone layer should be greater (15 - 20 cm). For a truck to drive in, the cushion will not be enough; the surface will have to be pre-concrete.
Technology for laying paving slabs

The first step is to determine the intended purpose of the site, whether it will be a pedestrian path, a platform for a gazebo or a car. Then we choose the size, color and pattern of the tiles. To form a figured layout, it would be nice to draw the diagram by hand. Then we purchase paving slabs, curbs and backfill materials.
Preparatory work and pillow formation
- We fence the area that we are going to pave with paving slabs. To do this, we use wooden pegs and twine. We measure the dimensions of the area with a tape measure and plot them on the plan.
Important! We are thinking about how it will drain rainwater. Is drainage necessary?
- Then remove the top layer of soil. We calculate the depth as follows: crushed stone - 10 cm, gravel - 15 cm, sand - 10 cm, cement-sand mixture - 5 cm, paving slabs - 5 cm. It turns out only 40 cm. But taking into account the fact that we will compact the surface, and The tile should protrude 5 - 7 cm above the general ground level, then we make a recess to a depth of 25 - 30 cm.
- Pour a 10 cm layer of gravel with a fraction of 5 - 20 mm. It will perform frost protection functions. Level the surface. We tamp it carefully. For these purposes, it is best to rent a vibrating plate. But in the absence of anything better, you can use a log with a board nailed to the bottom (this option is not very good, but it will be enough for garden paths).

- We pour gravel or crushed stone in a fraction of 2 - 6 cm. This layer is load-bearing, so its thickness depends on the purpose of the site. Most thin layer- 15 cm. Large - 35 cm. We also level and tamp with a vibrating plate.
Important! To ensure that rainwater flows freely and does not stagnate on the tiles, a slope is most often made to the sides from the middle of the area. If this is a path around the house - a blind area, then the slope is made away from the building.
- At this stage, geotextiles can be spread on top of the crushed stone. It will prevent rinsing upper layers to the lower ones, but water will still pass through.
- The next layer is sand, which must be clean and free of impurities. If another layer with the addition of cement is planned on top, then 5 cm of sand will be enough. Carefully level the sand layer and use a tamper.

- We install curbs. To do this, we excavate the soil in the right place, pour crushed stone and sand. Then we install the curbs on the sand-cement mortar.
Important! The curbs should fit tightly to each other so that the sand does not wash out from the site when it rains. The border will also hold the tiles in place.
- We water the sand layer with a hose so that puddles begin to appear on the surface. Then let it dry (day).
- The next day on a sunny day warm weather Level the sand to a perfectly level state.

- Now he begins to fill in the finishing layer of cement-sand mixture. Its layer should be from 3 to 7 cm, depending on the thickness of the tile and the load on the surface. In order for the layer to be even, we lay beacons on the site with a distance of 1 - 1.5 m. For these purposes, you can use purchased beacons or ordinary plastic pipes required diameter.
- Preparing the mixture for paving slabs. It can have different consistency. But we mix 1 part cement and 8 parts sand. The ratio may be different (1:6, 1:4).

- Pour in the mixture and level it with a rule or board, leaning on beacons or pipes.
The surface is ready - you can start laying tiles.
Laying paving slabs
We check for the last time that there is the correct slope for water drainage.
Let's start laying the tiles. If there is no complex pattern, then it is better to start laying from the right corner of the curb. Otherwise, as the drawing requires (it is quite possible that you will have to start from the center). We do this on our own, i.e. We stand on the tile and lay it on the prepared surface.

We press the slabs tightly to the base. If they “walk”, then we nail them with a wooden mallet. We fit the tiles together tightly, leaving no gaps. They will appear on their own - naturally and will be much smoother than if we do it on purpose.
If any tile does not lie level or is lower in level relative to others, then remove it, add sand under it, lay it again and compact it.
Do not forget about laying tiles for water drainage that have a special groove.

Important! We constantly check the accuracy of the drawing and horizontal level. The error can range from 5 mm to 1 cm per 2 m2.

Lastly, we lay the broken tiles. To do this, we cut them on a special machine with a diamond cutter. You can also use a grinder, although it is harder and longer. Since the cutting process will generate a lot of dust, it is recommended to only slightly cut the tiles and then break them.
Upon completion of laying the paving slabs, we check their horizontalness and level position relative to each other. If one is positioned unevenly, we finish it off with a mallet.
Filling joints and compacting tiles
When all the tiles are laid, it is checked that everything is level, then all the seams must be filled with a cement-sand mixture or sand.
Important! You cannot add cement to the backfill of colored paving slabs, otherwise its color will change.

Pour the mixture onto the paving slabs. Take a mop with a stiff brush and sweep the mixture into the cracks.
Important! Do not put a large load on the tiles, for example, drive a car, before sand is spilled into the cracks.
When the sand has been swept away from the surface of the tile, we moisten it with a hose. The mixture is “washed” into the cracks. If necessary, add sand again and sweep the tiles. Then we moisturize again. The mixture should “set”. It is this “backfill” technology that makes it possible to ensure that the tiles do not move or move.
For the last time, carefully compact the tiles with a vibrating plate or vibrating machine.
Full use of a path or area laid with paving slabs is possible only after two days. At this point all work is completed. Don’t forget - if you save on materials for high-quality backfill, over time you will have to change the tiles throughout the entire area. So it’s better to spend money now, but later you will admire the strength and durability of the coating.