DIY projects to build a gazebo at your dacha. DIY light garden gazebo
Last summer I decided to do a little landscaping of my summer cottage. Slightly reduced the plots for vegetable beds, but allocated additional meters for a recreation area. The freed up space was enough for a small flower garden, a couple of bushes, and an inflatable pool. But this was not enough for a good rest. We need a gazebo. I decided to start building it during my vacation.
Initially, I planned to do something very simple, like a canopy on four pillars. But then, after consulting with familiar builders, I realized that it was quite possible to build more complex design. Also on pillars, but with walls and a full roof.
I had to sit down with the drawings and sketch out the project. On paper it turned out as follows: a wooden gazebo 3x4 m, on a columnar foundation with a gable roof covered with slate. The project was approved by family council, after which I rolled up my sleeves and got to work. I performed all stages of the work alone, although, I must admit, at some points an assistant would have been helpful. Bring, serve, cut, hold... It would be easier to work with two people. But, nevertheless, I managed it on my own.
I will try to describe the stages of construction in detail, since the little things in this matter turned out to be very important.
According to the plan, the gazebo should be light in weight, built from boards and timber, so the most optimal foundation for it is a columnar one. This is where I started my construction.
For this purpose, I set aside a suitable area near the fence with the dimensions of a gazebo measuring 3x4 m. I placed pegs (4 pieces) in the corners - this is where the foundation pillars will be located.

I took a shovel and in a couple of hours dug 4 square holes 70 cm deep. The soil on my site is sandy and does not freeze much, so this is quite enough.

In the center of each recess I placed a reinforcing rod, 12 mm in diameter, 1 m long. These will be the corners of the gazebo, so they need to be installed clearly level. I had to measure the diagonals, the length of the perimeter and the vertical reinforcement.

After dismantling the old buildings on the site, I was left with a pile of broken bricks. I poured it into the bottom of the recesses and filled it with liquid concrete on top. The result was a concrete base for the posts.

A cushion of broken bricks under a concrete base will help to distribute pressure evenly between the foundation and the ground

Two days later the concrete hardened, and on the resulting foundations I built 4 brick pillar by level.
4 columns in the corners were ready, but still the distance between them turned out to be too large - 3 m and 4 m. Therefore, between them I installed 5 more of the same columns, only without reinforcement in the center. In total, there were 9 supports for the gazebo.
I plastered each support with mortar and then coated it with mastic. For waterproofing, 2 layers of roofing material were laid on top of each column.

Brick pillars will serve as a reliable foundation for the base of the gazebo
Stage 2. Making the floor of the gazebo
I started with the bottom strap; in fact, it will hold the entire frame. I purchased 100x100 mm timber and cut it to size. To make it possible to join half the tree, I made cuts at the ends of the beams using a saw and chisel. After that, I assembled the lower trim, like a designer, stringing the timber onto the reinforcement in the corners. The holes for the reinforcement were pre-drilled with a drill (I used a wood drill with a diameter of 12 mm).

The bars were laid on the foundation pillars - 4 pcs. along the perimeter of the gazebo and 1 pc. in the center, along the long side. At the end of the process, the wood was treated with fire protection.

The bottom frame, laid on the foundation columns, will serve as a lathing for the plank floor
It's time to recoat the floor. Since ancient times, oak boards of just the right size have been collecting dust on my farm - 150x40x3000 mm, so I decided to use them. Since they were not entirely straight and slightly crooked, I had to run them through a frame. My neighbor happened to have the tool, it was a shame not to use it. After the leveling process, the boards turned out to be quite decent. Although there were as many as 5 bags of shavings!
I nailed the boards to the strapping bars. The result was a smooth oak plank floor.

Stage 3. Construction of walls
From the existing timber 100x100 mm, I cut 4 racks of 2 m each. They will be installed in the corners of the gazebo. I drilled holes at the ends of the posts and put them on the reinforcement bars. They didn’t really hold the vertical and tried to move at the most inopportune moment. Therefore, I fixed them with jibs, specially cut for this purpose in a miter box. The jibs were nailed to the floor boards and racks. Only after this the racks no longer leaned to the side and swayed from the wind.

Once the corner posts were installed, I attached 6 more intermediate posts. I also fixed them with jibs.
The turn of the horizontal railings came. They will form the walls of the gazebo, without which the entire structure will look like an ordinary canopy. I cut the railings from 100x100mm timber, and for the back wall I decided to save a little and took a 100x70mm board. This lightweight option is suitable exclusively for sheathing.

To install the railing, I mortized the posts, installed horizontal rails in them, and hammered in nails. Since it is assumed that people will lean on the railing, such a connection cannot be left. Additional fastening parts are needed for rigidity. For this purpose, I used additional jibs, which I tacked from the bottom of the railing. I didn’t install the jibs on the back wall; I decided to fasten the railings there with corners from below.
After everything was done, I began to work on the appearance of the wooden elements of the gazebo. To begin with, I sanded the entire wood using a grinder. I didn't have any other tool. So I took a grinder, put a sanding wheel on it and got to work. By the time I cleared everything out, a whole day had passed. I worked in a respirator and goggles, because a lot of dust was generated. At first she soared into the air, and then settled where she pleased. The entire structure was covered with it. I had to take a rag and a brush and clean all the dusty surfaces.
When there was no trace of dust left, I coated the wood with varnish in 2 layers. For this I used Rolax varnish stain, chestnut color. The structure shone and acquired a noble hue.

Stage 4. Roof truss structure
The time has come to lay the foundation of the future roof, in other words, to install the rafter system. The roof is a regular gable roof, consisting of 4 triangular trusses. The height from the ridge to the harness is 1 m. After calculations, it turned out that exactly this height looks proportional on the gazebo.
100x50 mm boards were used for the rafters. I made each truss from two rafter boards connected by a tie. On top, on both sides, there are OSB linings, nailed around the perimeter. According to plan rafter legs They rest on the top frame, so I made insets at their ends - the dimensions are suitable for the frame beam. I had to tinker a little with the inserts, but that’s okay, I managed to do that in 2 hours.

Rafter trusses assembled from boards and fastened on top with OSB overlays
I installed trusses every meter. At first I set it up, maintaining the verticals, then I fixed it with self-tapping screws. It turned out that dealing with the rafters yourself is not so easy. Here I regretted that I did not take anyone as an assistant. After suffering for an hour, I finally put them up, but I advise everyone who follows in my footsteps to still ask someone for help at this stage. Otherwise, you can end up with a skew, then you will definitely have to redo everything, which obviously will not add enthusiasm to your work.
Since the roof of the gazebo will not be subjected to increased loads, I decided not to install a ridge beam, but to fasten the rafters together with a lathing made of 50x20 mm boards. There were 5 boards for both slopes. Moreover, I filled 2 of them on both sides of the ridge at a distance of 2 cm from the tops of the trusses. In total, the sheathing for each slope was made up of 2 outer boards (one “holds” the ridge, the second forms the offset of the slope) and 3 intermediate ones. The structure turned out to be quite strong, it will no longer be possible to loosen it.

The sheathing connects the trusses and will serve as the basis for fastening the slate
In the next step, I exposed the roof trusses and the floor with two coats of stain varnish.
Stage 5. Wall and roof cladding
Next, I started covering the sides with pine clapboard. First, I filled 20x20 mm bars under the railings along the perimeter, and then nailed the clapboard to them with small nails. I covered the back wall completely, but the side and front walls only from the bottom, up to the railing. At the end of the process, I painted the lining with varnish-stain.
Only the roof remained unfinished. I covered it with painted slate with 5 waves, the color is “chocolate”. 9 sheets of slate were used for the entire roof, and there was also a ridge element on top brown(4 m).

Covering the walls with pine clapboard will protect the interior of the gazebo from wind and sun

Colored slate looks no worse than modern roofing materials, and in terms of durability it is much superior to them
A little later I plan to make removable windows in the openings to protect the gazebo space in the winter. I’ll knock together frames, insert some lightweight material into them (polycarbonate or polyethylene - I haven’t decided yet), and then they will install them in the openings and remove them as needed. Perhaps I'll do something similar with the doors.
For now, perhaps, that's all. I think that this option will appeal to those who want to build a gazebo quickly, simply and inexpensively.
A beautiful DIY wooden gazebo is a stylish and practical small architectural form that will help decorate your garden plot in any design direction. This comfortable place recreation for outdoor recreation at any time of the year – right choice The type of design will help you enjoy the functionality of the gazebo not only in the summer.
tree most practical material to create a frame:
- wood is easy to process using accessible tools;
- the material allows you to embody almost any style and shape;
- wood is an environmentally friendly material;
- if handled correctly, tolerates well external influences– moisture, temperature changes;
- The advantages of wood include high strength and durability.
Types of gazebos
According to the criterion of operating features and functional load, the following are distinguished:

According to the criterion of design features:

According to the criterion of location on the site:

How to choose a gazebo style?
Depending on the style of landscape design and the residential building on the site, you can choose the appropriate gazebo option:

Do-it-yourself summerhouses are represented by two of their distant relatives:

DIY gazebos: where to start?
If you have chosen a style and design option, you should choose a location for the structure. Depending on the size and shape of the site, the dimensions of the small architectural structure depend. Consider the purpose for which you are installing the structure:
- large family feasts in summer and winter or all year round;
- garden plot decoration;
- a convenient place for drinking tea in the summer;
- holidays in large groups on holidays or weekends.
In the first case, you should choose a secluded place, not very close to residential building so as not to friendly get-togethers did not interfere with the rest of those in the house. Especially if several generations live in the house. As a decoration, the gazebo is installed so that it fits as harmoniously as possible into and emphasizes its features.
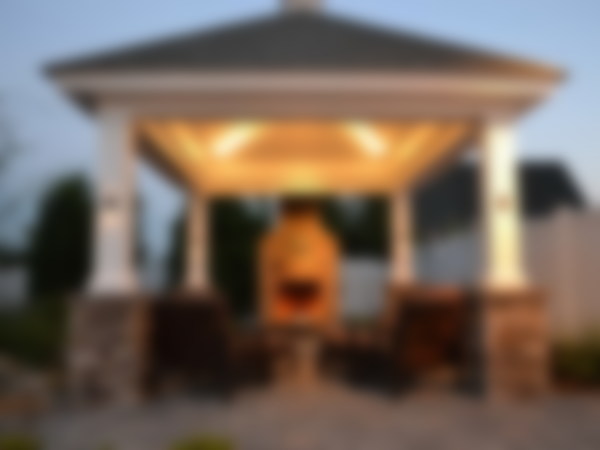
 A gazebo for feasts can be made in a closed form, equipped inside with a fireplace, a lighting system, and installed heating appliances. If you install it close to your home, you can quickly transport food and dishes prepared in the kitchen.
How to make or garden plot? It is worth paying attention to the recommendations.
Select the location for construction according to the following criteria:
- the area should not be subject to flooding;
- preferably a flat, open place;
- You should not install a gazebo next to outbuildings and.
Photos and drawings of wooden gazebos with your own hands will help you choose the best option: 
Foundation and walls for the gazebo
 Depending on the type of soil, the purpose of constructing the building, and its parameters, we select the type of foundation: slab, columnar, strip. A massive structure needs a strong and reliable foundation.
Wall options:
- wooden beam;
- boards;
- whole logs;
- slats.
If you are a professional, it will not be difficult to build a structure of complex shape, round or 6-gonal. For a beginner, we recommend starting with a simple, square or rectangular gazebo with lattice walls - it looks elegant and stylish.
Building a gazebo from timber with your own hands - video
DIY gazebo: drawings and dimensions
 Let's look at the features of building a small, open wooden gazebo. Characteristics of the future design:
- size: 3x3 meters;
- height of the structure to the top – 3.5 meters;
- 4-pitched roof;
- columnar foundation.
The initial stage for the construction of a gazebo
Preparing the site for construction. It needs to be cleared, excess vegetation removed, and the surface leveled. The size of the plot should be one and a half meters larger on each side than the building itself. Gazebo from natural wood with your own hands should be protected from flooding.
We buy materials for the gazebo
For a square building of 3x3 meters, you need to purchase timber in several cross-section options:
- 10x10 cm: 3-meter beams in the amount of 5 pieces for the base; 4 pieces 2.3 meters long for supports, 5 pieces meter long for the construction of the entrance, 3 pieces for strengthening and rigidity of the structure, for the center of other sides of the structure.
- 10x4 cm: for the roof - 8 pieces of 2 meters each, 7 beams of 3 meters each for piping and railings, beams of 2 pieces in sizes 1 and 4.3 meters (roof cross and railings).
To create a gazebo other than timber:
- massive batten: 4 cm thick, 9 sq. m;
- lining in the amount of 20 sq. m;
- wooden slats;
- inch for roof sheathing;
- roofing;
- bricks and cement;
- 5 kg of nails and screws;
- special processing agents for wood (about 15-20 liters).
Installation of a columnar foundation
 How to build a gazebo with your own hands? It is very important to build the foundation correctly.
Optimal look for small, open building– columnar. IN in this case, brick was chosen for it.
What is needed to install a columnar foundation:
- item for digging holes for posts: a drill or an ordinary shovel;
- level for leveling;
- roulette;
- material for posts;
- cement;
- steel reinforcement to strengthen the structure;
- roofing felt for waterproofing the bottom of a wooden gazebo.
Want to save money? If you have already used brick, you can use it for the foundation.
 A drawing is presented according to which the area for installing the gazebo should be marked.
It is necessary to dig holes at the points where the foundation pillars will be installed. The last row of bricks should be at ground level. Before laying the brick, you need to create a cushion that is placed at the bottom of the hole. The pillow is made of crushed stone or sand.
Using a hydraulic level it is necessary to level the plane brick pillars. To ensure the rigidity of the structure, reinforcement bars must be inserted into the corner posts.
Considering the size of the building, the result should be 9 columns: 4 corner, 4 intermediate between the corners, 1 central.
The supports should be located under the side walls every 2 meters. Considering that brick was chosen as the material for the supports, the holes need to be dug with a shovel, they should have a square shape. Recommended depth – 50 cm (not less). A hand drill is used if the posts are made, for example, from metal pipes.
For the base, beams with a cross section of 10x10 cm were purchased in the amount of 5 pieces. The reinforcement that remains on the surface of the posts is placed in a hole drilled in the corner beams.
In order to connect the beams at their intersections, you can use the “half-tree” fastening technique. If everything is done according to technology, the result will be a reliable, durable structure.
Installation of the floor in the gazebo
The design can be made with or without a floor. Floor installation requires a foundation.
If there is no floor, you need to prepare a platform for the gazebo, finished paving slabs, paving stones. The option without creating a special area is also allowed for summer open buildings.
Now consider the option with a foundation and floors. Installation is carried out after the foundation is completely completed and strengthened. What you need for the floor:
- beam;
- edged board;
- tools: hammer, drill, level, jigsaw;
- nails.
The easiest way to create floors is in a square gazebo or rectangular shape. The first step is to install timber around the perimeter of the base. Fastening is carried out using reinforcement that protrudes from the foundation.
 The next step is to install logs every 30-40 cm. The floor should not be inclined, so you need to use a level.
 And the last thing is covering the floor with boards.
When processing wood, it is necessary to use special substances to protect it from rotting, negative influence insects
Frame installation
 For the frame, logs 2.3 meters long with a section of 10x10 cm are intended:
- The surface of the beams should be smooth; an electric plane can be used to process the surface.
- It is necessary to make cuts to attach the roof rafters. The thickness of the cut depends on the thickness of the planks.
- In the corners of the gazebo there is reinforcement that must be mounted on support posts. To do this, you need to make a small hole at the end of the post - about 1 cm in diameter.
- The posts must be absolutely straight and vertical - you need to use a level to check the post's position.
- The position of the pillar is secured using first rough and then finishing struts made of timber.
In addition to wood, PVC or steel pipes. Polymer materials do not require special protection against rotting.
Installation of a roof for a gazebo and lining with clapboard
 Construction process:
- For the roof, a cross is formed from wooden beams. To connect, you can use the “half-tree” technique.
- Cuts are made at the edges of the boards to connect with similar cuts on the supports.
- It is recommended to use a special block to enhance the strength and durability of the connection.
- The structure is installed on supports.
After the frame is assembled, it is necessary to install the pillars and railings.
It is planned to create a 4-slope roof and cover it with bitumen shingles.
To create the roof, we use 10x10 cm timber - an 8-sided section about 80 cm long is made from it. Makes a cut in the timber for the first 2 planks. This is a post that will be fixed in the central part of the cross; it will ensure the strength of the future roof.
2 rafters are connected using the half-tree method and fixed in the grooves. We then attach the second pair of rafters to the central post. The entire structure is assembled on the ground. 
When 2 pairs of rafters are secured, we attach 4 more planks so that their lower ends lie on a bunch of outer posts.
If winter in your area is characterized by heavy snowfall, you should consider additional roof reinforcement. You need to add support posts between the corner supports, above the center foundation posts.
Now you can move on to covering the gazebo with clapboard and roofing work.
To cover the gazebo, we chose clapboard and special fasteners for its simple and aesthetic fastening. The roof is made of wood - planks up to 3 cm thick. We gradually cover all the roof slopes with these planks.
It is imperative to take care of creating a drain - the lower strips must protrude beyond the rafters by at least 10 cm.
In the future, the roofing covering will be laid on top of the sheathing. The choice of roofing depends on stylistic nuances and financial capabilities.
The open parts of the gazebo, which are not covered with clapboard, can be decorated with thin wooden planks fixed crosswise.
Since the work is carried out with wood, care must be taken to protect the structure from the negative influence of external factors. Wood is treated with special substances to protect it from rotting.
Alternative: log walls
 Projects for building a gazebo at the dacha involve the use of logs to create side walls.
If you choose logs for the walls of the gazebo, keep in mind that you do not need a frame. The actual laying of logs in rows begins immediately. The first row is attached to a base protected by waterproofing. Fastening the corners is done by creating grooves at the ends. Docking is carried out at the corners. The number of rows depends on the project - for the design open type 3-4 rows are enough.
What material to choose for the roof?
The material that will cover the roof of the gazebo must meet a number of requirements:
- resistance to moisture and temperature changes;
- high level of strength with low weight;
- durability;
- providing protection from precipitation (especially if the gazebo is closed and will be used in the autumn-winter period);
- stylistic match, if the house is covered with soft bitumen shingles, it is naturally better to use it for the gazebo.
Calculation rafter system roof depends on the choice of roofing material, so you need to think through all the points in advance. The weight of the future structure, which also takes into account the roof, influences the choice of foundation type.
When choosing, consider the type of gazebo, its style and purpose.
What roofing options can be used for a wooden gazebo:

Foundation options for gazebos
Above is an example of the technology for installing a columnar foundation. This type combines practicality and ease of installation. There may be two more types of bases for a wooden gazebo in your arsenal:

High-quality execution of the gazebo is the key to its durability and aesthetics.
Video about building a wooden gazebo with your own hands
The opening of the dacha season implies not only the beginning of land and planting work, but also relaxation in nature, away from the bustle of the city. And so that good rest no bad weather or scorching sun prevented summer cottage you should get a small house or a summer gazebo.
It is good because it consists of a simple and lightweight design. In addition, the gazebo will not only be protection from inclement weather, but also the highlight of the site. There are an incredible number of options for country gazebos, both in design and in price category.
But if you decide to build a miracle house with your own hands, then before this venture it is recommended to become familiar with some of the intricacies of the work and consider the projects.
From the article we will learn how to cheaply and beautifully build a summer gazebo.

Choice of materials and design
Wood remains the most budget-friendly material for making a summerhouse. But despite the low cost, such a summer house will last quite a long time. Especially if the wooden blocks are also treated with various antiseptic impregnations, which will save the wooden structure not only from exposure to the external environment, but also from unwanted wood pests and prevent fire.
Creating such a gazebo will not take much time and will not be difficult. The approximate production time for unhurried work will be about three days.

A summerhouse based on metal structures will also last for decades, but the cost of such an invention will be many times more expensive. And besides, from time to time it will be necessary to treat metal pipes with various protective equipment for metal.
And owners of summer cottages are more concerned about creating high-quality ones that do not require special effort for the manufacture of inexpensive gazebos.

Therefore, before building a gazebo with your own hands, it is recommended to draw up an estimate and a drawing of the future structure, where all measurements and materials for manufacturing will be indicated. And then you should familiarize yourself with the construction projects. So, how to cheaply and beautifully make a summer gazebo for and what is needed for this? Before construction, you need to choose a suitable place for the structure, where before starting work you should remove top layer about 10-15 cm of earth and compact it.


It is important to know that the cheapest option will remain a gazebo made of wooden structures without the use of metal components.

But before creating it, you should consider some nuances. Let’s say that if you make a concrete foundation for a wooden gazebo, then the service life of such a structure will be no more than 5 years. Since prolonged contact of wood with concrete leads to further rotting due to damage, despite previous treatment with antiseptics. And, as a result, further destruction of the structure.

The best way to protect a wooden gazebo is to treat wooden supports with bitumen or roofing felt.
If you still decide to make the base of the structure concrete, then it is recommended to place it in in the right places small metal pipes so that the ends are at least 30 cm from the base of the concrete. Next, holes are made in them for fasteners, which will subsequently support the structure for many years.

For further protection from strong winds, it is not necessary to build brick fences. It will be enough to make a fence from eurolining about 80 cm high, strengthening it with two longitudinal beams. Such a fence will completely protect from gusty winds.


Polycarbonate structures
Protected from the wind sun rays and the rain will be helped by cellular polycarbonate. They can easily cover a wooden gazebo structure. Cellular polycarbonate has a lot of positive qualities:
- shockproof;
- waterproof;
- sunscreen;
- light weight;
- flexible;
- variety of color (from transparent to dark tones).

Using cellular polycarbonate, you can not only sheathe a gazebo, but also build a high-quality fence. In addition, it is not necessary to make a frame out of wood; polycarbonate is attached to a metal structure just as well. When creating such a gazebo with your own hands, you can resort to the help of the Internet. Can be found large number photo of polycarbonate gazebos with full manufacturing instructions.


Typically, polycarbonate gazebos are installed near dense trees. Thanks to its transparency, sunlight will be supplied in sufficient quantities.

You can sheathe a gazebo made of wood or metal construction using wave slate.
Do you know how to build gazebos?
Vote
But there are several nuances:
- The gazebo must have a length that is a multiple of one meter.
- The slope of the structure is made 1.75 m long.
- When laying the slope in several rows, it should be overlapped by about 10-15 cm.
Let's find out how else you can build a summer gazebo, consider cheap and beautiful projects.

Features of the construction of simple gazebos
A gazebo made of cellular polycarbonate is not only low-cost, but also easy to manufacture. To build it on the basis of a metal frame, you will need a corner made of a metal structure, a strip of metal, polycarbonate and a planed board. You also need to first pour the foundation base, concreted the corner supports into it. The next step will be welding.
It is necessary to weld a metal corner to the supports. One corner chord should be welded to the roof base rods. Two belts are welded in the middle part.

The flexibility of cellular polycarbonate simplifies the work when creating an arched roof. It should only be bent with light movements and secured to a metal structure in the form of an arch.
The roof of the gazebo will look gorgeous from pieces of bitumen shingles. You just need 3-4 OSB panels. They will serve as the basis for the future roof. The panels are quite rigid, even with a thickness of 10 mm. Therefore, additional protection in the form of bars is not required. The panels can be fixed to the framing beam of the structure.


This gazebo does not require an additional frame frame, as it is quite lightweight. The floor covering is usually reinforced metal mesh, concrete screed. You can easily install a barbecue on such a surface.
In order to use such a gazebo in winter, it is recommended to insulate the floor with wood and cover the walls with cellular polycarbonate. Thus, this building will be protected from snow and rain getting inside.


Advice! By installing a fireplace inside, as well as creating comfort and coziness, you can not only spend time here in the future, but also simply relax in body and soul.
Wooden garden gazebo
It is not difficult to build a garden gazebo with your own hands. Wooden buildings they look very beautiful and expensive. Using simple drawings and projects, it is possible to build a fairly high-quality and inexpensive gazebo. How to do this, see below.

To build a wooden gazebo you will need the following materials:
- beam 1 cm x 1 cm;
- roofing sheets;
- packaging of self-tapping screws;
- edged boards;
- slats.
To build the structure you will need a screwdriver, a circular saw and an electric planer.
In such a gazebo you can build a safe place for a future barbecue or create a summer kitchen.
It is better to install such a summer structure away from a residential building, so that smoke and noise do not cause inconvenience in the future.

Construction of a wooden structure
To create a cheap and beautiful wooden structure with your own hands, you should thoroughly study all the nuances and understand all the intricacies of such gazebos. So, how to build a summer mini-house, consider the original project below.
For the future construction of a gazebo from wooden structure 11 recesses should be made in the ground under the racks for further installation of the columnar foundation. To do this, you need to have a construction drill in your arsenal. Then, the recesses are filled with reinforcement strapping and filled with concrete.

The next step will be to assemble the frame. Using metal corners, at a distance of half a tree, you will need to fasten the wooden blocks together. Then, you should lay the logs under the flooring.
The assembled timber frame must be treated with protective antiseptic agents.

The next step will be laying the floor boards


Installation of rafters
Before installing the rafters, you should make cuts on the bases of the gazebo at the points of contact and sign the products with a marker.

- To fix the vertical posts, it is recommended to use construction angles. You should always check the perpendicularity of the position of the racks.
- Then horizontal ties are mounted along the contour from above and fastened with self-tapping screws to the load-bearing logs.
- All the main parts for the final installation of the roof are tightened and fixed, and after that the support should be cut flush in the center.
- Next, lay the sheathing and you can begin installing a fireplace or making a summer kitchen.
- Before this, it is necessary to prepare the trim to the base in order to install the sheathing later.
- The walls of the structure are covered with roofing felt for safety and filled with concrete.
- After this procedure, when everything is dry, you can start covering the walls with clapboard or blockhouse.
- The roof can also be covered soft tiles and begin interior decoration. The gazebo can be painted in all sorts of colors bright colors, so that it stands out against the background of other buildings, or simply treat it with a protective impregnation and leave the wood structure, which is very fashionable now.

The interior decoration can be done at your discretion, the main thing is that it is comfortable and cozy with family and friends.
People come to the dacha to relax from the bustle of the city and enjoy nature. However, during bad weather or hot weather you have to hide in country house. There is another option - to build a summer gazebo. The lightweight design will decorate the site and will protect the owners from bad weather. You can find many options for country gazebos. However, before independently constructing such a structure, you will have to learn many subtleties of the work. The choice of a particular option depends on the budget and preferences of the owners. To understand how to build the simplest gazebo with your own hands, you should familiarize yourself with the basic intricacies of the work.
Choice of materials and design
The traditional material for gazebos is wood. When used, the building acquires natural beauty. The service life of wood is also quite long. If you choose high-quality antiseptic impregnation for the wooden elements of the gazebo, they can last for more than one year. The cost of the material is also taken into account - wood is very cheap. It will take a little time to build such a gazebo. If you work slowly, you can finish it in three days.
Another popular option that is often considered when creating gazebos is metal. When assembling the frame of the structure from metal pipes, the gazebo can stand on the site for many decades. There are also countless designs for lightweight shelters for summer cottages. However, the main question facing land owners is how to build a simple gazebo quickly and inexpensively?

Setting up such a problem can be done with a wooden floor and a frame structure made of timber. A concrete base is quite inexpensive. Before work, an accurate construction plan is drawn up. The drawing indicates all dimensions and materials used. It is also important to choose the right place to install the gazebo. After this, the fertile layer of soil is removed. The soil must be removed to a depth of 10-15 cm. After removing the soil, it is necessary to level the site.
Important! Very simple gazebos are made of wood, so the instructions will be designed for the absence metal elements in the design.
It is most practical to protect wooden supports bitumen or roofing felt. If wood comes into direct contact with concrete, it may be damaged. After 5 years of operation, wooden parts they will still begin to rot, which may cause the gazebo to collapse.

To cut off the tree from the concrete base, pipe sections should be placed in the ground. It is necessary that they stick out from the concrete by 30 cm. Holes are made in them for fastening elements. With this arrangement of supports, eternal pillars are obtained that can support the roof of the structure for many decades.

The simplest gazebo for a summer residence does not require the installation of brick fences that would protect it from gusty winds. A simple fence made of eurolining will do. It can have a height of 80 cm. This fence is reinforced with two longitudinal beams. This will protect the backs of vacationers from the wind.
Polycarbonate structures
An alternative to eurolining can be sheets of cellular polycarbonate. This material transmits light perfectly. It is convenient to fix it to wooden blocks. Polycarbonate is not afraid of heat and high humidity.

The roof frame of the structure is made of wooden beams with a section of 50x50 mm. A tent structure must be installed on the gazebo. It will be attached to the harness. The roof of a simple summer gazebo is usually covered with sheet roofing materials. For this purpose, choose polycarbonate, slate, and metal tiles.
When creating a drawing of a gazebo for a summer house, you need to calculate its exact dimensions and the width of the roof. This is necessary to simplify the work with roofing material. This way you won’t have to cut the sheets into pieces in vain. It is better to maintain an overlap for the side and end overhangs roofs.

For example, for wave slate, the length of the gazebo should be a multiple of one meter. In this case, the slope of the structure is 1.75 m long. When laying several rows of slate on one slope, it is necessary to take into account the overlap of the sheets by 10-15 cm.

When considering other materials for the construction of gazebos, it is necessary special attention devote cellular polycarbonate. It will be useful both for creating a high-quality fence and for constructing the roof of a gazebo. Polycarbonate is impact resistant and has no large mass. In addition, it can be installed on both wooden and metal frame. Photos of simple DIY summerhouses will help you understand how such structures are constructed.

It is appropriate to install a polycarbonate gazebo in the shade of spreading trees. At the same time, the transparent material will provide an optimal level of illumination. Thanks to the translucent roof and dense foliage above the building, a pleasant partial shade is created inside the structure.
Features of the construction of simple gazebos
It must be remembered that light gazebo made of polycarbonate is a simple design. All that is needed to create it is a steel corner and a strip of the same material. For work you will need to prepare a polycarbonate sheet and planed boards.

After concreting the corner supports into the foundation of the structure, it is necessary to weld them steel angle. To support the roof, one belt of corners is welded to the posts. Two belts must be fixed on the racks in their middle part.
Polycarbonate bends well, so creating an attractive arched gazebo roof will take a little effort and time. You just need to attach two bent steel strips, bent in the shape of an arch, to the racks.

The roof that is installed on a summer gazebo can be made from elements of bitumen shingles. To do this, you should purchase several OSB panels. They will become the basis for such a roofing covering.
OSB panels, even with a small thickness (10 mm), are able to maintain sufficient rigidity. For this reason, for such sheets there is no need to construct a frequent frame of wooden blocks. They are simply fixed on the strapping beam of the structure.

As already noted, the most easy construction is not equipped with a frame frame. The base and floor covering for it is often a concrete screed. It must be reinforced with steel mesh. Such a surface can serve as a foundation for a barbecue. If you want to use the gazebo even during winter frosts, the floor should be made of wood. The base of the structure rises higher.
A columnar foundation is quite simple to construct, and the cost of materials is low. In order not to exceed the established financial limit, it is better to use standard red brick for the foundation. The construction of the base is quite simple - first, pits are dug for the pillars, and then brick supports with concrete mortar are placed in them.

The frame of the future structure is installed on the pillars. For this, a 50x100 mm beam is selected. Wood flooring the floor, which will be laid on the bars, will be reliably protected from snow and moisture. If the gazebo is winter, three of its walls can be made of polycarbonate.
Advice! By installing an open fireplace inside the structure, you can get a fairly comfortable room in which you can have picnics.

Wooden garden gazebo
Using simple drawings, you can build an attractive and reliable summerhouse made of wood. However, the design can be quite complex. Wooden buildings look quite solid and attractive.
The construction of such a gazebo requires the preparation of the following materials:
- timber 100x100 mm;
- sheets of roofing material;
- self-tapping screws;
- slats;
- edged board.

In addition, it is necessary to prepare the following tools - a screwdriver, a circular saw, an electric planer. This gazebo is equipped with a nook small sizes, where the grill will be installed. This solution allows you to make the gazebo comfortable and safe.
It is better to build such structures at a distance from a residential building. Thanks to this, the house will be protected from smoke, and the people in it will not hear noise.

Construction of a wooden structure
To figure out how to do a simple gazebo with your own hands, you need to understand in detail the features of such buildings. This will ensure the durability of the summer shelter. Stages of building a gazebo:


The walls are covered with blockhouse elements or clapboard. The roof is covered with soft tiles. A gazebo for a summer residence, which is built with your own hands, can be made with any interior decoration. Subsequently, the gazebo is painted from the outside and inside. It is better to choose colors that match the overall style color range buildings on the site.
There is no such owner land plot who would not dream of equipping it in the best possible way, having equipped cozy places for relaxation in the fresh air. A traditional element of landscape design is a gazebo, but there are quite a lot of varieties of these light buildings, and therefore it can be difficult to decide on the right model, as well as decide to build it yourself, without at least theoretical training.
The question of how to build with your own hands has always been and remains relevant, as more and more city residents move outside the city for permanent residence or acquire summer cottages. When starting to build any building, you first need to decide what it should look like, which is why it makes sense to consider several design options for gazebos that you can easily raise yourself.
Popular types of gazebos
These summer buildings may differ in style and design, size, and material. And the optimal model is selected depending on the size and design of the site, as well as the personal preferences of its owners.
Lattice gazebos

Gazebos lined with bars along the diagonal walls are quite popular for summer cottages and private areas, as they provide good shade and at the same time do not interfere with the flow of fresh air. An important condition To choose a place to install such a building, it is a closed space where there is no draft, otherwise the gazebo will be built in vain, since it will not be very comfortable to be in it. If the dacha plot is not yet planted with trees and there is no area not blown by the winds, then it is recommended to make the leeward side of such a gazebo “deaf”.

Such gazebos are most often built so that over time the stems of climbing perennial plants can rise along the lattice walls, which will create protection from the wind and fill the space under the roof with constant freshness. If you plant around a building flowering plants, then, relaxing in it on a hot day or cool evening, you can enjoy your favorite aromas.
The disadvantage of such a gazebo, until it is covered with vegetation, is that it is open and unprotected from slanting heavy rain, so it will not be possible to hide in it from such bad weather.

Another version of a larger gazebo with two rear “blank” walls that completely cover its interior space from the eyes of neighbors, also has lattice cladding - in the lower panel part and under the roof itself. After the climbing plants planted around the building climb the lower sheathing, you can stretch ropes from it to the trim under the roof at the required distance from each other, thereby forming “windows” framed by greenery and flowers.
The roof of the gazebo shown is covered with transparent polycarbonate, which has a green tint, which gives the interior a calm, pleasant lighting. This factor will certainly contribute, in combination with fresh air, to a more comfortable rest.
Due to the fact that the gazebo has enough large sizes, it is raised above the ground by approximately 200 mm on a columnar foundation. This will help protect the floor boards from the harmful effects of moisture, since the space under the building will be constantly ventilated.
Small original gazebo

This original design summer vacation spot will not leave guests indifferent, and the residents of the house will be convinced more than once of the comfort of such a gazebo. The building has a simple design, but it is quite roomy, and it can easily accommodate a soft corner and a table. If desired, the size of the gazebo can be calculated for a specific set of furniture. The blank rear walls of the building will close the space from the wind, and round entrances in the other two walls will help ventilate the room. If desired, the round openings can be equipped with waterproof or anti-mosquito curtains, which will allow you to stay in the gazebo in any weather or even stay in it at night when the house becomes too stuffy.
Gazebo - summer house

This gazebo deserves the name " summer house", which can be used for living in the warm season. For example, if you plan to build an economical version of a house on a summer cottage, then this design is perfect for this purpose.
You can build such a structure on the site of a private house, since in the summer you want to spend more time in the fresh air, and thanks to large windows and the door opening wide, there will be plenty of it in the room.
To build a similar version of the gazebo, more costs will be required, since the design includes windows and glazed doors. But it is thanks to these elements that you can achieve complete comfort for relaxation, both during the day and at night, and in any weather.
Gazebo - pergola

Pergola came to Russian landscape design from Italian style design of gardens, where, in accordance with the features of its design, it could serve as a canopy, arch or extension. Thanks to domestic improvements, this type of garden structure has become a real decoration of many summer cottages and areas of private houses.
The pergola is installed to create support for climbing plants, as protection from the hot sun for a certain place on the site, a gazebo for relaxation, or simply as a decorative element of the garden. Therefore, the model of this building must be chosen depending on what tasks will be assigned to it, but most often it is used for several purposes at once.
The first photo shows a covered pergola installed as a canopy over the rest area. In essence, she created open gazebo, under which fit a massive table, quite sufficient for a large family to gather around it, as well as a grill built into the back wall. The convenience of the design is that you don’t have to make a foundation for the covered space - it will be enough to lay or lay garden plastic panels on top of the ground. The foundation will have to be made only for the support pillars.

In this case, the pergola performs three functions at once - a passage arch, a support for a rose bush and a gazebo, which successfully complement each other. The benches in this seating area are located at such a distance that a table can easily fit between them, so in such a cozy place it will be great to spend evenings having family tea. In addition, the gazebo, entwined with greenery, is a great place to relax on a hot day, where you can hide from the sun and sit comfortably with a book.

This pergola option is designed as a support for climbing plants that will cover a small gazebo, which will certainly become a favorite place for some family members who love privacy. This version of the gazebo also does not require a foundation, due to its light weight, which significantly reduces the overall amount of work. The roof can be left open, as this follows the classic pergola design, or it can be covered with a lightweight roofing material such as plastic slate.
Construction of garden gazebos
Having prepared everything necessary tools, can be purchased building materials for the selected gazebo model and proceed to construction work.
jigsaw
Required Tools

When constructing any gazebo model, you cannot do without special tools and devices, so for work you will need to prepare:
- circular saw, electric jigsaw and a hacksaw.
- Miter box for sawing off structural elements at an angle.
- Electric drill and set of drills.
- Screwdriver.
- Hammer, tape measure, folding meter, construction square, marking pencil.
- Construction level, plumb.
- Pincers and nippers.
- A drill for making holes in the ground for installing foundation pipes.
- The stairs.
Rectangular gazebo

A rectangular gazebo can be called a traditional option for summer construction, since quite often this type of structure is chosen for installation on a site. It should be noted that such a gazebo is quite comfortable to use and aesthetically pleasing in appearance. In addition, if desired, you can make your own adjustments to the design, for example, closing one of the walls completely or raising the fence to a higher level.
The building does not have too much mass, so it is installed on or even simply on well-compacted soil, reinforced with a layer of crushed stone, which will also provide good drainage.
The depth of laying the foundation, if provided, depends on the characteristics of the soil in a particular area.
Since wood is street conditions will constantly be found negative impact: ultraviolet rays, moisture, wind, etc., it is recommended to carefully treat finished parts with water-repellent compounds. Such protection will protect the material from rotting and insects, and will maximize the durability of the building.
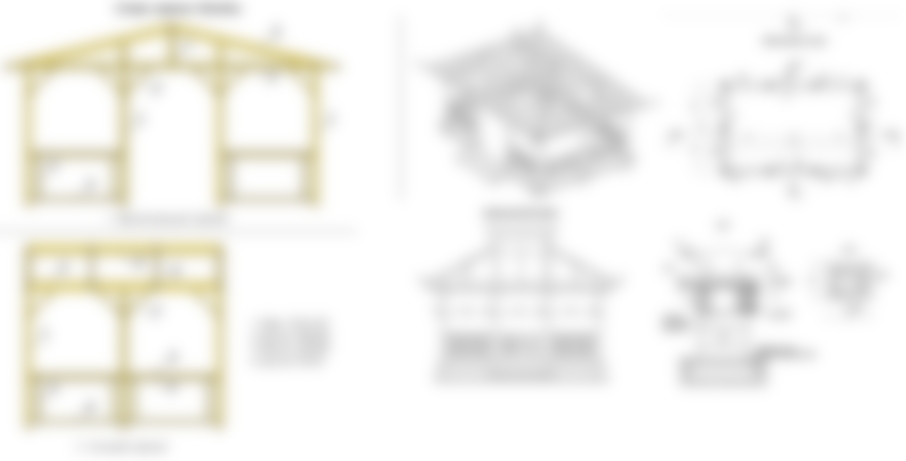
The diagram below shows a drawing of the gazebo. All its details are assigned letter designations- they are listed in the table necessary materials. Further, as we describe the assembly process, we will come across drawings in which the dimensions are given in inches. To convert to the metric system: 1 inch = 2.54 cm or 25.4 mm.
To build this gazebo, you will need the following materials, which have letter designations on the diagram; the dimensions on the diagrams are given in inches: 1 inch = 2.54 cm or 254 mm.

| Required materials | Dimensions of parts, mm | Quantity, pcs. | |
|---|---|---|---|
| Columnar foundation (A) | Asbestos concrete pipes | Ø 200÷250, length 1200÷1500 | 9 |
| Racks (B) | Wooden beam | 100×200×3250 | 8 |
| Bottom frame of the structure (C) | timber | 100×150×3600 | 2 |
| 100×150×4725 | 2 | ||
| Intermediate floor frame beams (D) | timber | 100×150×1655 | 4 |
| 100×150×4550 | 1 | ||
| 100×150×2240 | 2 | ||
| Floor joists (E) | timber | 50×150×1750 | 10 |
| 50×150×2325 | 8 | ||
| Flooring (F) | Boards | 50×100×2400 | 40 |
| 50×100×1800 | 52 | ||
| Upper harness (G) | timber | 50×150×3600 | 2 |
| 50×100×4725 | 2 | ||
| Gazebo fencing (H) | Boards | 20×100×675 | 92 |
| Beam (harness) | 50×100×2230 | 9 | |
| 50×100×1630 | 12 | ||
| Roof ridge (I) | timber | 50×150×2445 | 1 |
| 50×100×1930 | 2 | ||
| Diagonal rafter legs, cut at the ends at an angle of 60 degrees (J) | timber | 50×100×2760 | 4 |
| Ordinary rafters (K) | timber | 50×100×2450 | 10 |
| Rafter legs with ends cut at an angle of 34 degrees (L) | timber | 50×100×1375 | 4 |
| Rafter legs with ends cut at an angle of 45 degrees (L) | timber | 50×100×800 | 4 |
| 50×100×1360 | 4 | ||
| Base for roofing material (M) | Plywood | 15×120×2400 | 11 |
| Waterproofing material for roofing (N) | Ruberoid or membrane | based on 27 m² of roofing, with the necessary reserve | |
| Roofing material (O) | Bituminous shingles | ||
| Consumables | Nails, self-tapping screws and screws. |
Work on the construction of this gazebo occurs in the following order:
| Illustration | |
|---|---|
 | The first step is to mark the territory at the site chosen for construction. To do this, pegs are installed along the perimeter of the future building, onto which the rope is stretched and secured. The corners of the marked area must be measured very precisely; they must be perfectly straight. To make sure the markings are correct, you need to measure the diagonals of the rectangle and make adjustments if necessary. The diagonals must be equal to each other. The illustration presented shows an example of calculating and marking a site for construction, albeit with different dimensions, but this does not change the principle. |
 | Next, holes are drilled to install the columnar foundation pipes. Their depth should be 150 mm greater than the soil freezing level. The height of the pipes above the ground can be different, depending on the desire of the master to raise the gazebo to a certain level. If necessary, their excess height can be cut off using a grinder. On average, for the base for a gazebo, the pillars go deep into the ground by 500÷700 mm. Having installed the pipes in the drilled “sockets”, they are set exactly vertically in level and the soil around them is strengthened with the help of crushed stone and soil, which is well compacted. Then, the pipes are filled with cement-gravel mortar to ⅔ of their volume. |
 | The next step is to install the rack bars into the foundation pipes. It is recommended to pre-treat the lower part of the beam with bitumen mastic. The beam is set according to the level (plumb). Inside the foundation pipe, it can be supported with fragments of crushed stone or wooden supports can be installed, securing them to stakes driven into the ground. The pipes are then completed concrete mortar to the top, and this structure is left until it hardens completely. |
 | After the solution has hardened, before fixing the beam of the bottom frame, it is recommended to lay waterproofing material, for example, roofing felt, around the vertically installed beams. Next, the timber prepared to the size for the lower trim is fixed in the lower part on the vertical posts with self-tapping screws measuring 90 mm. To avoid splitting of the timber, before screwing in the fasteners, holes are drilled for them 2 mm smaller than the diameter of the screw. When securing the strapping, you should carefully control the horizontal installation of the beam using a building level, since this will determine correct location other elements of the building. |
 | After the framing beam is secured, intermediate beams are installed and fixed, which will divide the floor area of the gazebo into four parts and give the necessary rigidity to its structure. |
 | The next step is to install logs on the strapping and intermediate beams. To increase the strength of the floor, the logs are fixed as shown in the diagram. The logs are installed in increments of 400 mm, ideally horizontally, according to pre-made markings. |
 | The lags are fixed to special metal support elements, which are screwed with self-tapping screws 50 mm long to inside frame beams and floor beams. Moreover, they must be fixed strictly at the same level, otherwise the floor will turn out uneven. |
 | Supporting element for installing a beam-cross member. Such parts are produced different sizes in height and width. |
 | Next, flooring is made of floorboards on the logs. If the prepared base is reliable and level, then laying the boards will be quite easy. The boards are fastened to the joists with nails or galvanized self-tapping screws 60 millimeters long. The caps of the fasteners must be flush with the main surface of the board or recessed into the wood by 1.5÷2 mm. Since the building will be located outdoors under the influence of moisture, the wood may well swell, so it is recommended to leave a gap of 3–5 mm between the boards. Such cracks will also contribute to the timely removal of water and moisture from the boards and their rapid ventilation. |
 | When the gazebo floors are ready, the top frame of the building is secured to the top of the posts. It is also secured with self-tapping screws 90 mm long, with outside timber. To check horizontality, use a building level. |
 | Having a ready-made, well-mounted frame of the gazebo box, you can proceed to installing the fence. The first step in the installation of this part of the building is the installation of horizontal crossbars secured between the posts. They are installed in two rows, one of which runs along the lower edge of the racks, and the other rises to the level planned by the project. The crossbars are leveled and secured to the racks with self-tapping screws. Additionally, they can be reinforced with metal corners, which are attached to the crossbars from below, and then screwed to the racks. |
 | Next, balusters are mounted between the crossbars. These can be ordinary polished boards, as presented in this project, or you can carve round classic balusters from timber, which can be given their own configuration if desired. Flat balusters are secured to the lower crossbars using nails or self-tapping screws screwed from the inside of the gazebo from top to bottom. In the upper part, the balusters are secured through crossbars. If round balusters, machined from timber, are chosen, then they are mainly mounted both above and below on glued dowels. After their installation is completed, railings are attached to the upper crossbars. They are first glued with wood glue and then fixed with self-tapping screws, recessing their caps into the wood. |
 | Any roof for the gazebo can be chosen: - single-pitched, for which it will be necessary to raise the façade of the building by attaching short posts of 200÷250 mm to the top frame; - gable or, as presented in this project - four-slope hip. You need to start installing such a roof by creating a rafter system consisting of diagonal and middle rafters and a ridge beam. The rafters can be prepared at the bottom and then raised to the top frame. To simplify your task, you can temporarily fix the rafter legs and ridge beam in the desired position until final fastening by installing supports with a height from the floor of the gazebo to the ridge. |
 | The fixed initial frame of the rafter system begins to be strengthened from the hip sides - rafters (springs) are installed and screwed onto them at a distance of 600 mm from each other. The flanges on the hips begin to be secured from the center of the triangle. |
 | The next step is to fix the rafters onto large, trapezoidal slopes, starting from the middle of the ridge beam, and then moving to the diagonal rafters. The upper side of the rafters is fixed to the ridge beam, and the bottom - to the beam of the upper frame of the gazebo structure. |
 | If lightweight material, such as bitumen or plastic, is used to cover the roof wave slate or polycarbonate, then it is attached directly to the sheathing, which is made of boards (for example, 100×25 mm), installed with the required spacing on the rafters, perpendicular to them. |
 | In the case when the work will be carried out strictly according to the demonstrated project, using bitumen shingles for covering, then a continuous sheathing of plywood 15 mm thick, pre-cut using a circular saw, is first attached to the rafters. This material is secured with self-tapping screws 30 mm long with a pitch between fasteners of 150 mm. A gap of 1÷1.5 mm must be left between the sheets for thermal expansion of the material to avoid warping. |
 | A waterproofing material is laid on top of the plywood - it can be roofing felt or one of the types of modern membrane materials. Waterproofing sheets are mounted from the eaves in horizontal strips, overlapping each top sheet with the one below. The waterproofing is secured using staples and a stapler. Bituminous shingles are installed on top of the waterproofing, starting from the eaves. It should be installed according to the manufacturer's instructions. This diagram shows the installation of piece bitumen shingles - it will also require the creation of sheathing. Sheet bituminous shingles can be laid directly on plywood prepared for this operation. |
 | Upon completion of installation of the roofing material and fastening of the ridge element, a decorative strip is fixed along the cornice. |
After the gazebo is ready, adjustments are made to small details, such as filling holes and recesses with wood putty or a composition of epoxy glue mixed with fine sawdust. The putty should dry well, after which all unevenness and roughness should be sanded with fine-grained sandpaper.
The next step is everything wooden elements structures are covered with stain and yacht varnish or paint, which will additionally protect the wood from external influences and will give the gazebo a finished aesthetic appearance.
Building a pergola

A pergola can be an excellent place to relax, which is organized near the pool, in the garden or as an extension to the house. This type of light construction will definitely add a “zest” to the overall design of the site.
Classic pergola

To build a pergola, you will need less materials than for a traditional gazebo, but if desired, the list can be supplemented roofing covering and slats for diagonal cladding, as well as other elements.
The diagrams below show dimensions in feet and inches. In the table of materials they are already converted to millimeters.
| Basic elements of pergola design | Required materials | Dimensions of parts, mm | Quantity, pcs. |
|---|---|---|---|
| Columnar foundation | Asbestos concrete pipes | Ø 200÷250, length 1200÷1500 | 4 |
| Cement, sand, gravel or crushed stone for filling pipes. | Depending on depth | ||
| Racks | timber | 100×100×2400 or 150×150×2700 | 4 |
| Mortgages anchors(if needed) | 4 | ||
| Support beam | Board | 50×150×3600 | 4 |
| Cross beams | Board | 50×150×3600 | 13 |
| Crossbars | Board | 50×150×3250 | 5 |
| Attaching the support beams | Screws | M6×175 | |
| Fastening for cross beams | Self-tapping screws | 150 | |
| Fastening the crossbars | Self-tapping screws | 75 |
Work on the construction of a classic pergola is carried out in the following order.
| Illustration | Brief description of the operation performed |
|---|---|
 | The construction of a pergola begins in the same way as any building - with marking the territory, after which holes are drilled in the ground for a columnar foundation. The diameter of the holes is 250÷300 mm, depth 900÷1000 mm. Crushed stone is poured into the bottom of the prepared pit in a layer 80÷100 mm thick and compacted well. |
 | Asbestos concrete pipes are installed in the pits, leveled, and then soil mixed with crushed stone is compacted around them. After this, a solution is mixed, which is used to fill the inside of the supports of the columnar foundation. |
 | Pergola posts can be secured to foundation piles in two ways. The first of them is their installation in poured concrete and fixation with spacers - until the solution completely sets. |
 | Another option for securing the racks to the foundation is embedded metal anchor holders with a leg, which are embedded in the yet uncured concrete. |
 | The holder embedded in the post looks like this. |
 | Concrete poured into asbestos cement pipes, should set well, it needs to be given time for this at least three to four days. This time can be used to decorate the space, which will be covered by pergola elements installed in the form of a roof. |
 | This area can be cleared of the top fertile layer, covered with sand and cultivated with paving slabs. In addition to this option, there are other modern garden coverings that do not require labor-intensive preparation of the base, but are simply laid in the place chosen for them. |
 | After the concrete has hardened, the pergola posts are installed and leveled to the building level. The posts are secured in the holders using M6 screws with wide washers. |
 | The support beams are given in advance classic shape- it may differ slightly in the shape of the sections. Next, they are fixed on the racks in pairs. |
 | By fastening two posts together, the support beams give the structure the necessary rigidity. Their installation is carried out according to the scheme using bolts or self-tapping screws. They are installed in such a way that they protrude beyond the perimeter marked by the posts by 250÷400 mm - the amount of such overhang will depend on the preference of the craftsman or the owner of the site. |
 | If you imagine this process schematically, it will look something like what is shown in this picture. |
 | Having secured the support beams, they are perpendicularly covered with transverse beams, of which there are 13 pieces in this project, and they are installed in increments of 300 mm. However, it should be noted that there may be more or less of them, and their number determines how much the space under the pergola will be shaded. The boards for the beams must be perfectly straight, as their curvature will be immediately noticeable. |
 | In order to make the structure strong and rigid with the help of cross beams, two grooves are cut in these elements on each side at ⅓ of the height of the beam, at which it is installed on the support beams, as shown in this figure. After they are installed, they are fixed from above to the support boards with self-tapping screws 150 mm long. |
 | To make the installation of cross boards less complicated, you need to accurately measure all the distances and depth of the grooves. If the markings are carried out correctly, the installation will proceed without problems. To ensure that the grooves are neat and even, cuts are made in the boards to the marked depth, and then the cut piece of wood is selected using a chisel and hammer. The best option is to make one template beam, fit it exactly, and then cut it according to it required quantity"clones". It is immediately necessary to drill vertical holes for the self-tapping screws, which should fall exactly in the center of the selected grooves. |
 | After completing the installation of the cross beams, five crossbars are installed perpendicular to them and parallel to the support boards. They are also fixed onto measured and cut grooves - using the same technology discussed just above. |
 | If there are 13 cross beams, then the same number of grooves should be cut. Moreover, the crossbars should be slotted onto the crossbars freely, so the grooves are made slightly larger than the thickness of the boards on which they are installed. After this, the assembly of the pergola can be considered complete. |
As you can see, assembling such a pergola is not at all difficult. The main thing is to prepare high-quality material and be very careful in the manufacture of parts.
Miniature pergola-gazebo

This is the most compact version of a pergola-pergola, which will simultaneously serve as a basis for liana plants, decorate the site and create a secluded place for those who like privacy.

To make such a mini-pergola-gazebo, you will need the following materials:
| Basic elements of the gazebo design | Required materials | Dimensions of parts, mm | Quantity, pcs. |
|---|---|---|---|
| Pillar foundation (if needed) | Asbestos concrete pipes | Ø 200÷250, length 1200÷1500 | 4 |
| Cement, sand, gravel or crushed stone for filling pipes. | Depending on the depth. | ||
| Racks (A) | Wooden beam | 50×100×1800 | 4 |
| Seat frame (B) | timber | 50×100×1625 | 2 |
| 50×100×460 | 3 | ||
| Bench back (C) | timber | 50×100×1625 | 2 |
| 25×100×275 | 13 | ||
| Cross beams (D) | Board | 50×200×1800 | 2 |
| timber | 50×50×840 | 9 | |
| Seat (E) | Board | 20×100×1625 | 6 |
| Lattice lining (F) | timber | 50×50×1350 | 4 |
| 50×100×410 | 4 | ||
| Consumables | Nails, self-tapping screws and screws. |
In order not to repeat myself, it must be said right away that for this gazebo, the same as for previous buildings, the foundation is built. Since this version of the structure has very little weight, it is most likely not necessary to make a deep foundation. If there is a cemented or tiled area on the site, then this small pergola can be installed on it by inserting the posts into special stands that are secured to the base. In addition, it is recommended to cement the lower part of the stand so as not to accidentally injure your leg on the sharp metal corner.
Screwdriver

Further installation operations are carried out as follows:
| Illustration | Brief description of the operation performed |
|---|---|
 | The racks on which all other structural elements will be fixed must be prepared by making cuts in their upper part - they will be necessary for installing the transverse beams. |
 | The next step, to ensure structural rigidity, is to assemble the seat frame and attach it to the vertical posts. The fastening must be reliable, so it is advisable to use metal corners, which are installed on the underside of the frame frame. The installation height is indicated in the assembly diagram. |
 | Next, the back of the bench is assembled from timber and boards, which will strengthen the rear pillars of the structure. It is recommended to assemble this element separately and secure the backrest to the rear pillars of the structure. Since the back will also bear a large load, it may also be worth using metal fastenings, which need to be installed from the back of the backrest, connecting it to the support posts. |
 | When the racks are securely fastened at the bottom with the frames of the seat and back, you can proceed to fastening them at the top. In this model, curved parts are made for longitudinal beams - a board measuring 50x200 mm is used for them. A curved beam is cut out according to a pre-applied pattern using an electric jigsaw. After this, the beams are cleaned and polished sandpaper different grain sizes. The finished parts are installed in the grooves arranged in the upper part of the support posts, and then fixed in them using self-tapping screws. |
 | Next, longitudinal cladding boards are screwed onto the seat frame in three places with self-tapping screws 30 mm long. They are distributed evenly on the frame bars, and it is imperative to leave 5 mm wide gaps between them for good water drainage and ventilation of the wood. |
 | To make side lattice panels, a 50x50 mm beam is taken, from which a frame is made, onto which the finished lattice, ordered from professionals, is attached. You can also make the grating yourself, for example, by cutting the timber using a circular saw into slats 5-7 mm thick. The grille is mounted on a timber frame between two wide glazing beads, which will refine the grille and make it neat by covering its edges. |
 | The next step is to mark the installation step on the curved crossbars, and then fix the perpendicular boards, which are installed on the edge, using cuts and screws. If desired, the roof can also be covered with roofing material. |
 | To protect the wood from moisture and transform the appearance of the pergola, it is coated with paint or stain and varnish. The color is chosen depending on the overall design of the landscape of the site. |
After familiarizing yourself with the manufacturing technologies of gazebos of various designs, you have the opportunity to choose the one that suits your needs. own plot, objectively assessing your capabilities in carpentry. After this, you can safely get to work - the main thing is to take your time and make all the parts and their connections as carefully as possible.
And at the end of the publication - an interesting video in which the master shares his secrets of quickly erecting a garden gazebo.
Video: master class on quickly building a gazebo