Draining the basement with lime. How to dry the cellar from excess moisture
There are many reasons for the appearance of water, but the result is one - water in the cellar. There are many different ways drying cellars, but many of them are time-consuming and costly. You can dry and ventilate the cellar in summer and autumn. It is desirable when the temperature inside and outside the cellar is approximately the same, somewhere closer to autumn. Before drying, we free the cellar from racks, shelves, trays and boxes (we dry them on the street). Then we ventilate for 2 - 3 days. Now you can start drying.
Cellar drying methods
1. A bucket of glowing coals. In an old bucket, along the walls and bottom, we make holes with an ax and make a fire (you can use charcoal and coal). When the fire flares up well, using a rope or cable, we lower the bucket to the bottom of the cellar. We close the cellar lid, every 25 - 30 minutes it must be opened for oxygen access. As the fire burns out, pull out the bucket and close the lid. You can’t go down to the cellar right away, in order to avoid carbon monoxide poisoning. We do this until completely dry. This method is used in the presence of ventilation, if there is no ventilation, then all this must be done with the lid open. Smoke also disinfects the room well from mold and various bacteria and pests.
2. With the help of a candle (60 volt incandescent lamps, alcohol burner). It is necessary to increase the ventilation pipe almost to the floor (distance 15 - 20 cm.). To create the initial thrust, we set fire to the paper in the pipe. Then we put a lit candle under the pipe, in tin can. Within three days we change candles, and wet, cold air pulls out.
3. Dry sawdust. We pour dry sawdust on the bottom of the cellar, when it gets wet, we change it to dry ones.
4. Cardboard boxes. On the bottom of the cellar we lay out dry carton boxes, in process of moistening we make replacement.
5. Slaked lime. falling asleep slaked lime along the walls and on the shelves, you can just put a box of lime in the corner of the cellar.
6. White moss. We place containers with white moss powder in the cellar. Salt. AT metal container we calcine the salt, and lower it into the cellar. Periodically, salt must be calcined or dried.

6. Calcium chloride. We lay it out in the cellar, collect it the next day, ignite it, and can be used again.
7. Ceramic bricks. We heat 2 - 3 ceramic bricks, and lower them into the cellar. Cooling down, the bricks pull moisture from the cellar. When they cool down, take them out and heat them up again. After the tenth time, the bricks need to be changed, they stop absorbing moisture. We do this until the cellar dries out.
8. Sawdust pellets (cat litter). open bag With cat litter leave it in the cellar. The granules will pull moisture well.
9. Silica gel (for cat litter). Silica gel can be hung or laid out in canvas bags in the cellar.
10. Wormwood. We hang or lay out wormwood in the cellar.
- It is interesting -
Sometimes, despite the ventilation system arranged in the cellar, dampness still occurs there. It may appear as a result of insufficiently reliable waterproofing of the walls, or when placed on shelves and in chests, it is not completely dried vegetables. In addition, the fault high humidity the ventilation itself may also become, during the calculation and installation of which miscalculations were made.

How to dry the cellar on your own and extend its functionality, as well as prevent future accumulation of condensate on the walls, ceiling and floor? This question arises quite often among the owners of private houses, since the appearance of dampness in basements and cellars is by no means uncommon.
The process of drying the cellar or basement, of course, is carried out in summer time when the temperature outside is conducive to this event.
- First of all, while drying the room, it is necessary to dismantle and remove all accessories and structures intended for storing supplies - these are boxes, boxes, shelves and racks. It will be more convenient to take them out to the street for airing exactly in summer period, since at this moment there are almost no last year's stocks left in the cellar, and new ones have not yet been prepared, and the shelves are usually almost empty.
- Then, you need to open the door or hatch at the entrance to the cellar or basement and leave it in this position for two or three days, naturally, if the days are fine. Over this time Fresh air will begin the process of weathering moisture from the room. If normal ventilation is arranged in the cellar, then the pre-ventilation procedure will be much faster. At the same time, it will be possible to check how efficiently the ventilation system works - perhaps it needs preventive cleaning.
- It is possible that a certain thermostatic equilibrium has developed in the system - heavy and humid cold air is very “reluctantly” rising through the exhaust pipe. So, it is necessary to stimulate the initial natural cravings. This can be done by setting fire to a torch made of thick paper and bringing it to the outlet for a short time. Hot smoke, leaving the hole, will pull the heavy one, and ventilation will improve.
- In case of strong humidity, with abundant condensation on the walls and on the ceiling, you can bring a box with a material that absorbs atmospheric moisture well into the cellar. It could be charcoal or even dry lime.
- While airing is in progress, you can come to grips with the wooden structures taken out of the cellar. A direct effect on their condition will be beneficial sunlight- this will contribute not only to drying, but also to the death of mold or fungus colonies that cannot withstand ultraviolet rays. Too raw parts can be burned in the flame of a blowtorch.
- All wooden parts must be washed with soapy water with the addition of soda. You can use a formalin solution that has good antiseptic properties. For greater effect, this solution can be "flavored" with the addition blue vitriol.
- After washing and drying, chests, boxes, shelves and other parts taken out into the air can be covered with a layer of whitewash with the addition of a solution of copper sulfate (about 100 g per bucket of finished lime).
- It would be useful to fumigate the room with sulfur - it leads to the death of microorganisms, insects, and prevents the invasion of rodents. To do this, use special smoke bombs, which can be purchased at agricultural equipment stores. It is clear that when carrying out such fumigation, all precautions must be strictly observed, since the smoke from these checkers is very harmful to the human respiratory system.

- After the initial ventilation, it is necessary to clean the walls and floor of the cellar from plaque and debris. All surfaces should be treated with a "strong" solution of potassium permanganate. If there is an earthen floor in the cellar, then it makes sense to cut upper layer soil, as it is often affected by putrefactive bacteria or mold. Instead, you can make a backfill with clean, dry sand.
If the measures taken are not enough, and the humidity in the cellar remains high, then you can proceed to the final drying of the room, which can be carried out in several ways.
Methods for forced drying of the cellar
Using the brazier
For a long time, the method of drying the cellar using a brazier, which you can make yourself from an old metal bucket or other container, has been used.

Fire can be made right in it, having previously made several holes in its lower part to create traction. You can install and cast iron or homemade, from metal rod, grate, and cut the bottom completely. Be sure to provide legs, approximately 100 ÷ 150 mm high. In addition, a hook with a cable or wire is being prepared, on which the brazier will be lowered into the cellar.
The location of the future installation of this brazier must be free of any flammable materials. If the floor in the cellar is wooden non-removable, then it is forbidden to use this method.
Charcoal or firewood can be loaded into the prepared brazier, fire is kindled with the help of splinters or liquid for fireplaces. Then, the brazier is lowered down on a cable. It remains to monitor the combustion and the need to add fuel. Due to the blowing from below, a strong draft will be created in the brazier. The fire must burn continuously, for 10 ÷ 12 hours.
Hot air will quickly fill the room, warming it up and weathering it. unpleasant odors mustiness, as well as disinfecting surfaces with smoke. In a well-dried and smoke-smelling room, colonies of microorganisms or harmful insects should not develop.
It is best to install the brazier, if possible, in the middle of the cellar, then the smoke will evenly cover the entire room and go into the ventilation pipe. For this drying method, it would be optimal to use dry birch or linden poles, since this wood has disinfectant properties and removes unpleasant odors well.
Going down into the cellar during such fumigation is strictly prohibited - it is deadly. All actions with the brazier are performed only on the street, after raising it to the surface on cable .
Drying the cellar with a candle
Another, quite popular way is to dry the cellar with an ordinary candle. It is installed in an iron can and placed near the exhaust ventilation pipe, and the front door or hatch is kept open for drying.

It is advisable to place the candle as close to the floor surface as possible. At the same time, the exhaust pipe is increased with an additional tin link.
It would seem that a very small candle flame creates intense traction, so the air circulation inside the room is accelerated. The faster the accumulated stale air in the cellar comes out, the faster fresh warm air from the street will get there. In this case, the drying of the entire room is not due to its heating, but precisely because of check quick air change, that is, intensive ventilation.
The candle, if desired, can be replaced with an alcohol burner.

A similar ventilation process can last several days, depending on the humidity of the cellar. A burnt-out candle is replaced as many times as necessary until all surfaces of the cellar are dry.
Use of dry alcohol
This method practically does not differ in its technology from the one described above - instead of a candle, dry sleep tablets are used. However, it also has its own advantage.

Use of electrical appliances
Drying the cellar with the help of various can be attributed to the fourth method. A heater can be used for this. closed type, such as oil, infrared, or convector. It is installed in the middle of the cellar with the expectation that thermal radiation will spread evenly over the entire area of \u200b\u200bthe room.

Naturally, if there is an earthen floor in the cellar, then a rigid base must be prepared for the heater.
If a decision is made to dry with an electric heater, you need to be patient, as this process can be delayed. You also need to remember that heaters, as a rule, always have a high power consumption, and this event will cost a lot. Therefore, if it is possible to use another method of drying, it is better to refuse such a method.

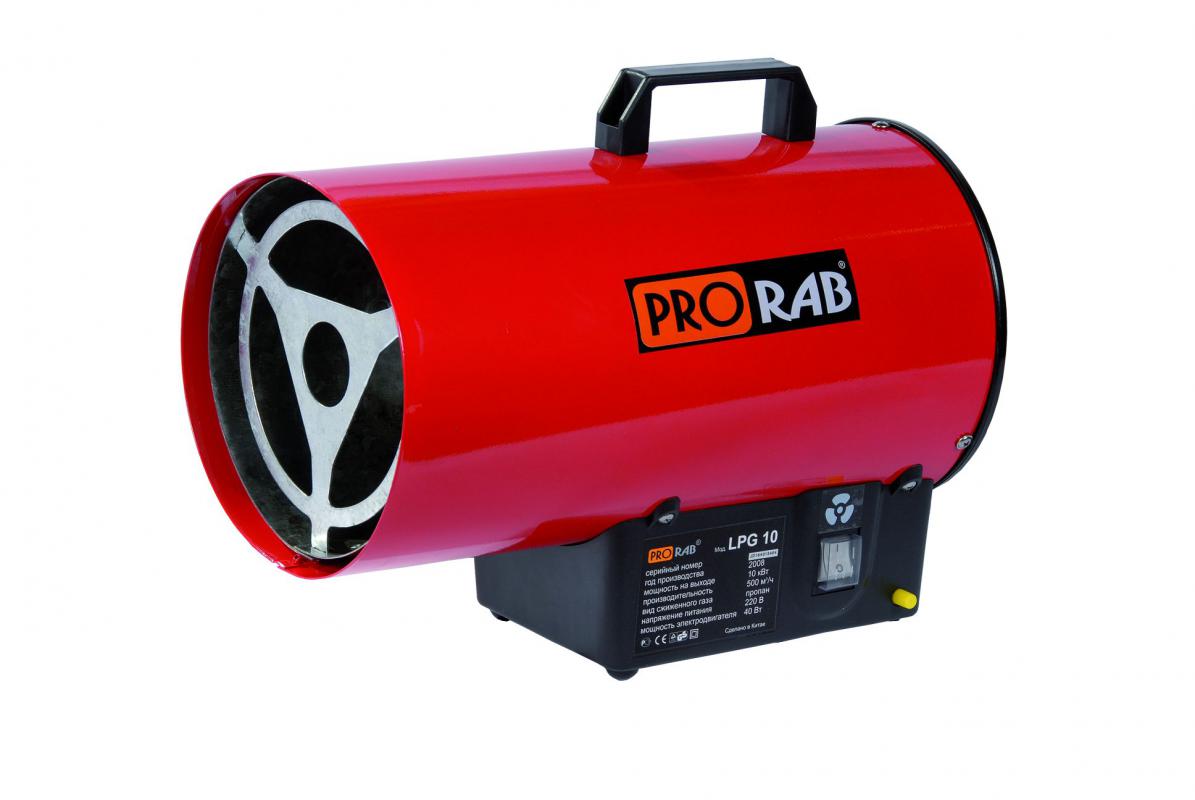
Separately, it should be said about the heat generator (it is often called a heat gun), which is very often used for drying various premises. And, it is used not only for drying rooms with high humidity, but also for rooms that were in flooded houses. Thanks to the power of thermal radiation and the fan built into such a gun, the drying of the cellar is quite fast. Although such a heater also consumes a lot of electricity, the drying process can be even cheaper, weeks using conventional heaters, due to the fact that the procedure takes much less time.
Application of forced ventilation
Some owners of private houses with cellars are not very puzzled over the question of how to dry their pantry. Several times during the summer period they open the front door leading to the basement and install a fan in the middle of the opening or on the stairs, which will increase the movement of air. In this case, the drying of surfaces will take place not under the influence of heat, but by weathering excess moisture.

This drying method is best suited for cellars where an exhaust vent is installed and the process will take from three to five days, depending on the volume of the room.
Folk craftsmen invent and own designs with large and small fans, for example, temporarily or even permanently embedding them in the exhaust ventilation pipe. An example of such a design can be found by watching the attached video:
Video: homemade duct fan for drying the cellar
Using a portable stove
Many are accustomed to drying their pantries with the help of small, wood-heated ones. The pipe from the furnace is brought to the exhaust hole and opens Entrance door or sunroof. To achieve the desired success, this event is carried out for 3-4 days. The generated draft promotes good air circulation. In addition, direct thermal radiation from the walls of the potbelly stove also plays a role.

This drying method is quite fire hazardous. In addition, it cannot be used if the exhaust ventilation duct is made of plastic pipe, which just starts to melt from high temperature exhausted smoke. You can, of course, use a flexible fireproof hose or a team metal structure to organize a temporary chimney, but it looks too complicated and costly.
Processing the cellar after drying
After drying, before bringing in and installing all processed wooden structures, you should thoroughly check the condition of the floor and walls. Perhaps the reason for the increased humidity lies in the fact that they did not receive sufficient waterproofing, and ground moisture freely penetrates into the cellar. If so, then appropriate action should be taken.
If concrete surfaces were dried, then it is recommended to treat them with waterproofing compounds, which in the future will not allow excessive moisture to reappear in the cellar.
- Today, a lot of materials are produced for waterproofing, but for concrete surfaces, an impregnating option is perfect, which is able to penetrate deep into the structure of concrete.

Impregnation is applied in several layers, each of which must penetrate to a certain depth and dry well. The composition closes all microscopic pores of concrete and crystallizes inside. It creates a reliable barrier to moisture, and at the same time leaves the material to "breathe".
It is necessary to work very carefully with impregnating waterproofing compositions, wearing a protective suit, gloves and a mask that covers the respiratory organs, otherwise you can get skin and mucous membrane burns. After absorption and polymerization, such a composition poses absolutely no danger to human health or to the safety of products.
- Another option that is suitable for cellar waterproofing is the familiar roofing material. But this material can also be laid only on a concrete surface, which is pre-coated with mastic. Then the mastic is heated with a burner, roofing material is glued onto it and pressed well against the surface. Individual canvases are laid overlapping st on top of each other and form a solid surface, which also protects well from the appearance of moisture from the ground.
If it is not possible to use modern technologies for the arrangement of the cellar, or preference is given exclusively to natural materials, then you need to secure at least the floor of the room. To do this, you need a natural material - clay. This method of waterproofing the floor is called stuffing, and for it it is necessary to choose clay with the highest possible percentage of fat content. In addition, you will need stones or broken bricks, which will become a reinforcing link in creating a clay coating.

- The stones are poured over the entire surface of the floor, and a solution of rubbed clay and a small amount of sand is laid out on top of them, 120 ÷ 150 mm thick. The consistency of the solution should be thick enough.
- The clay is spread over the surface and then compacted between the stones with a rammer, adding mortar until it completely covers the stone mound.
- After the floor becomes even and dense due to stones and tamping, coarse-grained sand is poured onto the still wet surface with a layer of 50 ÷ 70 cm. From the maximum possible it is compacted into a clay surface until it becomes dense. The remains of sand that could not be driven into clay are swept away from the surface. If you need perfect Smooth surface, then it is overwritten with a special wooden tool- grouts.

- This is followed by a long drying of the clay floor with an open hatch or door to the cellar. This process can take from 15 to 40 days, so it is best to start work on it in early or mid-summer so that the surface is fully ready for use by autumn.
Cellar walls can also be plastered with clay. But first it is necessary to make a wire mesh on the walls, which is fixed to earthen surfaces with the help of wire brackets.
Then, a thick solution of clay is poured onto the reinforced base and left to dry. It is not necessary to level this layer. Next, the following layer clay mortar, which the usually leveled by hand, in a circular motion, or in the same way as the floor - with a wooden grout.
In addition to these types of waterproofing, there are others, for example, or glass. You can choose any of them, which seems more affordable, but waterproofing is a must. It will help protect the room from the penetration of ground dampness, and hence from the occurrence of fungal colonies and mold spots, the presence of which negatively affects the safety of vegetables and fruits.
After the drying and waterproofing work is fully completed, you can bring in and install all the items of the “interior” of the cellar. After competently and fully implemented preventive measures, the degree of safety of products placed for the winter will be much higher.
Video: how to beat dampness in the cellar - theory and practice
The cellar always maintains a low temperature, which ensures the safety of products. However low temperature and insufficient air supply lead to the appearance of dampness and, as a result, to the appearance of mold. In addition, in the spring there is a risk of flooding the cellar. melt waters. And even if you forcibly pump out all the liquid, the room will still remain damp. Therefore, the owners face the question: how to dry the cellar? Consider all the main methods and determine how effective they are.
How to dry the cellar outside
So, we have a cellar on the street, for example, in the country. How is this building different from the underground for in the house? As a rule, such a cellar is a single structure or a pit connected to non-residential premises. This means that here it is possible to carry out drying and disinfection with the help of fire and smoke.
How to dry a cellar with a brazier? First, racks and shelves are taken out of the storage - they can be dried in the sun and treated with a solution of copper sulfate, which will prevent the development of mold. We kindle the brazier (it is easy to make it from a bucket) and lower it on a hook into the pit. The heat will help dry, and the smoke will disinfect the room.

You can also dry the storage by creating additional traction. To do this, we increase the pipe supply ventilation with the help of tin cans almost to the floor and put a candle near it.
Both methods are slow and may take several days to drain.
in the house

The easiest way to dry out your home's vegetable storage is with a conventional space heater. You need to take an extension cord, lower it into the cellar and connect any closed-type heater (without an open spiral). The type of device is chosen for safety reasons, since a person cannot be in the cellar all the time. It is also necessary that the heater has a fuse that will turn off the device in case of overheating. Drying time will depend on the power of the device and on the area of \u200b\u200bthe room, but, as a rule, this happens quite quickly.
How to dry the cellar with a heat gun? This method is rarely used in private homes, but it is with such devices that they get rid of dampness in industrial premises. Heat guns are highly efficient fan heaters. They are used both for heating large rooms and for drying. The disadvantage of this method is that you will have to buy special equipment, and, most likely, this explains the rare use of the method when drying private cellars. However, in recent times it became possible to rent heat guns, or, as an option, order the dehumidification of the premises in a specialized company.
So, now you know how to dry the cellar. However, it must be remembered that it is best to foresee the possibility of this problem even at the construction stage. Level Analysis ground water at the selected location and wiring supply and exhaust ventilation reduce the appearance of dampness and mold during the operation of the cellar.
The cellar in a private house serves as a year-round storage of vegetables and other household utensils. As a rule, there are no windows in the basement; at best, it has a ventilation duct. It is not surprising that dampness accumulates in the room.
What is the danger of cellar humidity
Increased humidity in the cellar and the lack of ventilation in it together lead to a number of unpleasant consequences:
- In the room, all surfaces are damp - walls, floor, ceiling (floor of the first floor). This phenomenon is especially dangerous for wooden structures, which leads to their decay;
- Raw air negatively affects the storage of vegetables - they deteriorate;
- Water serves as an excellent environment for the development of mold, fungi and other microflora, which causes rotting of fruits, damage to wood, an unpleasant smell in the basement;
- From damp basement the first floor also gets it - moisture along the walls is able to rise up, bringing mold with it to the walls of living rooms.
The situation is aggravated when the basement is not ventilated at all. Then there is no air exchange, which only contributes to an increase in humidity. As a result - weakening of structures, deterioration of winter food stocks, health problems are not ruled out.
How to prevent dampness in the basement
So that draining the cellar is not needed at all, it is necessary to exclude all forming factors at the construction stage:
- 1) Thoroughly waterproof the walls. This will prevent moisture from entering through the structures, and will also prevent water from seeping into the wall itself from inside the room;
- 2) Properly organize the waterproofing of the floor to prevent water from entering from the ground. To do this, the base is covered with roofing material or other polymeric material in 1-2 layers overlapping the wall, the seams are carefully soldered gas burner. Thus, a sealed "boiler" is obtained. Crushed stone is poured into it, a reinforcing mesh is laid and pouring is carried out concrete screed. Such a floor cannot be flooded even with a sharp rise in the groundwater level.
- 3) Vapor barrier of the ceiling will help reduce the ingress of moisture from the room and block the road of dampness from the basement to the wooden floor.
Proper arrangement of the hood

The mistake of many builders and developers is the construction of a basement without an exhaust hood. This is the main reason for the accumulation of dampness in the cellar. Without an extractor hood, it is difficult to dry the cellar from dampness afterwards. Organizing ventilation is simple: opposite side from the manhole you need to install an exhaust pipe, one end of which is under the ceiling, and the other goes outside through the wall. No need to pick up the phone large diameter, 40-50 mm will be enough.
Wall processing
It is necessary to treat the walls and ceiling with a solution of lime, as well as wooden shelves before placing stocks of vegetables in the cellar. It is necessary to carry out preventive disinfection at least once a year.
How to dry the cellar from dampness
If the necessary measures were not taken during the construction of the house and before laying vegetables in the cellar, before removing them, it is necessary to dry the air in basement. After that, you can carry out preventive and repair work for structural insulation and surface treatment.
Some sources give a different algorithm of actions: first repair, then drying. This is fundamentally wrong: high humidity the whitewash layer will dry much longer, changing or installing waterproofing on a wet surface is completely pointless, since water will remain between the structure and the roofing material, and it is uncomfortable to work in a wet room.
Preparing for dehumidification
The basic principle of air dehumidification is its heating in order to increase the water temperature and its natural removal through ventilation. The main task is to spin the air exchange flow. Therefore, before embarking on drying measures, it is necessary to remove from the premises all stocks and items that should not be heated - vegetables, cans with blanks, wooden crafts. Ideally, only the floor and walls should remain in the basement, if available, shelving, they also need to dry for further processing.
Method 1: install the brazier
The first method is suitable for drying the cellar in the garage. You will need a brazier, which is in many households. If there is none, you can use a metal bucket or an ordinary barbecue.
How to dry:
- First of all, we open all the holes leading to the basement: manhole, ventilation, if any - windows.
- We install the brazier in the basement. It is desirable to place it in the center of the room for uniform drying, but not right next to the wooden shelves.
- We make a fire in a brazier / bucket / brazier. For breeding, we use chips, then we throw in large firewood and make a good bookmark.
The essence of the method: humidity and condensate evaporate naturally, heated air, according to the law of physics, rises up the exhaust pipe, air exchange is twisted, so oxygen for the furnace will flow through the manhole. The smoke from the wood impregnates all surfaces, drying them and preparing them for further processing.
This method is only suitable for non-residential premises, since drying is done with smoke. The brazier should work for 1-2 days, it is constantly necessary to put new firewood into it.
Method 2: air heaters
Air heaters will help to dry the cellar in winter according to the same principle of heating the air and twisting natural whirlwinds, but without smoke. These are compact heat guns that can be adjusted to the desired temperature. For complete drying, the device is turned on at full power and left to work until the dampness in the room is completely removed. After that, the heater can be turned on periodically to dry the newly formed moisture.
The device is suitable for use in vegetable stores and other premises where it is necessary to heat or dry the air.
Method 3: candle
It is possible to dry the basement of a private house without strong air heating, but this will take more time. It will take the most simple candle, it is better to take a long burning, so that it lasts for a longer time.
- 1) First you need to organize a long exhaust pipe, if it is not. Without a pipe, it will not be possible to create a traction effect.
- 2) We install the candle in a metal or glass container and put it on a non-combustible tray directly under the base of the exhaust pipe. We light a candle.
- 3) To start the draft, take a small sheet of paper and set fire to it right at the base of the hood.
Principle of operation: the candle heats the air under the draft, it rises into the pipe, natural air exchange is twisted and the room is dehumidified with dry supply air.
This method is useful for draining a small basement in the warm season, for example, before harvesting. Moisture is expelled by the supply air, which, in turn, must also be dry. The process lasts 3-4 days, it is necessary to constantly and timely change the candles.
sawdust and newspapers

To collect moisture in the room, hygroscopic materials can be used: sawdust, newspapers, boxes and waste paper. They are scattered around the entire perimeter or area of \u200b\u200bthe basement for a while. Materials absorb excess moisture and are then removed. This method will not dry out the room on its own, but it will help maintain dry air after dehumidification.
Which way to choose: resume
So, to dry the basement of a private house, methods are suitable:
- Candle;
- Thermal heater.
The candle will be useful for a small basement in the summer before the harvest, heat gun will help get rid of large-scale dampness in a room with any area at any time of the year.
The method of kindling a cellar with firewood is not suitable for a basement in a private house, since carbon monoxide and smoke will enter the living quarters, which is unacceptable. Thus preparing for seasonal storage vegetable pits standing separately from the premises or in the garage. The only caveat is that the car will have to “live” on the street for several days.
In itself, drying the room is good, but in order to maintain normal humidity in the basement, it is necessary competent ventilation and waterproofing walls, ceilings and floors. All surfaces must be treated in a timely manner with an antiseptic, the best, most effective and cheapest is a simple whitewash.
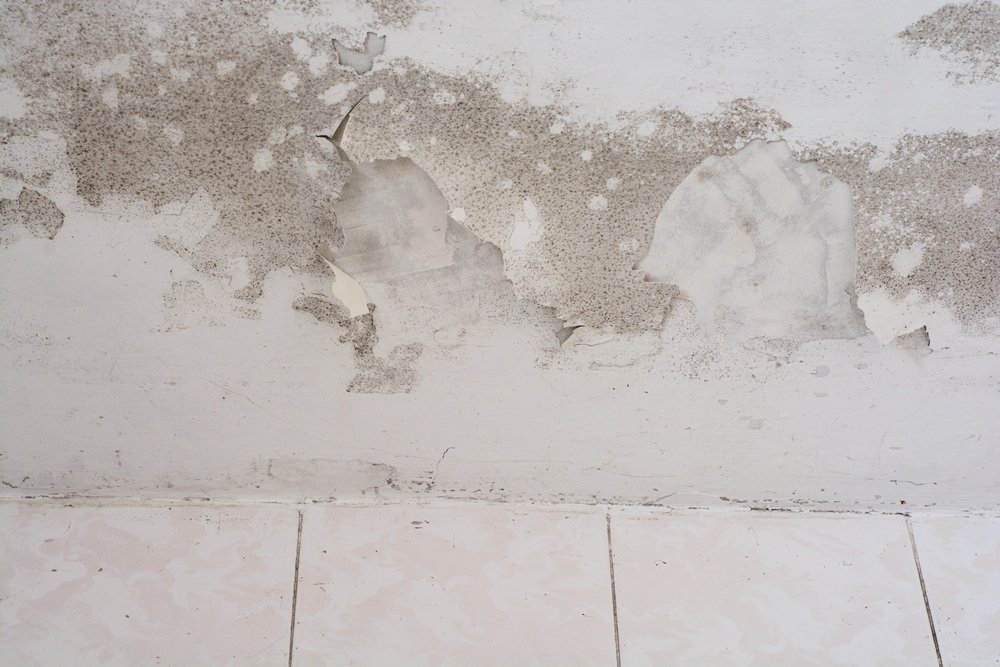
Dampness in the cellar is a common phenomenon that all residents of the private sector struggle with from season to season. Excess moisture may appear in the form of condensation on the walls and ceiling due to insufficient measures for waterproofing the room, water may form on the basement floor due to the proximity of groundwater or due to spring floods. The products themselves can also become a source of unwanted moisture if they are not collected on time or not dried enough. By itself, water is not dangerous, but it leads to the destruction of the building and all its details, in addition, it contributes to the appearance of aggressive mold, fungus and various insects.
This article will be devoted to how to dry the cellar, because it is simply necessary to deal with excess moisture in the basement, otherwise it will not work to save food.
Basement pre-drying rules
It is necessary to dry the cellars and cellars in the summer, when the weather is warm and dry. It is recommended to start this procedure as early as possible, preferably immediately after the rainy season. Cellar drying activities can last from a week to a month and a half - depending on how wet all the walls and floor are.
You need to start drying the cellar with natural measures, and if they are insufficient, you will have to move on to the second stage - forced drying.

Here's how you can dry your basement naturally:


Attention! If earthen floors are used in the cellar, it is recommended to change their top layer annually. To do this, the soil infected with mold and fungus is cut off and taken out into the street. Instead of this layer, a layer of dry coarse-grained sand is poured onto the basement floor.
How to dry a cellar without ventilation
It happens that there is no exhaust ventilation in the cellars, or there is one, but it is faulty or natural draft is not enough to ventilate the entire basement. It also happens that the weather in summer is rainy and cloudy, which contributes little to the quality drying of the cellar.
In such cases, additional drying of the cellar is needed, which is carried out artificial methods. There are several such methods and each of them deserves special attention.
Drying the cellar with a brazier
An ordinary metal bucket can act as the most primitive brazier. You can take an old bucket with a holey bottom or no bottom at all. A galvanized basin or some kind of metal trough is also suitable.
The container for the brazier must have legs, about 10-15 cm high. You can also put a bucket in the basement on bricks or stones. In any case, it is necessary to ensure the flow of air from below, which will stimulate the spread of heat in the cellar.

Important! If the basement floors are made of wood, and there is no way to remove them, the drying method using a brazier is strictly prohibited - this is a fire hazard! Before drying, all wooden and other combustible structures and equipment must be removed from the cellar. If the entrance to the cellar is made in the form of a hatch, it is necessary to provide a way to lower the brazier inside. It can be a regular rope with a hook at the end.
A bucket is filled with coal or firewood and a fire is lit on the surface of the earth, and only after that the brazier is lowered into the cellar, using a rope and a hook. The same applies to throwing firewood or coals: first, the bucket is removed from the basement to the street and only after that fuel is added.

A person can only monitor the condition of the fire and maintain the flame. In order to dry the cellar qualitatively, the brazier should burn for 10-12 hours. Thanks to the lower draft, the heat will spread throughout the cellar, filling all corners of the room with smoke and hot air.
As a result of such drying, the cellar will not only get rid of moisture, but will also be disinfected - acrid smoke will destroy mold, fungi and insects. The brazier must be placed strictly in the center of the cellar so that the heat and smoke spread evenly.
Advice! It is recommended to use linden or birch firewood as fuel. This wood has disinfectant properties.
In no case should you enter the basement while the brazier is working there - a person can simply suffocate in such a room or get poisoned carbon monoxide!
Drying the cellar with a candle
This method is very ancient, it was used hundreds of years ago. In order for drying by this method to be possible, the basement must be equipped with an exhaust pipe, which is usually located under the ceiling of the room.
The candle is placed in tin can and installed directly near the ventilation of the cellar. Be sure to extend the main pipe by installing a metal corrugation or a tin pipe on it.

A small candle warms up the air at the pipe inlet, because of this it begins to circulate faster in the basement, the draft increases. As a result, the air temperature in the cellar does not rise, but increases natural ventilation- Walls and floors dry much faster.
Cellar doors or hatch must be open when using this method!
Important! Instead of ordinary candle, you can use dry fuel tablets. This substance, when burned, releases disinfectant gases, which will not be superfluous in the fight against mold and germs in the basement. To dry the cellar, you will need to burn 10-15 tablets.
Drying the cellar with electrical appliances
This method is quite expensive, since a lot of electricity is spent during the drying of the cellar. Two types of heaters can be used in the basement:
- Closed heaters, such as oil, infrared, convector. The appliance is placed in the center of the cellar and evenly heats the air in the room. It will take at least ten hours to completely dry the basement, sometimes the heaters in the basement must work for several days.
- The electric gun is designed to drain the premises after flooding, so it is perfect for seasonal drying of basements. This device is very powerful, the heat gun is able to dry the cellar in just a few hours, so the whole process will be cheaper than in the case of a household heater.
Attention! If the basement has dirt floors, you need to lay a rigid base for the electric heater on them.
Drying the cellar with a fan
Cellars are usually dried by opening the doors on warm and dry summer days. You can speed up the natural process by installing a fan in the middle of the stairs. A prerequisite This method is the presence of an exhaust pipe in the basement, because the fan only accelerates the air, accelerating circulation.
Depending on the size of the cellar, it may take three to five days to completely dry with a fan.

Advice! Very efficient fan blades inserted directly into the pipe ventilation system basement.
Using a potbelly stove in the basement
A potbelly stove is very effective in drying cellars. However, such a furnace is not found in every private household. Those who have a potbelly stove can dry their cellar very cheaply and quickly.
The potbelly stove is placed inside the basement so that its pipe fits the exhaust vent of the ventilation system. They heat the stove with wood or coal - it does not matter, the main thing is that the heat in the basement is sufficient.

Hot smoke coming out of the potbelly stove chimney accelerates air circulation in the basement ventilation duct. Additionally, the heated walls of the furnace warm up the room, drying out mold and fungus, eliminating condensation and excess moisture from the basement.
The stove method is considered a fire hazard, so there should be no wooden objects or other flammable materials inside the basement at the time of drying. You can not use a potbelly stove in those cellars where the ventilation is made of plastic - the pipe will simply melt from the heat of the furnace.
What to do with the cellar after drying
At the end of the ventilation, dried shelves are installed, boxes and bins are brought into the basement, boxes and boxes for vegetables or fruits are placed inside the cellar.
In general, excess moisture in the basement should alert the owner: if condensation appears, the walls or floor get wet, it means that something was done wrong at the stage of building the cellar.

Improve waterproofing underground storage can be done in several ways:


In a dry basement, mold does not spread, fungus does not settle here, there are no bacteria and harmful insects, so the products are perfectly stored, remaining tasty and healthy until the next season.
There are several methods for drying the basement, each owner can choose the one that is more convenient and expedient for him.