DIY peat pots. How to use peat pots? What are peat cups and why are they used?
Peat pots are a must organic farming. They greatly facilitate the work of growing seedlings. They are easy to use, they quickly decompose in the soil, they do not contain harmful polymers, but they contain a real storehouse of microelements. Peat containers for seedlings have become an indispensable aid in obtaining the future harvest.
The benefits of peat pots
Peat pot - universal look planting containers made from a pressed mixture of peat, humus, wood pulp and fatty soil; it serves as a kind of “kindergarten” for the plant, facilitating growth in the initial stages. Having started their “path” in a peat container, the seedlings receive an excellent boost, which, with the proper efforts of the gardener, will contribute to an excellent harvest.
Composition of peat pots:
- peat is a substance formed in low, marshy areas from moss, fallen leaves and other organic components as a result of incomplete decomposition. It is a universal fertilizer containing large number carbon, which accelerates plant growth;
- humus is obtained from manure or compost that has been decomposing for more than two years. Being a loose mass, it serves as an excellent source of nitrogen, phosphorus, potassium, magnesium and other trace elements;
- Wood pulp is an excellent breeding ground for bacteria, which, multiplying on the remains of wood, quickly process the organic components of the cup. It also binds moisture: retaining water, it prevents it from evaporating. Nutritional value for a plant does not have;
- fatty soil acts as a component that binds the components of the pot.
Evolution of seedling containers
Over time, like everything else in the world, even containers for planting seedlings undergo changes. After all, there was a time when gardeners heard nothing about either plastic or peat containers for plants.
Wooden boxes
Many gardeners and gardeners still use wooden boxes for sowing seedlings, which are very durable, can withstand transportation and any other movements, and serve faithfully for up to ten years.
Most often, seeds are placed in them by continuous sowing, so that in the future the seedlings will need to be planted. Every season, such boxes must be thoroughly disinfected with fungicides before new crops, and this is a big disadvantage of this type of seedling containers.
Plastic containers
Plastic products for growing seedlings are much lighter than wooden ones. They are produced from plastic of various thicknesses and densities.
The thicker the walls and harder the plastic, the longer the seedling pots last. In addition, many options are available in both volume and shape, which allows you to choose the appropriate shape and volume for any type of seedling. A significant disadvantage can be the use of unsafe plastic.
Handy containers for seedlings
Many summer residents use cups of yoghurt, juice, plastic bottles of milk and other drinks. The advantage is their zero cost, and the disadvantage is the impossibility of complete disinfection after food products.
Peat and cardboard cups and pots
The seedling grows in such cups throughout the entire period and is planted together with it in the ground without damaging the earthen ball and root system, which is very important for plants with a vulnerable root system.
Each plant grows individually in them, they are lightweight, and if you install them in a special plastic tray, they are easy to maintain.
The disadvantage is that the walls are breathable and the soil dries out very quickly. If you delay watering, the seedlings may die. In addition, sometimes when transplanting into the ground, a cup of peat or cardboard does not dissolve in time and inhibits the growth of the root system.
Table: disadvantages of peat containers
| Danger | Reasons | Consequences | Fighting method | Result |
| Drying out of the soil mixture | The loose walls of the pot pump out moisture from the soil, constantly remaining wet. | The plant dries out. | Do not water the seedlings from above, but add water to the bottom of the container where the pot is installed. | Water entering through the lower holes evenly saturates the walls and soil. The plant receives complete nutrition. |
| Mold formation | It is difficult to control the amount of water. | Mold appears on the walls. | Wall treatment grated garlic, Fitosporin-M. | Quick elimination of mold will protect the plant from infection with fungal diseases. |
| Rapid evaporation of moisture | Loose walls do not retain moisture. | Rapid cooling of the filler leads to hypothermia of the roots. The plant grows slowly. | Wrap the walls of the pot with film. | Moisture evaporation will decrease. |
| Do not decompose in soil | Low-quality, cheap fakes made of cardboard. Not to be confused with paper cups, which are sold as a separate product and are positioned as such | Without decomposing, they become a source of fungal diseases in the soil. | Buy one pot and soak it in water. | The paper swells, the peat tears. |
| The walls of the pot are too thick | At the roots different types Plants have different abilities to overcome obstacles. | The roots of the seedlings cannot penetrate the wall; the plant does not have enough space. | For plants with weak roots, use thin-walled pots. This primarily applies to cucumbers. | The plant does not fully develop and withers away. |
Advice. When purchasing, you should carefully consider the product. Cardboard is lighter than peat. It feels dense and pressed to the touch. Peat feels porous and brittle.
Photo gallery: the main disadvantages of peat containers
Mold from the walls of the pot transferred to the soil mixture. The seedlings died due to the rapid drying out of the soil in the pot. The walls of the peat pot became covered with mold.
Video: a prerequisite is not to overdry
Each gardener decides for himself how to treat peat pots. When growing heat-loving plants peat containers should be replaced with plastic containers.
Planting seedlings
You can buy peat pots in specialized gardening stores, on the market, or you can make them yourself. To get good result, adhere to the following recommendations:
- When purchasing, carefully read what is included in the pot. Such devices are made from peat, to which cardboard or wood is added. Most of all, gardeners praise cups with a ratio of the main substance of 70% and additives of 30%. If the composition is not indicated, you should ask the seller about it. Any doubts left? Buy one pot, soak it in water: if it swells and the walls increase in volume, it is not peat, but cardboard.
- If the roots of the plant are fragile, then you should not use cups with thick walls. For example, the roots of pumpkin and watermelon will freely pass through a wall 3–4 mm thick; for a cucumber, a pot with a wall thickness of 1–2 mm is better suited.
- Moisten the soil before filling the pots with substrate.
- After filling the cup with soil, lightly compact it. You shouldn’t do this too hard, otherwise it will be difficult for the seedlings to push through the soil. In addition, little oxygen will reach the roots.
The soil in the cups after sowing should remain loose so that it is easier for the seeds to germinate
- The seeds are sown to a depth of 2–3 cm, the bulbs are planted “up to their shoulders.”
- The pots are placed in a tray with high walls. For greater convenience and to prevent the walls of the pots from touching, it is better to use a tray with a lid in the form of cup holders.
- The soil inside the pot should be moist. It is better to water through a tray. If the soil dries out, a salt coating will form on the surface of the soil and the walls of the cup, damaging the young shoots.
- Before planting in the beds, seedlings are watered abundantly.
- The plant is planted together with a pot, which is buried so that the upper edge does not protrude above the ground.
Video: checking what the pot is made of
The depth and diameter of peat cups and pots are selected based on the size of the future plant. Usually the packaging indicates for which crops this or that type of universal container can be used.
Growing seedlings using peat pots is easy. Many summer residents fell in love with them because they allow them to preserve root system plants when planting. And this is very important when planting cucumbers and, especially, flowers, which thrive in them from the appearance of cotyledon leaves to mature seedlings. The main thing is to stick simple rules their use.
Even such spoiled beauties as the miniature snapdragon or streptocarpus take root well in peat pots and produce excellent growth.
Video: how to plant strawberry seedlings in peat cups
How to use peat pots
Setting a goal to get good harvest, get ready for experiments, one of which may be the use of peat planting containers. If you decide, then follow the advice of experienced people.

Fluconazole is a broad-spectrum antifungal drug that works especially well against yeasts and molds that cause “blooming” of peat walls.
Pots are not a guarantee of getting good seedlings. They have great advantages, but they also significant shortcomings, therefore, to avoid mistakes, analyze the situation and listen to the advice of experienced gardeners.
How to make peat cups at home
The great popularity of peat containers has led to the emergence of a lot of fakes. Some craftsmen have adapted to making peat planting containers with their own hands.
For home production required:
- sawdust;
- rich earth;
- azotobacterin;
- phosphobacterin;
- mullein;
- water;
- peat.
To 5 kg of peat add 4 kg of mullein and 1 kg of fatty soil, Azotobacterin and Phosphobacterin. Gradually add water and mix a thick solution.
To form pots, we make a simple device consisting of:
- pallet;
- steel glass;
- a pin with an iron circle attached to the end and blanks.
The diameter of the blank and circle should be slightly smaller than the diameter of the glass.
We place the glass on the pallet, lower the pin with the iron circle into it from above. Pour the solution onto the circle, no more than 15–20 mm, and compact it using a blank. Thus, gradually adding and pressing the mixture, fill the glass to the top. Then we take out the blank, and with the help of a pin - the finished glass.
Your first products will turn out, as they say, lumpy. Don't despair. With a little experimentation, you will find the optimal ratio of ingredients, the required viscosity of the solution, and the required pressure force when tamping.
Every real summer resident knows that a good harvest begins with seeds and seedlings.
We plant the seedlings, pick them up and transplant them into separate containers. We can plant in peat pots, plastic containers or the newfangled peat tablets.
We can also make pots for seedlings with our own hands and make as many of them as needed. Keen gardeners are able to fill literally everything with green sprouts; you can’t stock up on any store-bought containers.
The following can be used as a container for growing seedlings:
- Tea bags
- Tetra Pak bags
- Ice containers
- Waste paper and cardboard
- Citrus peel
- Eggshell
- Egg trays
- Plastic bottles
- Plastic cups
- Filter bags for coffee machines
- Toilet paper rolls
Tea bags

The original method of growing seedlings in used tea bags can compete in efficiency with growing in peat tablets, since tea has a beneficial effect on plant development.
Each bag is cut off top part, then put seedling soil inside with a spoon and sow the seeds. It is better to place such “pots” in a tray, for example, a container with low sides. When disembarking at open ground the bag is not removed.
Eggshell

Egg shells are an excellent option for a homemade container for small seedlings or for growing seedlings before transferring them to larger containers.
Take the shell and make a hole at the bottom. To do this, you can use a pushpin or a thick needle. Fill each shell halfway with soil and sow the seeds.
Place the egg “pots” with seedlings in a plastic egg container. To create greenhouse effect close the container lid. When the time comes for transplanting or transshipment, plant the grown seedlings along with the shells.
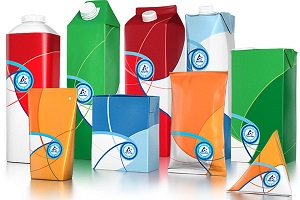
Tetra Pak bags

Probably one of the most popular options among hand-made containers for seedlings is Tetra Pak bags. This multi-component material is distinguished from paper and cardboard bags by its increased strength and durability.
Tetra Pak is used for packaging juice and dairy products; in addition to cardboard, it contains foil and polyethylene. It is very simple to prepare such bags for sowing seedlings - cut them into 2 parts and the cups are ready! You can also make a tray for seedlings by cutting the bag lengthwise rather than crosswise.
Be sure to wash containers thoroughly before use.

Old newspapers can be an excellent material for making a container for seedlings. To do this, you will need newspaper sheets (it is better to give preference to black and white pages), a cylindrical object (a bottle, a narrow tin can), flour and water.
We invite you to visit the page with our master class on making cups for seedlings from old newspapers or paper.
You can plant seedlings in a greenhouse or open ground directly in cups, but if you wish, you can cut or tear the “pot”.
Plastic bottles

From a plastic bottle you can make not just a container for seedlings, but a functional pot with an automatic watering system and a greenhouse effect.
Clean plastic bottle cut in half, do not remove the lid, but make several holes in it using the same heated awl, needle or nail. Through bottom hole stretch the synthetic cord (this will be the wick).
Turn the top part with the neck over and insert it into the second half of the bottle. Add soil and sow seeds. Remove half of the bottle with soil from the tray, pour water into bottom part"pot", then insert the half with the plant back into the tray.
Take another bottle of the same size, cut half of it and use it as a lid for such a seedling “pot”.
You can do it another way: from a bottle (great plastic will do bottle square shape with a capacity of 5 l, for example, from drinking water) cut off the side part, and use the remaining large part as a container for seedlings.
Plastic cups

Excellent containers for seedlings are made from yogurt or sour cream cups, disposable plastic and paper cups from under the coffee. To make pots, first wash the containers thoroughly and then cut a hole in the bottom to drain excess water.
If the hole is too large diameter, place a cardboard circle at the bottom of the glass. For convenience, you can write on the cup with a felt-tip pen or marker the name of the crop and variety that you are going to grow.
Place containers with seeds sown in them in a box or on a tray - it’s more convenient to store them this way. The advantage of such homemade pots is the convenient removal of the earthen lump when planting seedlings in open ground - just lightly press on the bottom of the cup and the lump can be easily removed, remaining intact.
Filter bags for coffee machines

If you brew coffee in a coffee maker, don't throw away the used paper filters - they make great cups for seedlings.
Fill each filter bag halfway with soil and place it in plastic box or a tray with high sides to give the “cups” stability. They will stand close to each other, which means they will not fall. Sow the seeds and place a box of coffee “pots” on the windowsill.
Toilet paper rolls

Cardboard tubes left over from toilet paper rolls can be easily converted into biodegradable planting cups. You can also use paper towel rolls.
If you need a short glass, cut the sleeve crosswise into two parts. Next, do the following with each part: fold it lengthwise and use scissors to make cuts approximately 1/3 of the height of the tube so that you get 4 blades.
Then straighten the workpiece and fold the blades one on top of the other, bending them, as is done with cardboard boxes to make the bottom.
On permanent place seedlings can be planted without removing them from the cups, since paper and cardboard are biodegradable materials.
Waste paper and cardboard
To make such pots, you need to mentally return to school years and remember the familiar, but slightly forgotten papier-mâché technology. So, you will need paper or cardboard, water and a mold.
You can use glass glasses as a form, but it is most convenient if you have metal mold for cupcakes with several cells.
Tear the paper into small pieces and place in a container with water, leave to soak. Then stick the resulting mass onto the mold: if you have glasses, then with outside, if the baking dish is from the inside.
The workpiece should be left to dry for a day, after which it should be used as a regular glass for seedlings.
Ice containers

An unnecessary tray (mold) for ice can become an excellent container for growing seedlings before picking and serve in this role for more than one year. Make a drainage hole in each cell (if the plastic is durable, use a drill), take a suitable tray and place the container in it.
Next, fill the cells with soil and sow the seeds. After some time, plant the seedlings in a larger container. Just as in the case of eggshells, it is better to grow plants with a small root system in such a container, since they may become cramped in small cells.
Egg trays
The egg tray is also used as a container for seedlings. It is convenient to place such containers on windowsills. To begin with, make a hole in the bottom of each container cell (if the tray is plastic, you can heat an awl and pierce it with it). Then the cells are filled with soil and the seeds are sown.
After some time, the roots of the plant will entwine the earthen lump, and for further picking it will be enough to carefully remove the seedling with the lump with a fork.
Citrus peel
If you like to squeeze juice from citrus fruits (orange, grapefruit, lemon, pomelo, etc.) using a juicer, then you probably have a lot of halves of the peel of these fruits left over. Why not use them as seedling cups?
Make a small hole in half of the pulp-free fruit (in the bottom) for moisture to drain out, then fill the peel with soil for seedlings and sow 1-2 seeds per “pot”, depending on the “dimensions” of the future plant and the size of the citrus peel. Subsequently, the seedling can be planted in open ground directly from the “pot”.
Subsistence farming in a broad sense is one of the oldest, and perhaps the oldest, human occupation. Over such a long history, it has gone through many stages of development and public perception. From urgent necessity, when growing plant food with one’s own hands was the main condition for survival, to neglect, when digging in the ground began to be considered the prerogative of exclusively financially vulnerable people and the elderly, who seem to have nothing else to do. But today, crop production, growing vegetables, fruits, and any other greenery through its own efforts is experiencing a new round of popularity. The basis for it was the fashion for organic products and public protest against artificial ingredients, which are increasingly used in food industry. Then mass fear of the notorious GMOs “connected”. The financial crisis also played a role, significantly reducing the ability of many of our fellow citizens to load the supermarket cart to the top. finished products in colorful packaging. And finally, over time (for some - with age, for others - under the influence of media propaganda), an understanding comes of the simple fact that there is no best food than the simplest and most natural.
One has only to step on this path - and fresh vegetables, grown in the garden, begin to seem a hundred times tastier than complex restaurant dishes, and there is no point in dwelling on the benefits of such nutrition: it is already obvious. Especially in the summer, when the body itself strives to cleanse itself and get as many natural vitamins, plant fibers and juices as possible. In such circumstances, even those who have never picked up a rake before in their lives, and learned about the ripening of tomatoes only by their appearance on the shelves, take up gardening. But for such novice gardeners, modern industry has created many aids. All kinds of devices, tools and chemicals make planting, growing, and caring for crops so much easier that their functionality is appreciated by experienced plant growers. And their special attention was given to peat pots, which now rarely do even one fan of gardening can do without. That essentially simple idea turned out to be so useful that now few people grow seedlings without them. Want to try it too? There is nothing simpler: to handle peat pots They are not difficult, they are not expensive and do not take up much space either in the house or on the site. And yet, for best result It’s better to learn in advance all the nuances of how to use peat pots.
Peat pots: properties and features
Peat pots are relatively small (the size may vary depending on your tasks) cups or boxes designed for growing seedlings in them. Main feature peat pots and their main difference from other containers for similar purposes is the material from which the pots are made. It is not difficult to guess about it just by the name itself, but in fact it is not 100% pure peat, but a mixture of peat with wood pulp or humus, dried, tightly compacted and shaped into a round or square container. This composition of the material for manufacturing was chosen because it is the lightest, most durable and effective in terms of the functions that are assigned to it. Every gardener knows about them first-hand, and for everyone else, we will once again remind you that the majority of both fruit and ornamental crops begin their life cycle from seedlings. This is a kind of “childhood” of the plant, and it, just like in humans, has a decisive influence on the entire subsequent life of the plant: its development, growth, fruitful indicators, etc. Therefore, it is so important to properly grow seedlings and provide them with necessary care. All this is provided for by the composition and design of peat pots:
- The root system is well supplied with oxygen and water thanks to the porous walls of the pot. Neither the nutrition nor the respiration of the developing plant is disturbed.
- After planting in the ground, the roots grow freely through the pliable and soft walls of the peat pot without encountering resistance.
- The base of the pot is strong enough to withstand the load of soil and seedlings as long as it is needed.
- The peat pot, getting into the soil, gradually decomposes and itself becomes a natural fertilizer for the plant, which provides its nutrition and improves growth rates.
- The peat pot is made entirely of natural ingredients that do not harm either the seedlings or the soil, and do not poison the harvest.

- The shape of peat pots can be round or square in diameter. This is not of fundamental importance for the success of growing seedlings, but it can save space or otherwise affect ease of use.
- Peat pots also differ in size, so do not rush to buy the first one you come across if their volume does not seem entirely convenient to you. Look for those that best suit your needs and provide your seedlings with maximum comfort and growth.
- Peat pots can be separate or joined into horizontal blocks of several pieces. It is more convenient to store and use piece peat pots. If you expect to simply break the block into separate parts, then do it carefully so as not to damage the integrity of the walls of the adjacent pot; for all their strength, they are quite susceptible to mechanical damage.
- Try to choose walls of peat pots from one to one and a half millimeters thick - experience shows that it is optimal for most types of seedlings.
- Do not confuse a peat pot with a cardboard one. They look very similar, especially if the cardboard is painted, and unscrupulous manufacturers take advantage of this. Cardboard pots, unlike peat pots, do not dissolve in the soil, do not nourish the plant and do not allow its roots to develop freely in the soil.
Having mentioned fake peat pots, we come close to current topic their shortcomings. Indeed, it cannot be that anyone, even the most convenient and simple device, there were no cons. There are also shortcomings regarding the use of peat pots, and they have long been noticed by gardeners. How to treat them - everyone decides for himself, depending on his capabilities, character and preferences among garden crops. We invite you to learn about the difficulties that other gardeners have encountered and decide for yourself how critical they are for you personally: are they worth giving up peat pots altogether, or simply take some measures to overcome these difficulties:
- Due to the looseness of their walls, peat pots cannot be dry when filled with moist soil. And if so, the moisture continuously evaporates, and the soil inside the peat pot dries out, causing the seedlings to suffer from “thirst.”
- On the other hand, since it is very difficult to control the degree of moisture and evaporation, there is always a risk of watering seedlings in a peat pot too much. As a result, the pot becomes covered with mold, which spreads to both the substrate and the seedlings themselves.
- Evaporation of moisture inevitably leads to cooling, that is, the fragile root system, which needs warmth, in practice begins to freeze, grows slowly and develops poorly.
- Some peat pots do not decompose in the soil as quickly as necessary and remain in the soil in clumps, littering the soil and interfering with other plants. Most often this is a sign of low-quality pots made not from peat, but from cardboard and other materials.
- Sometimes the walls of a peat pot are too strong for weak roots that simply cannot break through. For example, pumpkin copes with this task, but pepper gets stuck and withers.
If the above side effects you haven’t been pushed away, and you haven’t given up on the idea of growing seedlings in a peat pot, then it would be best to follow standard instructions on the use of peat pots. And as complications arise, apply a few tricks, which we will discuss later. One way or another, not all gardeners have complaints about peat pots, so it is possible that in your case everything will turn out well. And the probability of a successful result using peat pots will be higher, the more accurately you follow the following sequence of actions:

- Make sure that you are going to use peat-humus pots - and it is better to do this at the time of purchase, carefully studying the composition of the product in the packaging and asking the seller in detail.
- Fill peat pots with soil suitable for each specific type of seedling, pre-moistened and nutritious.
- Compact the soil slightly, but not too much, so that the seedlings can break through the soil and receive enough oxygen.
- Sow the seeds in the soil directly in the pot, bury the bulbs in the ground up to their shoulders, plant cuttings and seedlings depending on their size.
- Place the pots of seedlings in a wide tray. You can push them close together at first, and move them further apart as the root system grows to provide adequate space, light, and aeration.
- Make sure that the soil in peat pots is always moist. Water it directly or through a drip tray.
- Do not allow the soil in peat pots to dry out: this is fraught not only with drying out of the plants, but also with crystallization of salts, which further damage fragile seedlings.
- Water the seedlings in peat pots generously about a day before planting them in open ground.
- Do not remove seedlings ready for planting in the ground from peat pots, but bury them in the ground along with them. The depth of immersion of a peat pot into the soil depends on its size.
- Make sure that the top edge of the peat pot is level with the ground or not much deeper (no more than 1-2 cm in depth).
Secrets of using peat pots
Each gardener chooses for himself what devices to use in his work - fortunately, today you can find, choose and buy literally any tools. Listening to the opinions of others, you should try growing seedlings in a peat pot at least once yourself to form your own opinion. But if you didn’t like using peat pots, and you bought them in advance and with a reserve, don’t rush to get upset and count the “wasted” money. There are no unnecessary things in the household, and now we will prove this to you again using the example of peat pots:
- Using a hole punch, awl or other sharp object, immediately make several holes in the bottom and walls of the peat pot. Subsequently, this will make it easier for the plant’s roots to emerge.
- To prevent moisture from evaporating through the walls of the peat pot and cooling the seedlings, wrap each pot with plastic wrap or a bag. Before planting in open ground, do not forget to remove this polyethylene.
- Before putting soil for seedlings in peat pots, saturate them with the solution. mineral fertilizers. This will help the walls of the pots dissolve in the soil faster and provide the plants with additional nutrition.
- To prevent the peat pot from becoming moldy, spray it with a special preparation, for example, foundationol. This will not have a detrimental effect on the seedlings.
- And finally, you can use peat pots not for all seedlings, but only for the strongest and strongest ones - for example, the same pumpkin, whose roots easily penetrate the walls of the peat molds.
Choosing the right pots for seedlings is a science. Especially now, when all sorts of variations of these simple, but important and necessary garden tools. Experienced summer resident knows very well what is the best way to grow this or that variety fruit crop, but what should a newcomer to the world of gardening do? Of course, study what types of pots for seedlings there are, what are the pros and cons of each type.
These pots can be purchased at any store, even those that do not have a gardening focus. They are made of plastic and can be of two types - round and square. Sizes range from very tiny (about 50 ml) to quite large (1 liter or more). There are also plastic pots large sizes, but they are no longer intended for growing seedlings - rather, only for indoor flowers or landscape design.

The ease of use of a pot often depends on its shape. According to gardeners, it is more convenient to fill round pots with soil, but square ones can be placed more compactly on the window. The disadvantages of square products also include the fact that it is not very convenient to remove a plant along with a lump of earth from them: if a round pot can be “crushed” with your fingers, and the lump of soil will come out immediately, then a plastic one is more difficult to compress, especially if it is made of dense and high-quality plastic.
Note! To make life easier for gardeners, round inserts are often made at the bottom of pots, which help push the soil along with the plant out of the pot.
Plastic pots for seedlings usually have drainage holes, although the cheaper the container, the more likely it is that you will have to make holes in the bottom yourself.
Very often, pots for seedlings are sold as a set, and they come with a tray that will protect the window sills from moisture draining from them.

So, here are the benefits of using this type of container for seedlings:
- plastic pots optimal for growing absolutely any type of crop;
- they retain the necessary moisture well in the right quantity;
- can be used for several seasons in a row, as they are durable;
- perfectly protect the root system of plants from damage;
- they are very convenient to store.
Disadvantages of plastic pots:
- non-compact and take up a lot of space;
- It is not always possible to carefully remove the root ball when planting seedlings;
- They are quite expensive and will cost a hefty sum if purchased in large quantities.

Below is a table that will allow you to select the required pot size for a specific type of plant.
Table. Selection of plastic pots for seedlings.
By the way, the following recommendations will help you decide on the size of the pots.
- To grow seedlings of crops that definitely need picking, use pots of the smallest volume - 50 ml.
- For small crops that grow without picking, 100-200 ml pots are suitable
- Pots with a volume of 500 ml or more are suitable for tall and large crops that grow over a long period of time and develop strong roots.

Note! When choosing a pot, remember to consider the diameter and height, not just the volume. This is important for proper root formation.
Peat pots
Externally, the walls of these pots resemble thick cardboard, but consist of more than 70% natural peat. And the rest of the pot, by the way, is just paper.

The main advantage of peat pots is that there is no need to remove seedlings directly from the pot for planting in the ground. To do this, simply dig a hole of the required size in the garden bed and place the pot there without removing the seedlings from it. Gradually, the peat will rot, turning into a nutritious fertilizer, and the seedlings will grow into a beautiful and strong plant.
Peat pots are ideal for growing capricious crops - as a rule, these are cucumbers, zucchini, peppers, and others. And they are extremely simple to use: just fill them with soil, spill them, place the seeds, place them on a tray and that’s it. Further work on growing seedlings proceeds as usual.
Peat pots come in various sizes and, like plastic ones, in two shapes - round and square in cross-section. However, here the shape does not play a special role, since there is no need to shake the seedlings and soil out of the container. Is it necessary to take into account free space on a sunny windowsill – square pots can be placed more compactly.

Advantages of peat pots:
- easy to use;
- make it possible not to injure plants once again by picking and not to remove them during planting in the ground;
- are themselves nutritious fertilizers;
- made from environmentally friendly materials.
Disadvantages of peat containers:
- they quickly become soggy from water, so you need to water the plants in them sparingly;
- if the pots are too dry, the soil in them may become too dense for plants;
- when purchasing, there is a high risk of running into a low-quality product, which will only contain compressed cardboard;
- Excessive watering can lead not only to soggy containers, but also to mold on the walls of the pots and soil.
A peat tablet is a puck of compressed peat that is small in diameter and height. Before the production of this type of container, peat is enriched with microelements useful for seed germination and seedling development. Read more.
How to use peat pots? It's simple.
Step 1. Select the required size peat pots and process them. To do this, soak them for a short time in a solution of mineral and organic fertilizers and then dry it.

Step 2. Make drainage holes at the bottom and place expanded clay there.

Step 3. Fill the pots with potting soil, but not too tightly, to create the cavities necessary for successful development roots Spill the soil.

Step 4. Plant the crop seeds, each in a separate cup.

Step 5. Cover the pots with plastic and place them in warm room. Next, wait for the seedlings to emerge and continue to care for the seedlings, watering them moderately.

Step 6. While the seedlings are growing, you will increase the distance between the pots on the tray so that the branches and leaves of the plants do not interfere with each other.
Step 7 When the seedlings grow, transplant them into the ground garden plot as described above, without removing from the pots. Place containers 2-3 cm below soil level.

Homemade pots
Many gardeners do not want to spend money and buy ready-made pots for seedlings in the store. With persistence and fanaticism, they collect various containers or look for new ways to make containers for growing crops. And they often turn out to be right - why spend money on something you can do yourself?

There are a huge number of methods and master classes for creating containers for seedlings, and a variety of materials can be used.
Table. Materials for making pots for seedlings with your own hands.
| Material | Advantages and Disadvantages |
|---|---|
| Almost the same as plastic pots purchased in a store, only free, since you still buy yogurts, sour cream, etc. in the store. The product is eaten, and the jar is washed, drainage holes are made in it and it is removed before planting the seedlings. Neat, with smooth edges, safe and convenient, such containers can be used for many years. The only disadvantage can be small size, and sometimes – soil mold. |
| It turns out that many people make seedling pots from plastic bags. This material has many advantages - it is easily accessible, cheap, and it is very easy to make pots from it. You can cut pieces of polyethylene and tie their lower part with thread, make holes for drainage. You can take whole small bags - and the pots are ready. Disadvantages: the material does not hold its shape well (especially large sizes) and can cause mold in the soil. |
| What plastic bottles, what plastic cups for drinks - practically free and easily accessible seedling pots. They are durable and can be used for more than one season. And if plastic bottles still have to be cut with scissors, then cups are almost ready-made containers. It is enough to make drainage holes and you can use it. And removing a lump of earth with a plant is as easy as shelling pears - just slightly dent the walls of the glass and the soil will come out by itself. Gardeners found virtually no shortcomings. The main thing is to take care of accumulating or purchasing this material in time. By the way, plastic cups are much cheaper than special pots for seedlings. True, they do not come in very large sizes. And one more minus - the edges of plastic bottles, where the scissors “went”, can be sharp. |
| They easily and simply turn into containers for seedlings - just cut off one of their parts (top or bottom) and make drainage holes. Tetrapacks do not leak, do not become limp, and are soft enough to easily remove a bush from them. You get them for free (you buy juices and dairy products, right?), all you have to do is wash the boxes and store them until spring. The downside is the fragility. |
| An elementary and simple option for making pots for seedlings. It is enough to place such tubes on a tray, fill them with soil, and you can plant the seeds. But such containers are suitable only for plants that need picking, or those that do not grow too much, since the tubes are small. By the way, remove the seedlings from the container before planting summer cottage optional - this can be done together with a tuba. Gradually it will rot. |


Video - Pots for seedlings made of polyethylene
The main advantage of such homemade pots is the absence of costs, since the containers can be safely accumulated within a period of time. winter period, buying essential products. The most important thing is not to forget to make drainage holes in such containers.
Advice! Holes for water drainage are easier and more convenient to make using an ordinary thick nail. It must be warmed well over a fire (for example, in a candle flame) and sharp end melt holes in the bottom of the container. Be careful - hold the nail with pliers, as the metal heats up very quickly (you can get burned).

Unusual pots for seedlings
Pots for seedlings can be made from very unusual materials. Gardeners are creative people, and they can’t come up with anything to make their work easier and provide their plants with proper care. Let's look at three types of unusual pots for seedlings - some are made from eggshells, the second - from aluminum cans, the third - from newspapers.
Aluminum can pots
A good option for those who are fond of carbonated drinks in 0.33 liter cans. This material is not afraid of rust, is durable, and quite strong. It is convenient to wrap several of these jars with tape together - you get a kind of aluminum “cassettes”.
Step 1. Using scissors or a knife, cut off the bottoms of the cans.

Step 2. Cover the neck hole with the remaining tongue, but not tightly.
Step 3. Place some eggshells or expanded clay at the bottom of the resulting container for drainage.

Step 4. Make gauze bags, place them in containers and fill with soil.

Step 5. Sow seeds and grow seedlings.

Step 6. Remove the grown seedlings from the containers using a gauze bag and plant them together in the ground.
Egg shell pots
Very interesting way. It is convenient because in the future the plants, along with the shells, are planted in the ground - there is no need to pick them up and remove them from the “containers”. And the “pot” will serve as additional fertilizer

Step 1. Take egg shells and make a hole on the bottom of each small hole with a needle.

Step 2. Fill them halfway with soil.

Step 3. Plant the seeds and cover them with soil.

Step 4. Place the filled "pots" on the egg cell and grow the seedlings (as usual).

Spring is a busy time for gardening lovers, which primarily involves working with seeds. Modern stores offer gardeners a whole range of different containers for seedlings, but to save money, most gardeners prefer to make do with improvised means and materials. There are many ways to make cups for growing seeds with your own hands, and below we will talk about the simplest and cheapest of them.
The classic option is a container made from metal cans for canned food. Several holes should be drilled in the bottom (preferably from the inside), and to make it easier to remove the seedlings from the container, several cuts are made on its walls. If the cups are intended to be used more than once, it is better not to cut them, but simply put a strip of thick paper or polyethylene on the bottom - in order to get the earthen lump and not damage the roots, you just need to pull it. In a similar way, you can use tin beer cans, cut off at the top, as well as plastic bottles and toilet paper rolls.


Plastic yogurt cups can serve as containers for seedlings of vegetables and flowers. First you need to cut out the bottom of the jar, and instead put a suitable size circle of tin or cardboard.

When the shoots need to be planted, it will be enough to press on the improvised bottom with a stick. It is important to note that transparent disposable cups are the worst choice for seedlings, since the roots in such containers do not receive enough light and shoot growth slows down.

Cups made of paper or newspaper

Containers for seedlings from paper or newspapers are made in several ways. For the first one you will need a suitable cylinder (you can use a plastic bottle or tin can, cut off at the top) as a base, as well as strips of paper of suitable width. If the paper is thick enough, three strips will be enough to make one cup, and if it is thin, it is better to add 2-3 more. The paper strips must be attached to the base so that they protrude beyond its edge by at least 5-6 cm (depending on the radius), then wrap it in paper (not too tightly so that the cylinder or jar can be easily removed) . The protruding edges must be pressed well, thus forming the bottom of the cup. After this, the base can be removed and the seedlings can be planted in the resulting container.


Cups for seedlings can also be made using the papier-mâché principle. To do this, you will need several glass glasses, a bowl of water and old newspapers or even toilet paper. Soak the newspapers well and form the future container on a regular glass. If you will be using toilet paper to make cups, use a spray bottle instead of a bowl of water. Toilet paper wrapped around the mold, then moistened well with a spray bottle and pressed well against the walls of the glass. The workpiece is dried for 24 hours, after which it is removed in a circular motion.


Paper or newspaper cups are convenient primarily because it is very convenient to plant seedlings in the ground later. You can simply tear the paper and throw it away, or even plant the shoots along with the container (the paper will collapse over time in a natural way), without damaging even the smallest roots.


Film cups
To make cups for seedlings from polyethylene film It is best to take film that is used for greenhouses. In addition, you will need a base suitable shape and a regular office stapler. The film is cut into strips, wrapped around a base and fastened with staples, after which a square cup is obtained. A simpler option is to make tubes out of film, bend the top edges for rigidity, place them in a box or pallet and fill them with earth. In this case, the most important thing is that the film is thick enough, otherwise it will simply lose its shape.

If there are a lot of bags of fermented milk products accumulated at home, they can be used for seedlings. The bags are folded, seeds are planted in them, then the edges are turned away and sprinkled required quantity soil as shoots grow. The only drawback of this method is that the bags are quite unstable and require additional support. For greater rigidity, it is recommended to strengthen their edges around the perimeter with cardboard strips.


Which cups are best to plant seedlings in?
It is quite difficult to answer the question of which cups are best used for seedlings, since it depends on the characteristics of the crop that you plan to grow and other factors. Today in gardening stores you can buy different containers for growing plants: peat cups and tablets, as well as plastic containers different forms and sizes.
Peat containers

Containers made from compressed peat have a number of very valuable advantages. Firstly, they ensure maximum survival rate of young plants, since they can be planted in the ground directly with the container, without injuring even the smallest roots. This is especially valuable when growing delicate crops that do not like being transplanted to a new location. Secondly, the material from which the container is made is not simply destroyed naturally, but turns into a nutritious fertilizer.

Peat cups come in both round and square - the latter are very convenient as they do not take up much space on the windowsill.


When purchasing such containers, it is important to remember that to reduce costs, some manufacturers add cardboard to the material, and such containers are not suitable for growing seedlings - when planted in the ground, the roots of the shoots do not pass through the thick cardboard layer well, which is why the plants begin to grow poorly . In addition, planting seeds in peat pots requires knowledge of some rules:
- containers must be placed on expanded clay or sand;
- the soil must always be moistened, since water from such pots quickly evaporates, as a result of which the seedlings will grow poorly (however, excess moisture can lead to the appearance of tribes on the walls of the cups);
- As the shoots grow, they need to be moved away from each other so that the roots of young plants do not intertwine with each other.
There are also peat humus tablets on sale, which are no less convenient for planting seedlings - when wet, they can significantly increase in size. If it is not possible to buy such tablets, they can be replaced with nutritional cubes made by yourself.

DIY nutritional cubes
To make cubes you will need:
- humus (5 parts);
- turf soil (1 part).
- peat (3 parts);
- humus (1 part).

The components need to be mixed together, then for each kilogram of the resulting mixture add 15 g of ammonium nitrate, the same amount of potassium sulfate, 50 grams of superphosphate and water so that the mass has the consistency of thick sour cream. It needs to be placed in a tray in a layer of 8-10 cm, then cut sharp knife cubes of the required size. For convenience, the cubes are slightly moved away from each other and the seeds are planted.
Video - Tablets, cubes for seedlings with your own hands
Plastic containers

Plastic containers for growing seeds can be of two types: ordinary pots and cassette containers, which look like cells fastened together. Pots are more suitable for house plants, since replanting shoots from them is quite difficult - the roots are very tightly intertwined with each other, as a result of which they are severely damaged. If the seedlings are planned to be grown in plastic containers, it is very important to choose the right size.
| Culture | Pot width, cm | Pot height, cm |
|---|---|---|
| 12-17 | 12-17 | |
| 7-10 | 7-10 | |
| 6-8 | 6-8 | |
| 10-15 | 10-15 | |
| 10-15 | 10-15 |
Cellular or cassette containers are small pots fastened together, in each of which one plant is planted. They are made of high-quality smooth plastic, so the earth ball is very easy to get out without damaging the roots. When purchasing such containers, it is better to choose containers with a pallet, otherwise you will have to make it yourself.

The disadvantage of this method of growing seedlings is that as the shoots grow, they begin to crowd each other. That is, such a container is not suitable for seedlings that need to be grown for a long time, but it can be used for plants that do not grow large mass leaves: for example, asters or cabbage.


In any case, when purchasing ready-made containers for growing seedlings, you need to pay attention to the following factors: sufficient capacity, hard, opaque walls with low thermal conductivity, as well as the presence drainage system, which will relieve the seedlings of excess moisture. In such conditions, the shoots will grow strong and healthy, and the plants will delight the gardener with a rich harvest.
Video - Do-it-yourself cups for seedlings