Methods for connecting chipboard panels. What furniture fasteners exist and their scope of application?
Another very entertaining idea from Sergei Novikov. The result is very similar to the two previous lessons, in which he makes a rectangular cut in the part and edges it with a 2 mm edge. But in this lesson there is a fundamental difference: we are not doing a continuous corner piece, and join the two parts end-to-end.
This method can be useful when connecting pieces of tabletops, or even when making facades from economy-class laminated chipboard.
So let's get started. We prepare the parts for gluing: glue the edges and file them at an angle of 45 degrees (this must be done very carefully, .
To work, we will need a router with a disk cutter. Considering that it is planned to use a piece of HDF or fiberboard as a key, the thickness of the cutter should be 3.5 mm 
We make a cut in the center of the end of the part to be joined (the edges of the cut should not be visible from the sides, that is, the tool is buried in the material, retreating 10-15 mm from the edge. 
A similar groove is selected and on the second part it is advisable to place the router on the same side on both parts, in this case, even if you deviate from the center there will be no negative consequences it won't cause. 
We prepare a dowel from a piece of fiberboard or HDF (it should be as wide as two overhangs of the cutter, and 1-2 cm long shorter than the groove. 
Any PVA-based glue is suitable for gluing, for example Homakol or Moment STOLYAR. We coat the dowel and the end to be glued with glue, insert the dowel into the groove and assemble the joint. 
We connect both halves of the glued part. For reliability, you can clamp them in a clamping device (there are quite a few of them), or you can do without them. Special ties are relevant for countertops. Then we remove the excess glue that has protruded from the joint. 
After the glue dries, you get this neat connection without a difference in height. The tensile strength of such a connection (without additional reinforcements), I think, is not too high, but it is quite sufficient for shear. 
Joining techniques, that is, methods for creating strong connections between individual wooden parts when making furniture, are essential to the successful design of built-ins. Wall makers use dozens of joining methods, but to make furniture designs you'll only need a few of the simple joints shown here.
The choice of connection method depends on how the built-in furniture structure will be used and how it should look. For example, built-in furniture design for displaying items such as decorative glassware can be made with simple butt joints, and for heavy items (such as a multi-volume encyclopedia) with strong groove connections, reinforced with screws. If important appearance furniture, choose a hidden connection method. For example, a built-in design with tongue-and-groove joints is more similar to a factory design than a design with butt-and-batten joints.
Lap joint
When making many built-in furniture designs, you will need to glue and tighten several joints at the same time. For this job you need a range of different clamps. Use wood glue to reinforce all joints. Connections made with nails and screws alone will weaken over time.
Types of furniture connections
Method of gluing furniture


Pull the pieces together to hold them securely at the joints. After measuring the diagonals, make sure that the corners are right. Their straightness is evidenced by the equal length of the diagonals. If the lengths are different, adjust the position of the parts. |
Secure the connections by drilling pilot holes in them. Drive in screws or finishing nails. For the screws, drill out the base holes so that the screw heads are countersunk. Deepen the nails using a punch. |
Close the counterbore holes with plugs from hard rocks wood, coated with glue, and cover the nail holes with wood putty. When the glue or putty has dried, sand the surface smoothly and then varnish. |
How to make a dovetail joint

1 Measure the profile to the desired length, then set the miter saw blade at a 45° angle.
2 Clamp the profile in the miter saw, then cut to size. Apply a thin, even layer of wood glue to the beveled edges of the profile.
3 Place the profile sections on wooden structure so that their beveled ends are pressed tightly against each other. Drill through base holes in the profile and in the product and attach the profile with finishing nails.
How to make a butt joint

1 Using a frame square, outline the location of the connections on wooden blank. If desired, attach strips along the bottom edge of each joint for reinforcement.
2 Apply wood glue to the surfaces to be joined. When doing this, use a cardboard stick or strip, which ensures even application of the glue.
3 Connect the two pieces to reinforce each joint by drilling pilot holes and driving a finishing nail or screw into the joints. (The guide line on the piece will help align the nails.)
How to make a groove connection

1 Hold the pieces together and “mark the groove.” Insert a straight cutter into the cutter and set it to the desired depth. Typically the groove depth is half the thickness of the wood piece. For example, with a thickness of 3/4 inch, the depth of the grooves should be 1 cm.
2 Clamp a rectangular ruler on each side where the grooves will be, so that the edges of the rulers are against the marked lines. Place a piece of scrap wood the same thickness as the workpiece between the rulers to measure the gap.
3 Cut the groove with two passes of the router bit. On the first pass, press the base of the cutter firmly against one of the straight racks, then make a second pass in the opposite direction, pressing the base of the cutter against the second rack.

4 Apply wood glue to the surfaces to be joined and tighten the parts together. Drill pilot holes and drive in screws or finishing nails 7.5-10cm apart. For screws, countersink the base holes.
How to make a blind joint on tenons using a template

1 Arrange the parts as you want them to look when connected. Label them A and B as shown above. Turn the pieces over as shown below. In this case, the surfaces are connected and look at you. Using a template and an additional clamp, tighten the pieces together so that the ends are in line.
2 Insert the brush bit into the drill. If you are tenoning a 3/4" thick board, use a 3/8" drill bit.
To ensure you drill the holes to the correct depth, install a stopper.
3 Drill tenon holes in both pieces through the template hole. For a 3/4" thick piece, the holes in piece A should be 1.3cm deep and the holes in piece B should be 3cm deep. Move the template and drill new holes 7.5-10cm apart.

4 Check that the connection is correct by inserting 1 1/2-inch grooved tenons into A, then tapping B into place with a wooden hammer. If the parts do not fit tightly, deepen the holes for the tenons in part B.
5 Separate the parts and remove the tenons, apply glue to the tenons and insert them into the holes of part B. Apply glue to the surfaces to be joined. Attention. When joining melamine-coated particle boards, apply glue only to the tenons.
6 Assemble the parts by tapping them with a wooden hammer until the joint “sits” tightly. Use a damp cloth to remove excess glue.
How to Make Blind Face Joints Using a Tenon Center Marker

1 Mark a joining line on the front side of the workpiece. Using a template, make holes for the tenons on the edge of the other part, then insert a tenon center marker into each hole.
2 Place the parts edge-on flat surface, then press them together so that the tips of the markers leave marks on the wood.
3 Drill holes at the marked points using a brush drill. For 3/4" thick wood, the holes should be 1/2" deep. Use the guide to rectangular drilling with drill stopper. Assemble the part with the spikes.
How to make through tenon joints

1 Pull and glue the parts together, draw an auxiliary line. Using a brush drill bit with a stopper at a depth of 4.3 cm, drill tenon holes in one piece that extend into the adjacent piece. Place the holes at a distance of 7.5-10 cm from each other.
2 Apply wood glue to 1 1/2-inch grooved tenons then insert the tenons into the holes. Using a punch, drive the spikes in until they stop.
3 Cover the tenon holes with hardwood plugs coated with glue. Let the glue dry, then sand the surface with an emery block.
1. Main material: laminated chipboard
Surprisingly, wood in pure form is the lot of expensive “elite” furniture. Wood is practically no longer found in cabinet furniture.
The main material from which cabinet furniture is made is laminated chipboard (LDSP). Typically these are 16 mm thick slabs. Still on sale laminated chipboard sheets thickness 10 mm and 22 mm. 10 mm laminated chipboards are used as filling for blind doors of sliding wardrobes, and 22 mm - for shelves in bookcases, where greater resistance to loads is required, and ordinary 16 mm laminated chipboard can seriously bend under the weight of books.
Also sometimes 22 mm parts are used as design elements furniture products, introducing originality into the design (for example, on top of a regular 16 mm cabinet lid you can put a protruding cover with a thickness of 22 mm more dark color). Such delights are economically feasible only in mass production, since you always have to buy a whole sheet of laminated chipboard for cutting. Typically, all parts of cabinet furniture (except for doors and facades) are made from 16 mm laminated chipboard.
Laminated chipboard is sawn on special machines along guides. Of course, at home you can saw off something with a jigsaw - but in this case the edges of the seam will be “torn”, and the seam itself will probably wiggle from side to side. It is almost impossible to achieve a straight saw with a jigsaw.


2. Edges
The cut of laminated chipboard is the most ugliest and vulnerable place - moisture easily penetrates through it and the material swells and deforms. Therefore, it is recommended to cover all ends of laminated chipboard with special edges. Several types of edges are known:
. ABS edge- an analogue of PVC edges made of another, more environmentally friendly plastic. In addition to environmental friendliness during disposal, the remaining differences are rather invented by marketers. It's not even sold in our city.
 |
. Wooden and veneered facades- will delight lovers of natural products. True, in the modern plastic world such facades are quite expensive. Yes, and evil tongues claim that there are so many varnishes and impregnations in this wood that there is only one name for the wood. By at least, manufacturing companies strongly recommend regularly maintaining such facades with special chemicals.
. Enamel facades- painted facades. Their main drawback: the coating is very easily scratched, deformed, and is not resistant to chemicals. Previously, they were used only for their saturated bright colors. With the advent of acrylic plastics on the market, the demand for painted facades has decreased significantly.
. Aluminum and glass facades- made in high-tech style. They are beautiful and modern, but difficult to manufacture and require non-standard fasteners, often installed simultaneously with the production of the facade.
4. Back walls and bottom of drawers.
Typically, the back walls of furniture, as well as the bottoms of drawers, are made of LDVP. At the same time, its front laminated side looks inside the drawer or cabinet. The color of HDF is selected to match the color of the HDF used. The sheet thickness is usually 3-5 mm.

At one time it was fashionable to place such a wall on brackets using furniture stapler. This is wrong - the staples last for a limited time, and no matter how strong the structure may seem to you immediately after assembly, after a few years it may well break apart under pressure or deformation. It is especially incorrect to place the bottom of drawers on staples, which is constantly subject to pull-out loads. So what about furniture stapler forget - it is only applicable in upholstered furniture.
Sometimes fiberboard is inserted in the groove- but this technology requires milling this groove, and at the same time maintaining all dimensions of the product exactly down to the millimeter.
Sometimes the back walls and bottoms of drawers are made of chipboard. This is practiced to create " stiffening ribs"in tall cabinets, and in those drawers where there will be a very heavy load (20 kg and above). The rear wall of the cabinet can be equipped with one or more stiffeners made of laminated chipboard, and the rest of the space can be filled with LDVP.
5. Countertops
Tabletop- a horizontal work surface on which people constantly work (cook, eat, write).
Most office desks and cheap options dining rooms are limited to a tabletop of the same material as the table itself. It can be laminated chipboard 16 mm or better 22 mm, chrome plating must be 2 mm PVC edge.
Special countertops are used for kitchens. They are usually a leaf Chipboard thickness 28-38 mm, covered with plastic using postforming technology. This plastic is quite durable. If the cut of the tabletop is gray, it’s ordinary chipboard, if it’s blue-green, then moisture resistant. Correct kitchen countertops equipped with a strip of silicone - the so-called " drip tray", which does not allow spilled liquids to flow down and onto the kitchen furniture.

The weak point of such countertops is the edges of the cuts. They are usually edged with melamine to match the color of the tabletop when cutting it. But melamine is afraid of moisture, and often the edges become unusable after just a year of use. Therefore, for the ends of the tabletop it is recommended to use a special aluminum profile, having previously thoroughly coated the cut surface silicone sealant. There is also a profile for joining tabletops at right angles - without sawing them and fitting them to each other - this profile is very convenient to use in corner kitchens.
It is not customary to make holes in the tabletop (they spoil the smooth surface of the table and then dirt gets clogged in them), so such a tabletop is usually screwed on from the inside screws to horizontal struts. In this case, the screws should not be too long so as not to pierce the lid through.

Countertops made from natural or artificial stone . Products from natural stone very heavy and require additional care due to the porosity of the material. Artificial stone is free of these disadvantages. In addition, artificial stone countertops can be given almost any size and profile. The only drawback of such countertops today is their price.
6. Location of parts
We have come to those sections that will form your final understanding of how to make cabinet furniture. So, first let's talk about the relative position of the parts.
Detail- this is any element of cabinet furniture: bottom, lid, sidewall, back wall, facade, shelf. So, every detail can be nested, or maybe overhead.
Let's consider this thesis using the example of two kitchen cabinets. One will stand on the floor (on legs), and the other will hang on the wall.
Base cabinet:
As can be seen from the figure, it is best when the operating voltage (and for a floor-standing cabinet it is directed from the lid downwards) naturally transmitted through wooden parts to the place of contact of the product with the support - on the legs of the cabinet (see the “correct” diagram).
In the second, “wrong” option, the voltage is transmitted to confirmation(this is a special furniture screw, we’ll talk about them a little later) - and the force will constantly try to break it out of the wood.
Second example: wall cabinet .
Here everything is the other way around: the force is applied to the bottom shelf and the things on it, and the fastening point of the cabinet is higher than the point of application of the force. Naturally (at the junction wood boards) we will not transfer the force upward in any way. Therefore, voltage will necessarily be transmitted through the fittings.
If we make the same construction here as in base cabinet(see diagram "wrong") - all four confirms will experience constant effort to tear out made of wood. Therefore, we choose the worst of two evils: it is better to let the confirmees experience the effort for a break(see diagram "correctly").
At first glance, this seems difficult, but trust my experience: after the third designed and assembled product, you will begin to intuitively, without thinking, determine where this or that part should be located.
7. Furniture fasteners
Furniture fasteners are hardware, which are used to connect furniture parts. Most often, such a connection is made at a right angle of 90°. all modern types of furniture fasteners are very well described, with detailed description their advantages and disadvantages. Let's briefly go through those with which we will work.
. Euroscrew (confirmed)- special furniture screw. The most common fastening of cabinet furniture. Confirmat is especially well suited for beginners - since it does not require precise addition of parts - you can drill a hole for it “on site”, during the process of assembling the product.
Have you noticed that self-tapping screws are almost never used to connect parts? That's right, in the furniture business they are replaced by confirmats. Due to their ideal shape for 16mm laminated chipboards, they have a significant large area threads and hold much stronger than self-tapping screws.
 |
 |
To drill holes for confirmations it is required special drill- finding something like this in our provincial town was not easy. In principle, if you don’t have such a drill, it’s not a big deal: you can get by with three drills different diameters: under the thread, neck and cap of the confirmat.
Confirmats come in several sizes. Typically 7x50 is used. When drilling for confirmation special attention You should pay attention to the perpendicularity of the drilling - so that the drill does not “run away” and pierce the wall of the part being drilled.
Confirmations are being twisted screwdriver with hexagonal bit or manually with a special hex wrench. Confirmations made under Phillips screwdriver- these are not correct confirmations! You will never be able to tighten these screws all the way.
The main aesthetic drawback of confirmations is that the caps, although remaining flush, are still noticeable. To hide them they use plastic plugs, inserted into the caps. The color of the plugs is matched to the color of the chipboard.
. Eccentric couplers- the most correct and modern look furniture fasteners. Leaves no traces front side products, only from the inside. Main disadvantage- requires very precise drilling, including aligning holes on both sides and limiting the drilling depth (so as not to drill through).


To drill additives for eccentrics, a special drill is usually used. Forstner drill. It is possible to do it manually - but it is very difficult; it is better to have a drilling machine.
If you are assembling furniture, the ends of which will not be on public display, but will be hidden (for example, kitchen cabinet or a wardrobe in a niche) - then there is no point in bothering with eccentrics. Use confirmations.
8. Furniture fittings
The hinges can also be adjusted in height and planting depth. This allows you to more accurately align your cabinet door. There are also inset hinges - when when the door is closed, the facade is recessed inside the cabinet (rarely used). There is a range of glass door hinges that can hold the glass firmly in place without drilling.
Buy only quality products famous manufacturers(for inexpensive ones, we can recommend Chinese Boyard) - so as not to have problems with them in the future. Among the world's serious manufacturers - Austrian Bloom, but it is expensive and you still have to try to find it.
9. Drawers and their guides
There are many ways to make furniture boxes. The simplest one is to make the perimeter of the box (sides, front and back walls) from chipboard. This method is described in detail and with illustrations. The only thing I disagree with the author is that instead of nails to secure the bottom, I would use self-tapping screws.
If required beautiful facade, then it is screwed with self-tapping screws to one of the sides of the drawer into the lining, as shown in the diagram in section 5 (the role of the countertop in this case will be played by the front of the drawer).


But assembling the box is half the battle. The main thing is to make it open and close. That is, put it on the guides.
Drawer guides There are two types: roller and ball.
. Roller guides - usually white, attached to the bottom of the drawer. A box on such guides rides on two rubberized rollers, rumbles due to its unstable position, and at the point of maximum exit tends to fall out of the guides from any sharp push. Such guides are bad because a heavily loaded box will try to tip over from any position when it is extended more than halfway. The only advantage of such guides is the price: approx. 30 rub for a couple.
. Ball guides - or as they are usually called “full extension guides”. These guides are a telescopic structure that can increase its length exactly twice. Inside they contain several dozen balls (as in bearings), which ensures smooth movement of the box. The guides are rigidly fixed with self-tapping screws to both the cabinet and the drawer, which eliminates the possibility of tipping over and prevents the drawer from “derailing” regardless of the load and speed of jerking.
The process of installing a drawer on full extension ball slides is well described. The price of such guides is approx. 100 rub per set. It’s very disappointing to see when in a kitchen with a total cost of more than 40 rubles, the manufacturer squeezes and installs roller guides, saving 70 rubles. You know, you want to take it and strangle it for such a disgusting attitude towards the buyer. So if you order a kitchen, immediately specify what type of drawer guides will be.


. Metaboxes- a solution first proposed by an Austrian company Bloom. The idea is to save the craftsman from having to attach the guides to the drawer, and sell ready-made side walls, with built-in guides, holes for the front and grooves for the back wall. Having bought a metabox, all you have to do is hang the facade on it, put in the back wall and bottom (by the way, many metaboxes are designed for a bottom made of chipboard and not fiberboard).
The guides in the metaboxes are roller. Accordingly, the metabox is not a full extension product. Cost of Blum metabox: from 300 to 500 rub. Now many companies, including Chinese ones, produce products with the name “metabox”, which has already become a household name. Here is a good article on calculating and assembling a metabox.
. Tandemboxes- a more technological solution from the same company. If the metabox rides on roller guides, then the tandembox rides on full extension ball guides. The number of balls in them is several hundred. Tandembox is usually equipped with automatic door closer and a shock damper (BluMotion system) - which ensures surprisingly pleasant and soft closing of the drawer (always full closing) with one push.
For tall drawers, tandem boxes can be equipped with one or two additional stops. Tandem boxes are manufactured white and stainless steel. The latter, of course, are twice as expensive.
If you happen to be on furniture exhibition, stop by the Blum stand. You can’t even imagine how pleasant and high-quality the usual furniture fittings. But the tandembox costs accordingly: 1000-2000 rub. per set.
10. Doors for sliding wardrobes
The last thing worth talking about in our furniture educational program is wardrobes. In general, the kitchen and wardrobe are the most affordable and interesting for a beginner furniture maker areas of activity. Well, not counting, of course, bedside tables and shelves. Furniture for the living room and bedrooms usually requires a serious design approach, the use of non-standard or difficult-to-process materials: natural wood, tempered glass. With kitchens and wardrobes, everything is simple and clear.
The sliding wardrobe comes in two versions: with walls (side and back) and without them. the latter option is simply a part of the room (usually a niche) fenced off with sliding doors, inside which you can do whatever you want: shelves, drawers, hangers, and a bunch of other interesting things. Here are listed and photographs of the most common elements filling sliding wardrobes.
The most interesting and attractive mechanism in a sliding wardrobe is its sliding doors. You can’t skimp here, and you need to buy only high-quality fittings - otherwise you’ll suffer with falling and jamming doors so much that you yourself won’t be happy. In our city, the only decent stuff they sell is sliding systems domestic company Aristo, however, according to reviews they are quite worthy.


A sliding wardrobe usually contains two or three doors. Each door is a canvas enclosed in a special frame made of decorated aluminum profile. In this case, the door does not have to be uniform - it can be created from two or more different panels, connected at any angle using a special profile.
Traditionally, the frame profile for sliding wardrobe doors is designed for a leaf thickness of 10 mm. For the manufacture of blind doors, 10 mm laminated chipboard sheets are usually used. A design alternative to it can be special sheets rattan(decorative wicker), bamboo, and even artificial leather (on a base made of chipboard or MDF).
Using special silicone seals, a 4-mm mirror. The main thing is that those who will cut you mirrors for your closet do not forget to apply reverse side a special elastic film that will hold fragments in the event of an impact. Even if a child breaks the mirror surface, this will significantly reduce the likelihood of injury.
In order for the doors to move, guides are attached to the bottom and top. The lower guides of the sliding wardrobe ensure the opening/closing of the door, the upper ones ensure the fixation of the door relative to the depth of the cabinet. The lower rollers are usually made of plastic, equipped with a shock-absorbing spring and a screw for height adjustment. The upper rollers have a rubberized surface.
For more information on self-production cabinet furniture, I strongly recommend reading the following resources:
. http://mebelsoft.net/forum/- Forum of professional furniture makers. Perhaps the largest and most popular resource dedicated to this topic.
. http://www.mastercity.ru/forumdisplay.php?f=19- City of Craftsmen, section "furniture and interior design". Those who try to do everything with their own hands gather here.
. http://mebelsam.com- DIY furniture. There are many articles and examples of a wide variety of technologies, not just cabinet furniture.
. http://www.makuha.ru- Furniture directory. A beginner portal, but it already contains interesting articles.
Well, that’s the end of our little furniture educational program. I hope you are now full of strength and determination to make cabinet furniture with your own hands. Add a little imagination here in choosing colors, edges, fittings and figured cuts- and you will get the opportunity to make the furniture that exactly what you need.
And it's not even about what happens cheaper and often better quality than in the store. And it’s not that you no longer limit yourself to factory models. The fact is that the things you have made, the things in which you have invested your soul, your enthusiasm and skill, are stored the warmth of your hands. I think this is important.
To efficiently assemble and install interior elements, it is used furniture fasteners. Depending on the location of fixation and method of connection, there are several varieties. These elements not only make the assembly and installation procedure easier, but will also be invisible after the process is completed.
The design and type of fastener will depend on the purpose of the furniture on which it is fixed. The elements can hold the product together inside, creating its frame, and also secure the base of the furniture to the wall or floor. Today the following types of fasteners are used:
- Furniture corner;
- Confirmation;
- Dowel;
- Screeds;
- Shelf supports;
Each of these types has its own characteristics and features that distinguish them from each other. To find out which element is needed to assemble furniture, it is recommended to consider in detail the advantages and disadvantages of each category.
Furniture corner
This element belongs to a simple and outdated type of furniture fastener. It would seem that if a detail is outdated, then why talk about it? It's simple - such a corner will be useful for beginning assemblers. He will also become an assistant in independent design furniture products and subsequent assembly. In addition, its installation does not require any special equipment or skills. According to the production material, there are 2 types of furniture corners:
- Plastic - fastened with self-tapping screws, has a more miniature appearance and is relatively light weight. This corner is convenient to use for fastening light furniture panels or for supporting furniture parts;
- Metal - has stiffening ribs and is produced at an angle of 90 degrees. To fix the part, plastic or metal screws and couplings are used. There are holes on one side of the corner and grooves on the opposite side.
Such fasteners are used to tie the roof or bottom of a sliding wardrobe with its walls or when assembling a cabinet kitchen furniture. Plastic options are equipped with a special plug, which gives the product a finished look. Metal ones are considered affordable and very durable. The disadvantages of fastening include the gradual loosening of surfaces secured with corners, as well as an unattractive appearance.

Plastic
Confirmat
This name is usually used to refer to ordinary furniture screws. In another way they are called euroscrews, as well as euroscrews. The fastener is easy to install and does not require precision; a screwdriver or drill is required to fix it. In the screw head there is a hole for a hex key, which is also necessary for work.
To install this part, you need to drill two holes: one in the end of the part, and the other in the element that will be attached. The ease of assembling furniture using a confirmat allows the furniture maker to drill holes on site. It takes a minimum of time to complete the job. You can simplify the process as much as possible if you use a special drill for confirmation for installation. However, many furniture makers claim that over time this device becomes loose and the cutters become clogged. wood shavings. Therefore, for frequent use, standard drills are used.
The most popular and used confirmat size is 7x50 mm. Below are the pros and cons of using this fastener.
Based on the information provided, it is worth noting that these furniture fastenings are convenient and reliable. But if you can use them, then it is better to give preference to an eccentric coupler.


Dowel
Hidden types of fastening are a feature of furniture assembled using dowels. This is a small wooden cylinder, its dimensions are often 35x8 mm. The first number shows the height of the element, and the second indicates the diameter of the fastener. The essence of fastening with dowels is as follows:
- Holes are drilled in each of the two parts;
- The holes must be coaxial - that is, coincide in the location of the axis;
- A dowel is inserted into one hole, which only goes halfway deep;
- A second furniture piece is placed on the cant protruding from the furniture piece - this is how they are tied together.
In order for the connection to have increased strength, the hole is treated with PVA glue, which additionally fixes the dowels and makes them motionless. The big advantage of this type of furniture fastener is that it remains invisible: it cannot be seen from the outside or the inside. The dowel connection has some disadvantages: it is done once, so it is extremely difficult to disassemble such furniture without damage. The second disadvantage is that precise drilling of holes is required for a perfect fit of the two components. This nuance creates the need to use special devices.
Devices for installing dowels are called conductors. They can be factory-made or home-made. The former are considered the best in quality, but the latter can be made independently.


Ties
Today there are two main varieties furniture screed– eccentric and intersectional. It is necessary to consider in more detail each of these types separately:
- Eccentric tie – this element is used only in conditions of factory assembly of furniture. To put him on furniture board you need to use a device to drill an exact hole. The main advantage of such fasteners is the ability to remain invisible, then the furniture acquires a neat and attractive appearance. Another advantage, compared to confirmed ones, is that such furniture fasteners allow you to assemble and disassemble furniture several times without losing rigidity. In addition, using an eccentric coupler it is possible to fasten parts at an angle;
- Intersectional tie - represented by a screw and a nut, with the help of which two perpendicular furniture elements are tightened. An intersectional screed is convenient for fixing the headboard and bottom of the bed, as well as tabletops. It is necessary to select fasteners based on the thickness of the particle board.
The most popular tie size is 32 mm, but this figure can reach 50 mm.

Eccentric

Intersectional
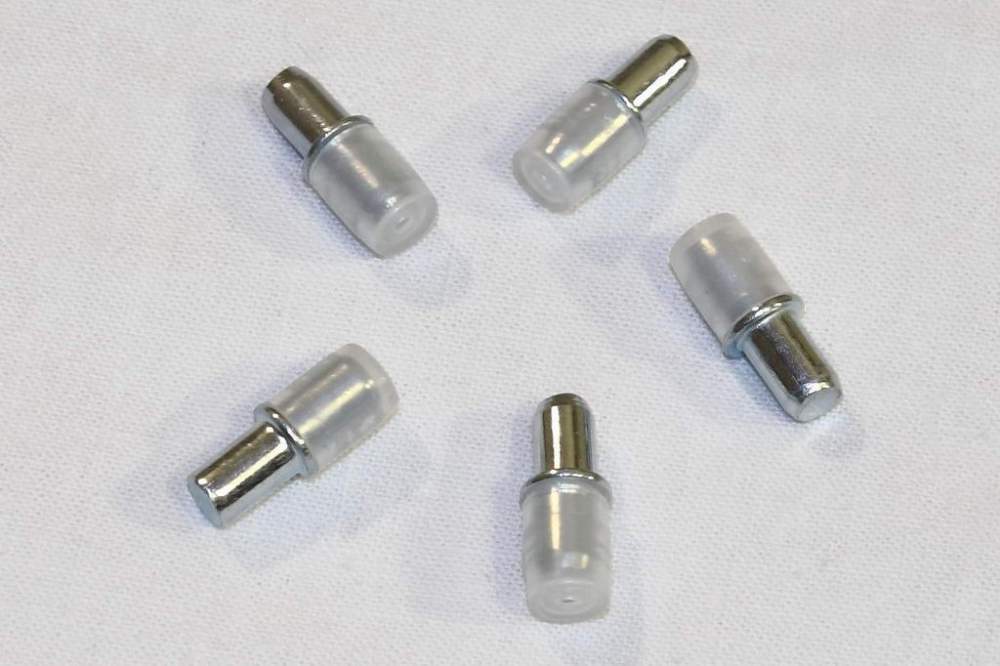
Shelf supports
A large number of shelf holders allows us to divide them into 2 subgroups: for parts made of chipboard and glass. IN furniture showrooms You can find many models where glass is harmoniously combined with a wooden base. To efficiently hold two materials of different composition together, shelf holders are used.
Each of the types can be separately divided into two more categories: with and without fixation. Let's take a closer look at how to fix glass in furniture, as well as how to use a shelf holder for chipboard.
When installing shelves in a cabinet or cabinet, you cannot do without shelf supports. They should ideally match the style of the furniture and be combined with general principles interior

Previously, the bolt-nut system was widely used to fix furniture parts. With this connection, a hole was drilled in both surfaces through which the bolt was threaded. On the other side of the cabinet wall, this bolt was secured with a nut. Today, a screw with a nut is also used - it is the simplest type of connection of furniture parts. The screw is equipped with a semicircular head, which, after connecting to the nut, does not rotate, but remains motionless. This fastener is easy to use, but with the advent of new materials, it has faded into the background. Bolts with nuts are suitable for use by craftsmen entry level assemblies.
The advantages of such fasteners are:
- Possibility of self-assembly;
- Availability of parts;
- Possibility of reusable assembly and disassembly of furniture.
Among the disadvantages is the visibility of the fasteners, which is why they have ceased to be relevant. Another significant drawback– the ability to connect only parallel surfaces.

Types, depending on the material to which it is attached
Modern manufacturers today use not only chipboard to make furniture. Glass, metal parts, and plastic elements are widely used. Fastenings for furniture made of chipboard were discussed throughout the material, and options for fastening objects made from other raw materials are discussed below:
- Glass - screw-type holders are used that are screwed into a wall made of concrete or plasterboard. They are used to fix shelves and mirror surfaces without damaging the coating of the part. For glass doors on the cabinet, the use of furniture hinges is suitable;
- Metal – screw fastenings are used to connect the shelves of metal racks. They are screwed into the racks using a drill or screwdriver. An attractive cap is installed on the front side;
- Plastic – plastic parts can be secured using any chipboard fasteners.
Separately, it is worth highlighting the fastening dovetail– it is used to connect boxes. The essence of the connection is to cut out a comb surface on each part, which is inserted into another part, resulting in end-to-end fixation. Choose only the type of fastening that suits you best. Before purchasing, be sure to calculate the thickness of the material so that during the assembly process screws and self-tapping screws do not protrude on the surface.
Recently, they have become increasingly popular in the manufacture of furniture. corner connections slab materials with a miter bevel. In this article, our friend and colleague Sergei Novikov will share the secrets of making such a non-standard joint. Unlike a joint with an acute angle, which, firstly, is quite traumatic, and secondly, it is itself susceptible to chipping and deformation with minimal impact, this option is free from the above-mentioned disadvantages.

So, first, using a tire, we file the mating edges at an angle of 45 degrees. In principle, this can be done with sawing machine, but a plunge-cut saw with a guide bar (2 passes) in relation to chipboard gives better results.
So, we get two parts with sharp corners, let's move directly to their connection.


To enhance the strength of the joint, we will need a lamellar router (I think we can get by with a regular one, but with special devices(so far there are only vague outlines in my head). These flat furniture dowels (slats) are inserted into the grooves selected by the slats.


They prevent the parts from moving during displacement, and also add strength to the final connection, significantly increasing the gluing surface.
We coat the mating surfaces with glue (any PVA-containing glue will do).


We connect the parts and clamp them with clamps until the glue dries completely. After removing the clamps, glue streaks remain on the corner - they do not need to be removed, because... Later they will fall off on their own.


The next step is to smooth the corner. It is carried out either with an angular cutter (45 degrees), or cylindrical cutter, but for this the router must have an angular base.
After cutting the corner, you get this trapezoidal profile. Now our task is to improve this corner. You can, of course, just paint it or stick on an edge, but the edge will not stick, and when painting you won’t be able to get a neat, flat surface.


The cut must be puttied. IN in this case Automotive putty with fiberglass is used (what was on hand), but it is better to use more homogeneous mixtures.
Degrease the surface to be putty. The solution for this should not contain water. Apply the composition with a spatula, rubbing it into the pores and leveling.


After final drying, we finally smooth the surface with a sanding block with fine sandpaper. Now let's paint it over. Cheap spray paint will work for this.


We glue to protect the surface of the cut edge masking tape and cover with paint 2-3 times. For additional durability and shine, we cover it with a layer of acrylic varnish.

