How to make furniture out of paper: with your own hands? Do-it-yourself doll furniture Origami paper furniture diagrams for children.
In any family with a little daughter, there is always a huge variety of dolls. And loving parents try in every way to please their children, acquiring more and more new toys. But people are increasingly asking the question: “How can you make furniture for dolls with your own hands?” After all, she is so dear, and I really want to pamper the little princess. And in fact there is a way out! The main thing is the presence of imagination, the work of hands and the availability of material.
Furniture for dolls can be made from any available materials. It could be matchboxes newspaper tubes, cardboard, dish sponges, plywood, and many other materials that you will find use for. If you wish, you can even create entire doll cottages with your own hands, which will delight your children.
This article invites you to interesting master classes, which can help diversify the doll world and fully satisfy your child’s desires.
Master class on making soft chair for a doll with your own hands.
1 large dish sponge;
2 small dish sponges;
Textile;
Lace;
Cotton wool;
Scissors;
Threads;
Glue gun;
Needle.
Work process.
It is impossible to imagine a single doll without her own house, which also needs to be furnished. Since we already tried to make a chair, and it turned out to be quite simple. Now you can start creating a sofa. And don’t think that your child won’t need it to play! And if guests come to the doll, will they need to be seated somewhere? After all, a child’s imagination is very vast, so everything should be taken into account. possible options. Therefore, we invite you to consider the detailed master class on making a sofa for a doll with your own hands.
Tools and materials needed for work.
Oatmeal box;
Glue;
Scissors;
Viscose napkins;
Ruler;
Pencil.
Stationery knife.
Work process.
Chest of drawers from matchboxes.
Materials and tools necessary for work.
4 matchbox;
Accessories for making legs and handles;
Textile;
Braid;
Glue;
Paints.
Work process.
- First, let's paint all the boxes inside and outside with paint.
- After the paint has dried, the boxes will need to be glued together.
- Now you will need to wrap the chest of drawers with fabric and use glue to secure the fabric from below.
- We glue a beautiful braid on the sides.
- All that remains is to attach the legs and handles for the drawers. In this case, we will use fittings. We will need four barrel beads and four regular round beads. We put them on glue. And let it dry.
- Now you can use it. Dolls can hide their things or miniature dishes here. I think the child is definitely will find application this wonderful chest of drawers.
Monster High dolls are very popular among children these days. They not only have unusual look, but also the same furniture, different from the standard accessories. Therefore, in this article we will pay attention to creating a wardrobe for a Monster High doll. So, welcome to the master class on making this element.
Wardrobe for a Monster High doll.
Materials and tools necessary for work.
Cardboard;
Corrugated cardboard;
Scissors;
Scotch;
Textile;
Glue;
Ruler;
Pencil;
Work process.
In fact, furniture for dolls is very important in a child’s life. After all, it provides an opportunity not just to play with dolls, but to conduct real housekeeping, albeit a doll-like one. The child teaches his pet how to put things in order in a miniature room, and naturally these skills are deposited in her own cute little head. After all, a little girl is a good housewife in the future, who learns by playing with dolls. After all, the dolls are also friends with each other, go to visit, cook, decorate their premises, while developing a girl’s sense of taste and responsibility. Therefore, if you love your children, then try to please them. You don’t need to think that the desire to buy some new toy or furniture for a doll’s house is just fun. No! Play helps a child develop. Therefore, make a good contribution to the positive development of your children.
There is probably no girl in the world who would not dream of having toy house for dolls with furniture. A real set, of course, won’t fit in it, but it’s easy to make paper figures yourself. Our detailed master class, after studying which you can easily assemble origami furniture.

To work, we will need a square sheet of paper (white or colored). When choosing a size, be guided by the required dimensions of the future chair.  Scheme:

To learn how to make an origami chair, we suggest using a video tutorial. Follow step by step instructions MK and the entire manufacturing process will take you no more than 10 minutes.
Video: Master classes on creating an origami chair
Forming an origami table
Origami table – simple paper craft, a necessary thing in any home, even though it is a toy. It will make a wonderful set with chairs. The work will not take you much time, and the result will certainly please you.
Assembly diagram for beginner craftsmen: 
Video: Lesson on creating an origami table
Origami cabinet
We suggest you make a cabinet with drawers - a craft for storing small accessories. Children put dolls' clothes in it.
 To work, you will need 2 square sheets of paper (20*20 cm), which must be folded sequentially, as in the video instructions.
Video: Master class on assembling an origami cabinet
Origami bed
The bed is the main subject home interior, we will try to make this thing out of paper. The assembly process is simple, so both children and adults can master folding skills. To work you will need a square piece of paper medium density(20*20 cm). If desired, take other sizes.
Template diagram:  Step by step description:
- Fold the sheet in half, different sides(crosswise) and mark the center.
- We bend the side edges towards the center, 1/3.
- Then fold it again to form a rectangle.
- We lower the side parts to the fold line and open the pockets, turning the corners along the contours.
- We bend the corners away from ourselves - we make legs.
- We get a wonderful bed.

Video: MK for creating an origami bed
If difficulties arise during the folding process or some points are unclear to you, then look at the hint from an experienced craftsman.
Origami sofa
It's hard to imagine a living room without a sofa. For a guest, this is a great place to sit down, and for the owner, it’s a great place to lie down and relax after work. Let's make a sofa out of paper using the origami technique, as in the photo:  Scheme:
Step by step instructions:
- Fold the sheet in half (twice) and unfold it. Get a cross-shaped fold.
- Fold 1/6 of the page along the dotted line (see photo).
- We wrap the sheet along the fold opposite this strip.
- We wrap the side parts of the resulting rectangle, 1/3 on each side.
- Bend the corners forward (in the places indicated by the white arrow). Back side We don’t touch the leaf.
- Fold the opened white rectangles in half.
- Raise the part of the craft marked with a dotted line.
- Bend half of the raised part down.
- Bend the sides forward.
- Pull the front part (back) forward.
- We get a paper sofa.
Video: Lesson on how to form an origami sofa
Schemes for folding furniture using origami technique


Miniature doll furniture in children's toy stores costs a lot of money, but for games you need so much - a table, chairs, a sofa or bed, a wardrobe, bedside tables. Interior items can be made with your own hands, having simple materials on hand. Unlike store-bought furniture, homemade furniture can be made in a variety of ways. different forms and flowers and decorate as you wish.
No matter how much big house for a doll, he needs an interior. After all, your daughter’s doll should receive guests and relax somewhere. Make furniture for dollhouse It’s very simple, and the costs for such work are minimal.
To create future furniture you will need:
- Empty matchboxes;
- Cardboard boxes;
- Boxes for tea, cosmetics;
- Plastic bottles;
- Tin lids for beer or soda;
- Pieces of fabric and thread;
- Paints;
- Buttons, rivets, beads.
First of all, you need to decide what pieces of furniture you want to have in your home. Do you need a bed, what size will the closet be, and where will the table and chairs be? Based on the general dimensions of the doll’s house, you can roughly figure out the parameters of the furniture and select the necessary materials.
Furniture can be made both functional and simply decorative.
Matchboxes make ideal drawers for a chest of drawers or nightstand. You can cover a sofa with fabric and cotton wool - it will look just like a real one!
So that the wardrobe and other pieces of furniture are in harmony with each other and fit into the general view doll house, you can paste them with colored paper or paint them with paints.
Using your imagination, you can create the most unimaginable furniture and decorate it to your taste.
Paper furniture for a dollhouse: diagrams and detailed instructions
Before you start working on homemade furniture, you need to prepare drawings according to which the interior items will be assembled. In order for the furniture to turn out correctly when gluing, you need to draw three-dimensional figure in parts with dimensions.

Diagrams of the main pieces of furniture:
- Table. It is needed even in doll house. If you want to do rectangular table, you will need a piece of thick cardboard (or box) measuring 12x10 cm. To make table legs, you can use cocktail tubes, which should be wrapped in paper and glued to the tabletop. You can also make square legs. To do this, you need to cut 16 strips 1 cm wide and 7 cm long and glue 4 pieces together. Glue the finished legs at the corners to the table.
- For round table You will need a piece of cardboard with a diameter of 8 cm. For the legs, you need to cut 4 strips of 17x2 cm, glue 2 each. Place the legs under the table in a semicircle crosswise and glue them to the tabletop.
- Chairs. The doll chair consists of two parts - a back with rear legs and the seat itself with front legs. The back of the chair can be curved a little, made openwork - as your child decides. The seat of the chair should be trapezoidal, like a real chair. Glue the finished parts together.
- Sofa. To create a sofa you will need 2 side parts 10x6 cm, a back 18x7 cm. For the base of the sofa you need to make something like a box - on a piece of cardboard 18x9.6 cm, retreat 2 cm on each side and make bends. Seal with thin tape to prevent the box from opening. Glue the side parts on the sides, place the back in the center.
Finished furniture can be covered with colored paper or self-adhesive film. The sofa can also be covered with thin felt, so it will look more like a real one.
What furniture templates are needed for dolls?
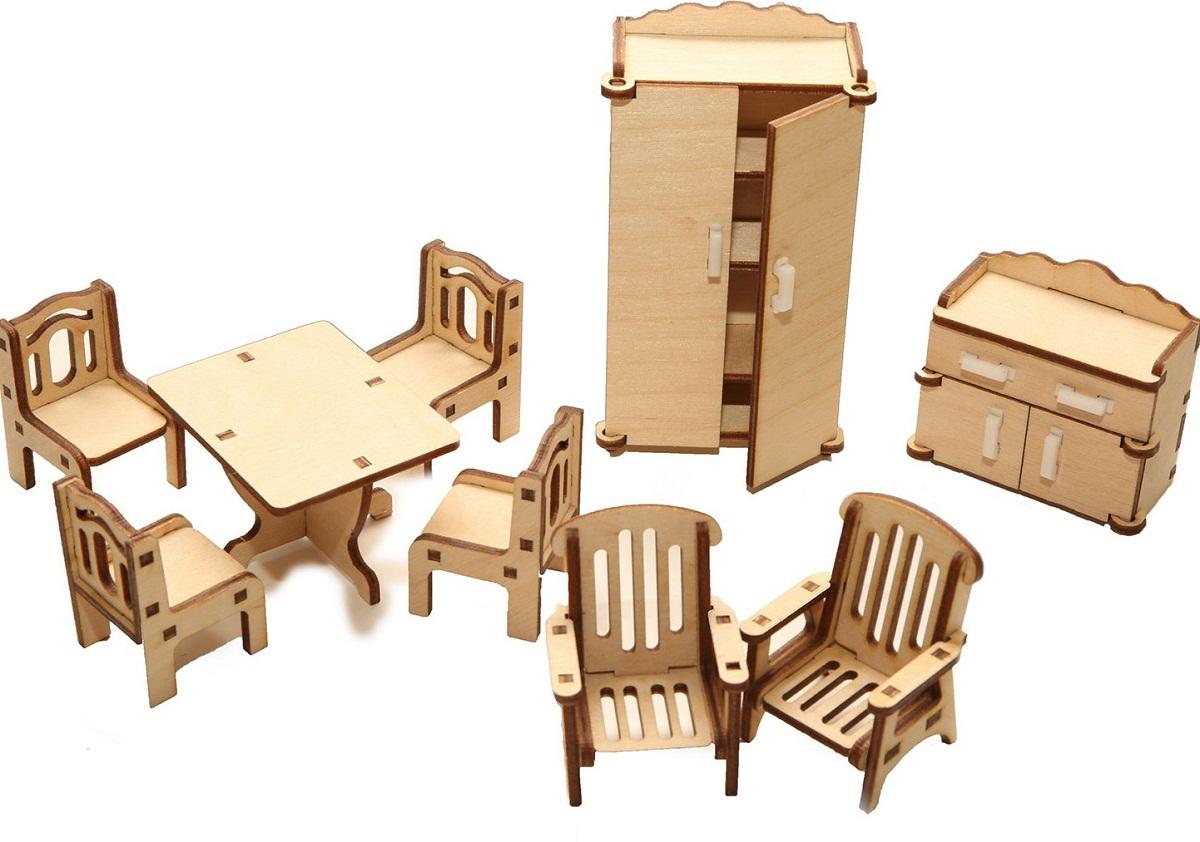
The topic of miniature doll furniture is now very relevant for parents who have daughters growing up. In addition to a doll, girls want to have a house, and it should have furniture. If you don’t want to save money on the doll, then you can make both the housing and its contents with your own hands.
In order to correctly assemble doll furniture, you need drawings with dimensions according to which you need to make templates. The cut-out printouts will be attached to the material from which the toy furniture will be made - cardboard, plywood, wood.

Templates can come in different shapes and sizes. For example, a table needs a rectangular or circle template. The legs will be attached to the finished base.
For a bed you need 7 different quadrangles - the base of the crib, the headboard, the foot and the side slats. In each plank you need to make cuts into which other parts of the bed will then be inserted. This doll bed does not need to be held together with glue; it will stick well anyway.
The bed can be made with a piece of an old towel or scraps of fabric.
Paper furniture for dolls: cut out according to templates
Many girls love to play with paper dolls, which are cut out according to a template. Now in any bookstore or stationery store you can find a whole set of beautiful little paper dolls - Snow White, The Little Mermaid, Barbie, Monster High and many other modern cartoon characters. These dolls often come with pictures, a set of clothes and a dollhouse with furniture. All that is required of you is to cut out the templates, make bends in in the right places and glue the house and furniture together.

If the set does not include a certain piece of furniture, you can find it on the Internet, download it and print it on a printer.
When a baby plays with dolls, builds a house, and arranges furniture, she learns to be neat, develops imagination and develops creatively.
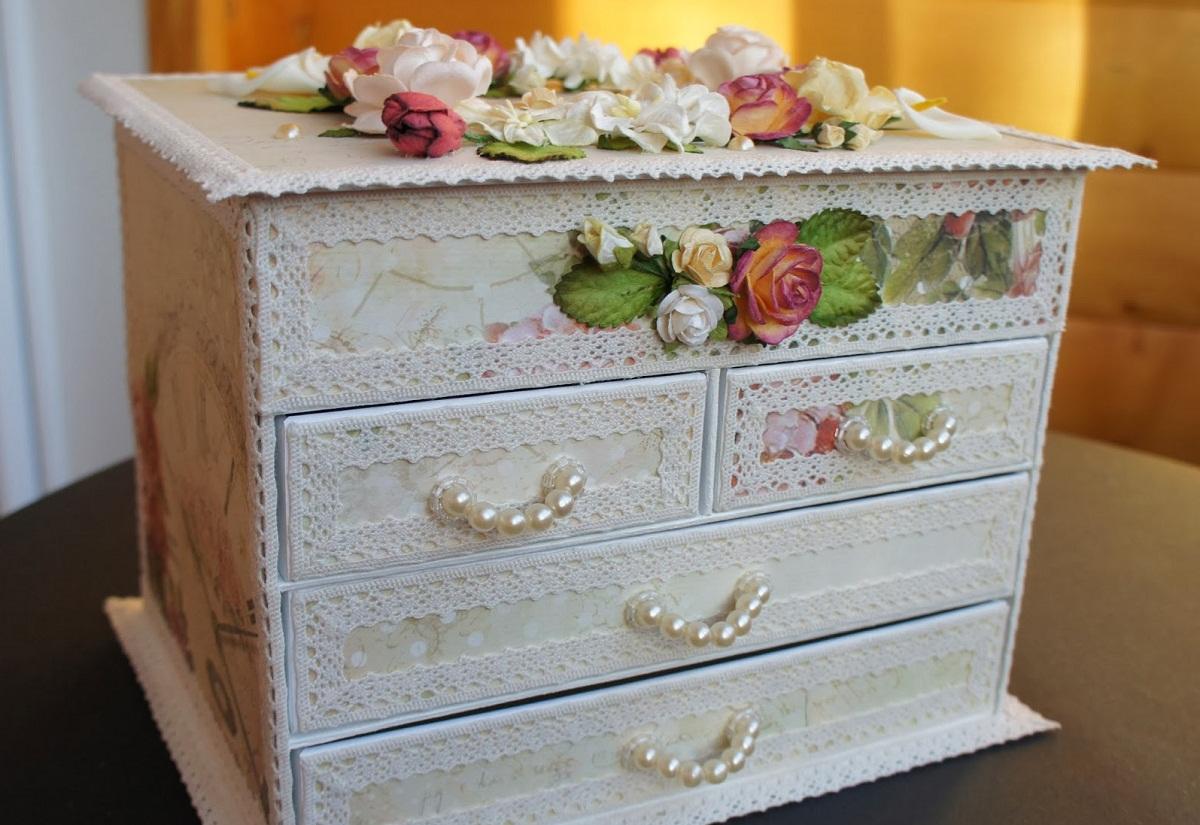
Doll furniture made of cardboard: making a chest of drawers for Barbie
Matchboxes will make an excellent chest of drawers for a doll. You can store beads, doll jewelry or rubber bands in a mini chest of drawers. To work, we will need three empty matchboxes (or other small boxes), PVA glue, a piece of cardboard, and beads for pens.
Work progress step by step:
- Glue the boxes together without the inner parts.
- Cover the finished frame with cardboard to form a durable quadrangle. We do not seal the front part of the chest of drawers where the drawers will be inserted!
- Cover the front of the drawer with colored paper and glue a bead onto the glue; by pulling it, you can open the drawer.
- Cover the entire chest of drawers with colored paper. Insert drawers into the chest of drawers.
- The legs of a toy chest of drawers can be made from shaped pushpins.
Your daughter will really like this chest of drawers. It is not difficult to make and, if desired, you can create many stylish chests of drawers for a dollhouse.
Miniature wardrobe: how to make furniture for a dollhouse
Your daughter's little friend also needs a closet to hide hers. beautiful dresses. It's easy and interesting to do. This is where your imagination can run wild! A doll's wardrobe will definitely be unique, because you come up with all the “stuffing” yourself - the number of shelves, drawers, their location.
To make a closet you need shoe box, wallpaper or colored paper, a piece of foil and a piece of wire.

Work progress:
- From the cover cardboard box trim the bends to width.
- Cut the lids lengthwise. Cover the halves with colored paper. These are the future cabinet doors.
- On inner side Glue a piece of foil to one of the doors to imitate a mirror.
- Glue the halves onto the box. You need to glue them on outside boxes so they can open.
- Make shelves out of thick cardboard inside the cabinet as you wish.
- Make boxes from matchboxes.
- The wooden stick will serve as a pipe for the hangers. To do this, you need to make small indentations in the walls of the box and insert a stick coated with glue into it.
- Cover the entire closet with colored paper and make appliqués.
The doll closet is ready. Now all that remains is to fill it with doll clothes and shoes.
DIY furniture for a dollhouse (video)
Furniture for dolls can be made from all available materials; this will not only save your budget, but also give room for imagination. Don't forget that finished furniture can be decorated. Beads, tulle scraps or lace are suitable for this.
Every girl dreams of a house for her dolls. Now there are a huge number of them on store shelves. But such pleasure is not cheap, and the assortment is the same.
We offer to please your child with a handmade gift. This will allow you not only to save money, but also to make the house one of a kind.

In addition, this will be a wonderful pastime for the whole family during leisure time.

There are many special training programs for making doll houses with your own hands. You can use a wide variety of building materials: boards, plywood, chipboard, laminate, cardboard, etc.

As a rule, the front wall on dollhouses is not made, or it is made removable or opening so that your child can put dolls there, change the decor in the rooms, and tidy up.

Choose the material - and we will teach you how to make a dollhouse with your own hands!
Dollhouses made of plywood and laminate
These are the most popular materials. Distinctive feature from “brothers” - stability and longevity. It is easy to decorate both outside and inside. But making such a house requires male strength.

If you try, such a house will be indistinguishable from the store version.

Diagrams and drawings can be found on the Internet, but if you have technical inclinations, you can try to draw it yourself. There are also photos of finished dollhouses on the Internet.

To make a house we will need:

- thicker plywood (from 7 mm);
- electric jigsaw;
- glue;
- self-adhesive floor;
- pieces of wallpaper;
- tape measure or ruler;
- pen;
- scheme;
- a little imagination and patience.

Let’s get to work, having first decided on the dimensions of the dollhouse (they will depend on the dimensions of the “tenants”):

- we cut out the walls of the future house from plywood or laminate;
- we cut out windows and doors in them;
- we glue the walls together; it is also fashionable to use construction nails or staples;
- we make a roof, it can be either flat or sloping. To give a real look you can use corrugated cardboard and then paint it;
- we fasten the resulting structure to the foundation - a sheet larger than the house itself. On an unused area you can make flower beds, sidewalks, a platform, and a parking lot;
- we glue wallpaper and lay floors;
- furnish the house with furniture;
- you can also add curtains made from pieces of fabric, bedspreads, rugs, etc.
Dollhouses made of plasterboard
Many household parents, after renovations, leave the remaining building materials to gather dust on the balcony in the hope that they will come in handy someday. Their time has come! Drywall can make an excellent dollhouse.

The good thing about a house made from this material is that it is very light and easy to assemble. But, at the same time, it will need to be handled more carefully - it will be quite fragile.

The layout of such a house is no different from a product made of plywood or laminate. But assembling such a house is much easier, and there are many more layout options - with the help of partitions you can divide the rooms between each other.

Foam houses
To assemble such a house we will need:

Pay attention!

- sheet foam;
- glue;
- canape sticks;
- rulers;
- bamboo sticks;
- cardboard;
- pieces of wallpaper and fabric;
- dye;
- sponge for washing dishes;

Pieces of plinth for the ceiling
Let's get started:

- make a diagram;
- cut out walls from foam plastic;
- we make doors and windows in them;
- we connect the walls using toothpicks, then glue the walls together;
- to make the roof stronger, we first install bamboo sticks on top of the walls, and only then glue the roof to the walls;
- we make a ladder from wooden rulers or the same polystyrene foam;
- You can also use toothpicks for railings;
- in addition, if desired, you can also make a balcony, massandra or even a terrace from polystyrene foam;
- painting the house;
- We decorate the house inside as in the previous description.
Houses made from bookshelves and cabinets
House from old furniture it won’t be difficult to do - after all, the walls are already ready.

All that remains is to cut windows and doors in them, and think about what to make the roof out of, if necessary.

It can also be made from the materials described above. We arrange the furniture, let the cat in - happy housewarming!

Cardboard houses
For this design we will need:
Pay attention!


- cardboard;
- house detail templates;
- scissors and stationery knife;
- gouache or watercolor paints.

We are building a house:

- If you have a large piece of cardboard, then do not cut it, but bend it in places according to the diagram, and then glue its component parts.
- install interior partitions made of cardboard, they will serve not only to delimit space, but also to fasten the frame structure.
- Let's get started with renovations and furnishings!

House made of boxes
The simplest and quick option. It is enough to select the required number of boxes (depending on the number of rooms), fasten them together using a stapler, after placing them on their sides so that the top of the box serves as an exit.
This will allow you to open the front wall at the right time to rearrange, tidy up, etc.

We cut out windows and doors. Let's start designing the frame.

Pay attention!

House made from paper folders
It requires four folders. We cover them from the inside with wallpaper or printed sheets with decorative items and household appliances in a plane.

We cut out windows in the folders, install the folders vertically, and fasten them with the help of clips that are included with each folder. Your house is ready.

Fabric house
This option is good because it takes up virtually no space and can even be folded up.

Using a thick piece of fabric we make the back wall - it will serve as the foundation. We sew a rectangular base for the house. We make pockets to which the cardboard for the floors will then be attached. We attach ribbons to both corners of the pockets.

All that remains is to sew the pockets with a rectangular base on one edge so that the ribbons end up with reverse side. Floors using tapes and sewing the tapes to the back wall. Let's decorate the house and start playing!

You can make houses from other materials - the main thing is to show your imagination! A wonderful gift it will also be suitable for a boy - after all, you can build a garage, parking lot, etc.
Photo of a dollhouse with your own hands


