Word templates for cutting out of plywood. What can be made from plywood with a jigsaw
All photos from the article
Plywood is not only a unique building material, but also an excellent basis for making various crafts. Moreover, for this you will need a minimum of tools - a manual or electric jigsaw, the plywood sheet itself, and the result largely depends on human imagination.
Scope and advantages of plywood sheets
There are many options for using this material; in general, we can distinguish the following methods of using plywood:
- floor covering, and plywood can be used both for leveling and for insulating the floor;
- wall cladding - unlike drywall, plywood sheets are much stronger, although they weigh more, and are susceptible to moisture;
- arrangement of formwork when concreting foundations or making concrete blocks;
- arrangement of a solid base for soft roofing material, for example, under bitumen shingles;

- making various crafts, ranging from simple figurines to complex mechanisms, in which even the moving parts are made of plywood. In general, in the question of what can be made from plywood with a hand jigsaw, the only limit is a person’s imagination and perseverance, so the scope for creativity is simply limitless;
- Full-fledged furniture can also be made from plywood, and its strength is in no way inferior to ordinary wood.
This material also has a number of advantages:
- even thin material has outstanding strength, due to the layered structure of the material. consists of several layers of veneer, and when gluing, the fibers of each layer are located at an angle to the previous one, so that such a sheet works just fine when bending;

- due to the use of adhesive mixtures when gluing layers of veneer, plywood is not afraid of moisture;
Pay attention! For use inside the house, you should choose sheets marked FC, this means that urea glue was used when gluing, which does not contain phenolic compounds that are dangerous to human health.
- You can buy a large sheet of plywood for about 500-700 rubles; it will be enough for several dozen complex crafts. So the price can also be considered an advantage of this material.
Rules for working with a jigsaw
When making any craft, you can’t do without cutting plywood with a jigsaw (manual or electric).
There are several rules in this matter that should be followed in any case:
- The plywood sheet itself is quite flexible, so if you try to saw it without a rigid backing, it will bend and it will be difficult to adhere to the drawing line. The stand can be made from an ordinary thick board with a hole in the center for a jigsaw file; it is attached to the work table with an ordinary clamp;

Pay attention! It is important to correctly install the file into the jigsaw before starting work. The direction of the teeth should be as shown in the figure.
- when cutting plywood with a jigsaw, the tool itself is held perpendicular to the sheet, there is no need to press hard on it;
- when working, you should turn not the jigsaw, but the plywood sheet itself;
- It is unlikely that when cutting figured shapes it will be possible to do without sharp turns and sharp corners. In order to obtain a sharp turn or an acute angle, the instructions require moving the jigsaw up and down in one place, gradually turning the plywood sheet so that a small hole is formed in it in which the file will turn freely. After this, you can cut out the desired angle;
- You may also need to cut out blind holes that cannot be approached from the edge. In this case, you can simply drill a hole in it, insert a file into it, and only then secure it to the jigsaw frame. After this, you can cut a hole of any shape.
It is not necessary to make plywood products with a jigsaw using hand tools; the same quality can be achieved using power tools.
Examples of DIY plywood products
It is physically impossible to consider all the options for plywood crafts in one article. But it’s still worth stopping at a few interesting options.
The simplest plywood crafts
As a test, you can try to make a couple of simple crafts consisting of only one element. There are many options, for example, you can try to cut out the outline of an animal from plywood and then paint it in the desired colors.
This level of complexity is suitable even for children; the work will be performed in the following sequence:
- first, the desired picture is simply printed on plain paper (or drawn by hand);
- then you need to transfer the outline of the image onto the plywood. You can do this using carbon paper or simply cut out the image and paste it onto a wooden base;

- then we simply carefully cut out along the contour; even a preschool child can make such plywood products with his own hands using a jigsaw;
- After cutting, all that remains is to sand the figure and paint it. In order for the figurine to look bright, it is advisable to use a wood primer and only then paint it.
You can complicate the task a little and try to make a figurine consisting of several elements, for example, a Christmas tree or a snowman. A plywood Christmas tree with a jigsaw will consist of 2 parts connected like a tongue and groove.

To make it, you just need to trace 2 contours of the future Christmas tree on plywood and provide grooves in both elements. In one part, the cutout is made from the top, and in the second - from the bottom, the size of the cutout is up to the middle of the height of the future Christmas tree.
An electric jigsaw is used by home craftsmen to create beautiful products made of plywood and wood. Such crafts are used for a variety of purposes. They can be decorative or serve as household items. Every home craftsman who is interested in this activity should know the features of working with the tool.
You should learn more about how to use the “miracle jigsaw” and what you can cut with it.

Subtleties of working with a jigsaw
A jigsaw is a universal device that is used for cutting figured products from various materials. All you need is to choose the right canvas. It is important to understand how to cut out shapes complex shapes. Many novice craftsmen need to figure out how bevels on boards and various components of crafts are made. Electric jigsaws work best when cutting wood coniferous species. However, the thickness of the elements from which cutting is performed should not exceed 3.8 cm.

Blades that will be inserted into a jigsaw quite often bend and leave beveled edges. A straight cut is usually achieved with a well-sharpened blade. However, you should not put too much pressure on the tool while working.

You should first start the saw at the highest speed, and then select the blade angle. This will result in fewer chips. In materials that are highly brittle, it is necessary to drill holes. This will allow you to saw off the workpiece without unnecessary risk. As a result, there is no chipping of the part.

To ensure fast cutting, coarse blades should be used. However, it should be taken into account that when choosing such consumables, it will be more difficult to sand them later. Blades for electric jigsaws are made in such a way that the cut is made when the blade moves upward.
Choosing the Right Blade
Choosing a blade for an electric jigsaw is a major consideration when cutting wood and plywood. Often a jigsaw lies idle in a home craftsman's household. However, when you need to make a complex pattern, this tool is more necessary than ever.
Quite often, an electric jigsaw is used as a tool for cutting a hole in a countertop or when installing a kitchen sink. This tool is also used for cutting metal. When using other saws, it is often impossible to complete the assigned tasks. A jigsaw is a universal device. Both beginners and experienced people can work with it home handyman. As a result, you can get excellent results using different materials- plastic, wood, plywood.

How to use the tool
A jigsaw is used for a variety of tasks. Its main function is to cut curved shapes into wooden products. Getting smooth curves using this tool is quite easy. The base of the tool should be kept level on the workpiece. When the preparation is completed, you can begin the main work. Then the engine is turned on and the device is slowly moved along a pre-marked line, at a distance of 2 mm from it. Fine sanding is done later.

The saw should be moved at such a pace that the blade can easily cut through the material without any deflection. A jigsaw works great when cutting boards crosswise. A stop must be used if a perfect cut is required. Bevel cuts are fairly easy to make using a jigsaw. Before work, it is necessary to firmly secure the workpiece.
If an oblique or vertical cut is performed, the distance between the blade and the fence is set to the same as on circular table. When it is necessary to make a precise and long cut, it is difficult to work with a jigsaw. In this case, first use circular saw. The final cutting of the element is performed with a jigsaw. It must be pressed firmly against inside marked line.

Where to start
First is well organized workplace. Fulfilling this condition is especially important for high-quality execution cutting If the space is arranged correctly, work will be convenient and comfortable. This condition is necessary to create a quality product.
The thrust structure is a special machine. People call it “swallowtail”. This table is made from boards rectangular shape. It has a wedge-shaped incision that goes into work area. Dovetail attached to the edge of the table.

Job electric jigsaw carried out standing or sitting. The workpiece should be located at a distance of 40 cm from the eyes. It is necessary that the lighting lamp be installed in front of the master. It is placed at an angle to the surface.
Tool preparation
The saw blade in a jigsaw must be fixed in a strictly vertical position. The teeth should point down. Before work, you need to stretch the fabric well. The degree of tension must be adjusted by compressing the frame. The device must be rested against the edge of the table. Then you should tighten the lambs with pliers. When straightening the frame, the canvas will stretch.

To cut out parts with a jigsaw small size, or shapes with sharp contours, you need to choose small files. This requires using fabrics with a large number of patterns per inch. When using them, the jigsaw does not jam when making turns. The cut is created neat and thin. If large-sized plywood products are made, it is necessary to use blades with large teeth.

How to cut with a jigsaw
To obtain an accurate cut, a number of conditions must be met:
- The hand holding the jigsaw should only move vertically.
- All movements must be made as smoothly as possible, without jerking. In addition, they must be performed with maximum amplitude. This is necessary to use the entire canvas.
- With the second hand, the workpiece turns smoothly during operation.
- Do not put too much pressure on the workpiece with the saw. No lateral pressure on the blade is allowed.
- Artistic sawing is carried out only when the file moves from top to bottom. For this reason, the reverse movement must be performed without pressure.

When working with a hand jigsaw, it must not be guided along the marked line. The canvas should be drawn along the inside of the contour. This is due to the presence of a kerf after sawing. After completing the work, one of the clamps should be loosened. The frame of the device should not lose its elasticity.
Jewelry box
You can make a beautiful and spacious jewelry box for Valentine's Day or International Women's Day. To complete such a craft, you will need to use an accurate drawing. The work is divided into several stages.

Preparing the work area
Before you start cutting out the parts of the box, you should prepare your workspace. A special table is installed for this purpose. The craft will be created on it. In this case, the following rules are observed:
- There should be no unnecessary items at the table while working.
- The cutting device should always be at hand. A specific place is reserved for it.
- Workbench. It is placed in a ventilated area. The room should be light and spacious.

However, it is not always possible to install a table for cutting with a jigsaw in in the right place. TO ordinary apartment The workbench is usually placed on the balcony if it is insulated. At the same time, you can work on crafts in any weather.
Plywood selection
For the box you need to use a plywood sheet. When choosing a workpiece, you should pay attention to defects that often appear - cracks or knots. The workpiece is selected with a thickness indicated in the diagram. To transfer the drawing to the material, you should:
- Sand the workpiece with sandpaper. You should start with coarse-grained material. This processing ends sandpaper with small grains.
- The surface must be level. To do this, you need to fix the sandpaper in the sanding device. If you don't have one, you can take a small block and wrap it in sandpaper.
- Grinding is carried out along the layers of wood.
- The workpiece is ground until its surface becomes as smooth as possible.

After such preparation, you should transfer the craft template onto it.
Transferring the template to a plywood sheet
Before starting sawing, you should transfer the prepared drawing to a plywood blank. First you will have to print the drawing on paper. To transfer, you must have tracing paper and a pen. First, the template is attached to the workpiece with tape. Having a blank in front of you, you should think about how to cut out the different elements of the box, saving the available material as much as possible.

Sawing out the box
When cutting, you need to adhere to some rules:
- The jigsaw should be positioned perpendicular to the product.
- It is necessary to ensure that all movements are performed as smoothly as possible. You should not rush while sawing - this way you can make a mistake and ruin a piece of material.
- It is necessary to use a sawing table.
- First you need to cut out the internal elements. Only after this they begin cutting the contour.

When leaving the cutting line, it is necessary to correct the line with a needle file while assembling the product.
Advice! During work, your hands will get tired. In this case, productivity drops significantly. Fingers and eyes get seriously tired. All this can lead to hand injuries. This is why it is necessary to take breaks from work.
Assembling the box
Before assembly, you must familiarize yourself with the product drawing. Combining the parts of a jewelry box does not require fine workmanship. Before gluing different elements, you need to make sure that they can be assembled together without problems. After several assemblies of the product without any difficulties, you should begin gluing the parts. Typically, a PVA composition is used for this purpose. During operation, it is necessary to eliminate any glue leaks.

Assembling a steam locomotive model
When the material is prepared and the drawing is printed, you should begin the process of transferring the diagram to the workpiece. In this case, it is necessary to take into account some operating rules. Many home craftsmen tend to transfer a drawing onto plywood using only a copy and a pencil. However, you can also use the “Black Ribbon”. When choosing this tool, the drawing is glued to the workpiece. Then the diagram is washed off the plywood with water, leaving only the marking lines.
Then you can make holes in the parts of the future locomotive. The parts of the locomotive contain parts of grooves cut out from the inside. To make such elements, holes should be made in them hand drill or an awl. The holes must be at least 1 mm in diameter. To avoid damaging the table surface when creating holes, you should place a board under the workpiece.

Now you can cut out the parts. You should not rush when cutting. The basic rule is to hold the jigsaw at right angles to the workpiece. All elements must be performed smoothly, avoiding unevenness.
IN lately Various inscriptions and individual letters made of wood or plywood are becoming very popular. They are used in a wide variety of situations. You've probably seen similar products in some magazines dedicated to interior design, in gift and accessory stores, in wedding boutiques, in offices offering organization of holidays. Often such decorations appear in television projects about renovation and interior design. In addition, you may have seen similar signs in stores.
What are these letters and inscriptions?
Essentially, it’s just plywood from which words or individual letters are cut out using some tool (more on that later in the article), painted in a certain color and decorated various decor(paper, rhinestones, threads, etc.). But, more often than not, it is just an inscription (or letter) without any additional decorations.
These products may have different fastening formats. In order to hang them on the wall, you need to provide special hooks on the back. To be placed on a flat surface - on a table or on a shelf - they are mounted on a stand made of the same plywood or glass. In addition, they are often used without any additional fastenings. They just bet on flat surface, and the inscriptions or letters stand due to the thickness. This is true for plywood products with a thickness of 12 mm or more.
Who needs such letters and words and why?
The question is correct and logical. After all, some readers might still not understand what kind of business this is. Who needs all these letters made of some kind of plywood? Where to use them? Why buy something like this at all? And who are these people - the buyers of “plywood words”? Let's look at these seven questions in order.
Where can all these words and letters made from plywood be used? Here are a few illustrative examples. And then you can figure it out for yourself.
Inscriptions for interior decoration. Despite the apparent simplicity of these products, they look simply amazing in real life. Especially if they are painted with high-quality expensive paint. Such inscriptions can be placed on a rack, on bookshelf, on the fireplace, on the desktop. They can decorate the walls of a house or apartment, giving the interior an unusual, modern and very stylish look.
Another area of application is creating a background for photo shoots. Now you can take pictures not just at home or in the park, but in a specially equipped studio. Just don’t confuse them with traditional komorkas, where they take passport photos in 5 minutes. It's about modern studios, where there is not only the different classes and destinations, but also various decorations to create a beautiful background. Words (and other figures) made of plywood are actively used by photographers to create thematic backgrounds for photo shoots.
Need more examples? Fine. Weddings, birthdays, anniversaries, corporate events. Everywhere there are letters and words made from plywood sheets, written in fashionable fonts and painted in stylish colors, will be a wonderful holiday decoration. No worse than the already pretty boring balloons and flowers. And for the birthday boy, you can generally prepare a gift by cutting out his name and age, for example, from plywood. Such crafts are especially loved by young mothers who are happy to buy these paraphernalia to celebrate their child’s birthday.
You can also make stylish inscriptions from plywood for restaurants, bars, cafes, shops, offices, etc. If you look at the world with your eyes wide open, you can understand that inscriptions and letters made of wood can be used almost anywhere where you want to add style, design and beauty.
How to organize a home business for making inscriptions from plywood?
This business has three components - equipment and raw materials, the manufacturing process and the search for distribution channels. That's all. It seems that everything is simple. Actually... it's simple.
Very often, such a business is organized by those people who are faced with the purchase of such accessories. When you need one such inscription, then, no problem, we order and receive it. But when a lot of letters or inscriptions are needed, many begin to think about the high cost of these products. And they are really not cheap.
Potential buyers begin to study the issue and come to the conclusion that it is more profitable (and more interesting) to make such inscriptions themselves. Right at home. Moreover, you can get by with simple equipment, and the raw materials are quite inexpensive. So, step by step, buyers turn into entrepreneurs.
Let's move on to organizing a business. Let's start with equipment and raw materials.
There is only one raw material in this matter - plywood. True, sheets of different thicknesses will be needed for different purposes. Just don't use it too much thin plywood(less than 6 mm) - it can quickly lose its shape, and therefore its presentation. In addition to plywood, you will need paint. You can use different types, but many “experimenters” end up choosing acrylic. This paint applies better, dries faster, holds tighter and looks very, very presentable.

Plywood costs about 500 rubles per sheet of 1.5×1.5 m format. Paint - depending on the manufacturer - from 150 rubles per liter.
Equipment. Everything here is very interesting. Each master cuts letters from plywood in the way that seems more convenient to him. Or the one that at the moment enough money. Because the price range is from several hundred rubles to hundreds of thousands.
The simplest tool is a jigsaw. Regular hand jigsaw. Even with its help you can cut out the most bizarre shapes. Including letters and entire inscriptions. There are a lot of advantages - accuracy, ease of use, low cost. Such a tool is worth even the most high quality no more than 1000 rubles. And non-branded models can be purchased for 150-200 rubles. The same goes for consumables– files – they also cost 100 rubles for a whole set (expensive ones – the same price per piece).
Of the minuses hand jigsaw The following can be noted. Firstly, the ability to work only with small inscriptions. You won't be able to cut a large surface with a jigsaw. Because it will be simply impossible to crawl up. Secondly, not every hand jigsaw can easily handle plywood with a thickness of more than 10-12 mm. It will work, of course, but it will take a lot of time. And you won't need a single spare file. Thirdly, hand cutting with large volumes it is a very problematic task. Whatever one may say, it’s difficult to work with your hands. And it won't happen quickly.
Therefore, the second option is an electric jigsaw. Has almost all the benefits of a regular jigsaw, but significantly speeds up production process. In addition, it allows you to saw even very thick plywood - 30-40 mm. The disadvantage is the price. Good model(Bosh, Makita) will cost 4000-6000 rubles.
Another option is a jigsaw. There are two types. The first real machine, which is similar in size and appearance to a machine. Such units cost from 15,000 rubles or more. For those who want to save (both money and space in their home), there are also desktop jigsaw machines. They look like sewing machine. And in size, about the same. Prices start from 3000 rubles.
Well, the most expensive option is automated milling machine. Price tag – from 150,000 rubles and more. But it seriously saves time and performs cutting flawlessly. In addition, it can be used not only for plywood, but also for wood, glass, acrylic and even metal. All this opens up new prospects for business development.
In general, choose the option that suits you. A lot here depends on your financial capabilities, as well as on the type of home you have. Well, it is very problematic to place the machine within an ordinary apartment.
Now about the manufacturing process. It is clear that at the last stage the inscription is cut out with a jigsaw or on a machine, after which it is sanded and painted. But another question arises - where does this inscription even come from?
First you need to install any graphics program on your computer. Ideal option– Photoshop. Moreover, today it has become available. The license costs about $20 per month. Next, download various fonts. Of course, we are interested in beautiful designer fonts. Just make sure that they are free (this will avoid problems in the future). Or buy good quality fonts.
The further process is simple and clear. In the program we create an inscription of the required size and using the desired font. We add some elements that will become part of the composition. Be careful - the letters and all elements of the inscription must be a single whole. That is, all elements must have points of contact. Otherwise, it will be impossible to cut out a whole word.
Next, print out the resulting template. You may have to print it on several sheets if the writing is large and long. We take plywood, apply our template, after placing carbon paper. We secure everything so that the inscription does not move around on the plywood. And we transfer everything to a blank for the future inscription. We remove the stencil and carbon paper. All. The material is ready. All that remains is to cut and paint.
Now about the implementation process. Of course, at first no one knows about you. Therefore, your initial goal is to shine. Wherever possible. Make some cool signs. Take good pictures. It might be worth inviting a great photographer. Create a portfolio. And then – leave your portfolio on message boards, on thematic sites and forums, on special platforms, such as the “Masters Fair”. Take a tour of gift shops, wedding salons, and offices that organize holidays. Offer them your products. After some time, the first orders will arrive. And then word of mouth will work. This will provide you with constant orders. And a stable income. Good luck!
Any building materials adjusted to the required dimensions by cutting. And plywood is no exception. Sawing plywood can be done manually or using special tools. Cutting plywood involves not only using it in construction, but also as a decorative element. Lace lattices, boxes, stands and other variety of decorative items are created using artistic cutting plywood sheet.
Construction cutting of plywood
How to cut plywood on a construction site and how to do it without chipping? Most often in living conditions To do this, use a knife, jigsaw, or circular saw.
Some rules for working with plywood sheets:
- thin sheet, the thickness of which does not exceed 2 mm, can be cut with a mounting knife
- sheets from 3 to 6 mm can be cut with a jigsaw
- if the sheet thickness is more than 6 mm, you will need a circular saw
- remember that coniferous varieties timber products have a viscous structure due to the presence of resins, which is why such material dulls cutting edge tool
- You need to work with plywood along the grain. If it is necessary to cut across the fibers of the outer layer, you must first make weakening cuts with a knife, and then work with a jigsaw
- if your work involves screwing in self-tapping screws, then before doing this you need to drill a hole of the appropriate size.
Figure cutting from plywood
Shaped cutting of plywood is a fairly popular activity among decorators and furniture makers. Using a plywood sheet and special tools, you can make not just a craft, but a real work of art.
The choice of tool for this procedure depends on the complexity of the pattern and the thickness of the plywood sheet. If the bend radius does not exceed 1 cm, then you can use a hand jigsaw. Round hole done with a drill. When the bending radius exceeds 3 cm, you should use an electric jigsaw. Which saw is suitable for plywood? Remember that the finer the teeth of the saw, the smoother and more complete the cut edges will be. For this purpose, for very small and complex figures it is better to buy a metal canvas.
It is better to apply the sketch on the back side of the sheet. In this case, if the chips rise, it will not be noticeable. At the same time, you should not rush, because the quality of the future product depends on the drawing. Drawings for cutting out plywood are available in large quantities on the Internet. Here you can find everything: from children's crafts to the most complex patterns.
You can create a craft from plywood using the following tools:
- hand jigsaw
- laser machine
- electric jigsaw
- CNC milling machine.
Sawing with a hand jigsaw
For this work you will need the following tools:
- saw for plywood. You may need several files of different sizes
- pencil and ruler.
Start with simple drawing. If you have a 5 in drawing, you can apply the pattern to the sheet with a simple pencil. If you are not very good at drawing, use carbon paper to transfer the pattern. For the first time, animal figures, flowers and other light designs are perfect.
Before starting cutting, it is necessary to secure the plywood sheet with a special machine to prevent the occurrence of defects, for example, in the event of the sheet shifting. However, if such a machine is not available, try to hold the sheet as tightly as possible. During cutting, only the jigsaw moves.
If you need to create through elements, you should use an awl. The file must be held strictly perpendicular to the sheet. At the end of cutting, it is necessary to sand the edges of the product with sandpaper.
Laser cutting of plywood
A laser machine burns a pattern onto the surface of a plywood sheet with a beam.
The main advantages include:
- the quality of the cut is the highest, the thickness is the smallest. Such indicators are quite difficult to achieve with other types of equipment.
- saving time and effort. No need to handle defects that occur when working with a manual or electric jigsaw
- high precision. All parts will be the same size, and the design may be the most complex.
 From negative qualities let's highlight:
- In case of excessive power, charring of the material may occur, as well as fire. Experienced craftsmen should work with such machines
- for each timber grade and type adhesive composition need your own processing mode
- if the machine operator is inexperienced, the beam may hit a knot, which is likely to fall out, and, consequently, there will be a defect in the work.
If we do not take into account the human factor, then we can say that laser equipment provides enormous opportunities for bringing design ideas to life.
Using a milling machine
The main advantages of this method:
- high speed
- no charred elements occur, as is the case with laser machine. This machine is best used by beginners
- high precision, as with a laser machine
- there is no need to process or sand the edges.
Using a jigsaw
It is worth noting that jigsaw files are fragile and can only be moved in a strictly vertical plane. Any distortion will cause the fabric to break. The saw functions when moving downwards, and the saws are positioned in the same way, with the teeth downwards. When working with complex areas, it is the workpiece that is scrolled, and the canvas should remain in one place. In the case where the outer perimeter does not contain difficult patterns that could be damaged during work on internal circuit, then you can start working from the outer perimeter. This way you will lighten the weight of the workpiece.
 It is imperative to control the temperature of the canvas. The file tends to heat up quickly, and overheating causes damage. For this reason, it is worth letting the nail file cool from time to time or changing it to another one.
In this article we tried to answer the question: how to cut plywood? Cutting plywood is more labor-intensive than cutting wood. This is mainly due to the multidirectional nature of the fibers and viscous adhesive mixtures. However, with the right equipment, these problems can be overcome with ease.
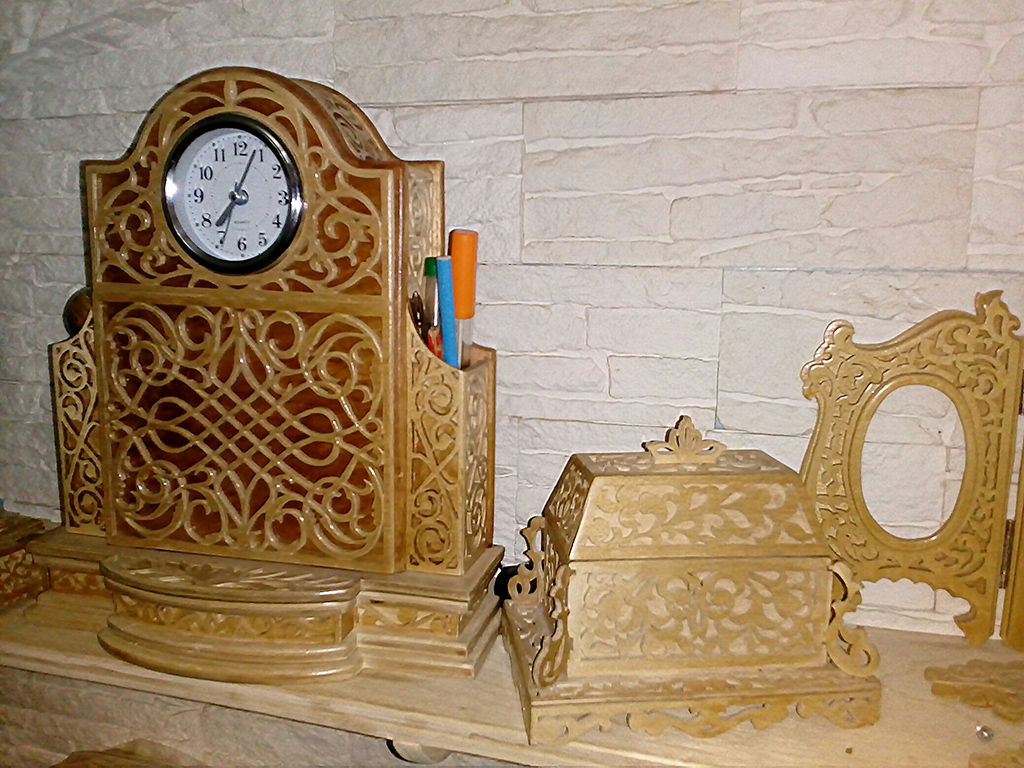
Sawing out plywood using a jigsaw according to drawings is a fascinating activity for handmade lovers. Openwork products can be used to decorate pieces of furniture, interior design, wall panels, caskets, etc.
The work is done with both a manual and electric jigsaw. You need to prepare free space at a table or workbench, purchase necessary materials and, most importantly, prepare a template, draw a picture or make a drawing.
In this article, let's look in more detail at how to cut out plywood using a jigsaw according to drawings, how to correctly transfer a template onto plywood, and how to select a high-quality workpiece.
Materials for work
- Plywood without knots good quality thickness from 3 to 5 mm.
- There are two types of sandpaper - fine and coarse. In order for the layers to be cleaned evenly, you need to place a rectangular board during sanding.
- Jigsaw manual or electric. If, when cutting out plywood with a jigsaw according to the drawings, the pattern turns out thin, with turns, and a radius of less than 2.5 cm, then it is better to use hand tools so as not to spoil the template.
- Stain (optional).
- Varnish. It is best to use acrylic, it is odorless and dries quickly.
- Drill. You will need it to make a hole for the jigsaw file.
How to make a template?
If you don’t know how to draw, but want to start cutting out plywood with a jigsaw, you can get drawings from numerous Internet sites. You need to find the required ornament or design and print it in full size.
The template is transferred to the plywood only after it has been thoroughly processed and used for application. ballpoint pen or a simple pencil of medium hardness. Some people use carbon paper.
Then the drawing is carefully drawn on the plywood, and all irregularities are corrected.
Preparation of plywood
Before starting work on cutting out plywood with a hand jigsaw according to the drawings, you must first prepare the base. First, for convenience, cut out the required size by attaching the template to a sheet of plywood.

Once the desired size is prepared, sand the surfaces. First, the sheet of plywood needs to be sanded with coarse sandpaper, #120 is suitable. Then wipe the surface with a dry cloth. Then the material is sanded with fine sandpaper, for example, No. 80. Wood dust can only be shaken off with a dry cloth.
Getting started
After the surface of the plywood acquires an even structure, transfer the pattern according to the template. To start cutting with a jigsaw, you need to make a hole for the saw with a drill. After inserting the file, secure it well on both sides of the hand jigsaw. If an electric tool is used, then the jigsaw must be secured to a special stand so that it does not vibrate and spoil straight lines.
The work is carried out slowly, carefully, observing safety precautions.
Once the entire design is cut out, sand the inside side cuts.
Last stage
In order for a picture or piece of furniture to acquire a finished look and last longer, it needs to be treated with varnish. If you want to give some other shade to the product, then first apply stain, and after drying, apply varnish. After applying the first layer of varnish, you need to let it dry thoroughly, then use fine sandpaper to treat the surface again, as the varnish can raise the pile on the plywood. The final final coat of varnish is applied after wiping the product with a dry cloth.
