How to make a hip roof with bay windows. Roof for a house with a bay window
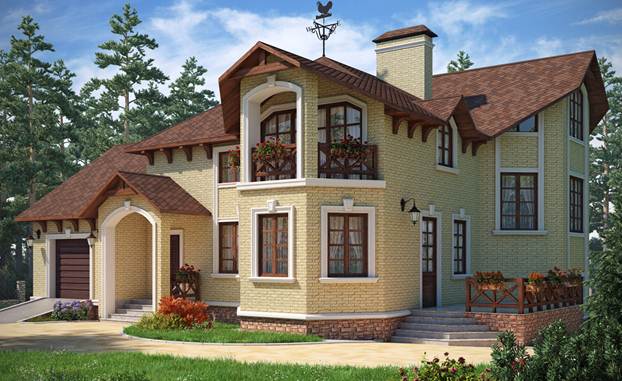
Houses with a bay window are aristocratic buildings that have become known since the time of the construction of fortresses. Previously, this detail was used purely for practical purposes - for the convenience of protecting the fortress and a better view. Now, bay windows perform primarily a decorative function. These buildings are distinguished by the complex structure of not only the building itself, but also its roof. That is why we will consider roof options for the balcony above the bay window.
Bay window characteristic
A bay window is a structure protruding beyond the bearing walls, which is similar in appearance to a balcony, but has solid walls. It is possible to carry out such a structure not only during the construction of the building, but also to attach the structure of the bay window to the already finished building.
Due to the presence of a bay window, the facade of the house looks amazing, and inside, the situation changes due to the unique design of the walls. A maximum of natural light will get into such a room due to the presence of a large number of windows in the bay window. Also, there are often projects where windows are arranged from floor to ceiling, which allows you to observe the landscape without any restrictions. Due to the implementation of the bay window, the useful area of the house is increased, and it can be used as an office, dining room, children's room, or otherwise, depending on the wishes of the owner.
The most difficult thing in decorating a bay window is designing and erecting a roof over it, so it is worth dwelling on this issue in more detail.
Bay window roof options
The main rule when performing a bay window roof is its combination with the main roof of the structure. The construction of such a roof is a rather difficult task. Not even all professionals take on such a task, let alone beginners. Any mistake or defect in the design of the bay window roof can affect it in a bad way and lead to disastrous consequences.
Bay window in its shape can be rounded, rectangular or multifaceted. Based on the shape of its structure, one or another version of the roof is being built. Roof configurations above the bay window can be as follows:

The first two options are distinguished by the complexity of the design, therefore, for their construction, you will definitely need a person who has sufficient qualifications and experience in such work. The latter can be performed independently, but, again, by those who know the basics of construction work on the construction of a roof on bay windows. But in any case, it is better to entrust the work to a professional so as not to worry about the possibility of incorrect installation and those problems that may arise during operation.
Roof device
First of all, it is worth noting that the rafters for such a roof are made of a bar with a smaller section, since the load on the bay window will be much less than on the main roof. As already mentioned, the roof structure for a bay window can be different, but it is either separate or connected to the main structure. In any case, the roof is designed and calculated in advance.
So, the erection of a roof for a bay window is carried out according to the following algorithm with strict adherence to the process technology:
- Execution of a reinforced belt. First of all, a monolithic ring structure is mounted with a metal mesh, which necessarily surrounds the contour of the bay window walls. This element is necessary for supporting the beams, as well as unloading the window lintels. With the help of a reinforced belt, the load is distributed and the entire structure of the bay window is reinforced.

- Creation of a rafter system. First of all, before starting work, all the necessary materials and tools are prepared. These are lumber for the construction of rafters, battens and beams, waterproofing material, fasteners and knitting wire. All wooden parts for the structure must be treated with antiseptics and fire retardants for additional protection.

First, a Mauerlat is attached around the entire perimeter of the bay window. This is done by installing metal studs in the armored belt. The roof trusses are assembled on the ground and raised to the bay window for fixation with the ridge. For reinforcement, it is necessary to install jibs, racks and other parts. Compliance with the proportions of the roof frame structure is extremely important, since they provide an attractive appearance of the entire roof and the house with a bay window as a whole.Important! The lower parts of the rafters should protrude above the bay window structure to obtain a cornice overhang, so that rain and melt water does not flow down the walls in the future, destroying them or onto the loggia.
Now there are special computer programs in which you can design any roof with a 3 D effect of any complexity for a better understanding of how to arrange it and understand the correct angle of inclination of the structure, as well as the ability to carry out calculations.

For the device of the bay window roof, a lot of fasteners are used, including studs, self-tapping screws, screws, nails, and a metal plate. It is not worth saving on them, since the reliability of the entire structure depends on the quality. Be sure to buy only galvanized fasteners, as they are protected by a special coating against corrosion. - Execution of the lathing. Before laying the rafters, the rafters are covered with a waterproofing film attached to staples, or roofing material, which is mounted on nails with wide heads. At the same time, it fits freely, without strong interference, and the lathing strips are already mounted on it.
Depending on what kind of roofing is chosen, the lathing can be solid or sparse. The first option is suitable for flexible roofing materials, and the second for rigid ones, for example, metal tiles.
Important! It is preferable to choose softwood material for creating the lathing.
- Roof covering. Bay window roofing in terms of laying roofing material is no different from the usual roof of a building. The peculiarity is only in what design the bay window is made, whether it is a continuation of the building or stands apart from it. The most common option is soft or natural ceramic tiles, as for such a small coverage, a material with the least amount of waste should be used.
Important! Particular attention is paid to the correct and high-quality waterproofing of the valleys.
End-type planks are divided into types. The first is the outer strips, which cover sections that are not attractive in appearance. And the second includes those on which a large load will be constantly carried out. In spring and summer, water flows down them, and in the cold season, snow accumulates on top.

To increase the reliability of the joints, sealants or a sealant are used. Insulation and vapor barrier of the roof is carried out last from the side of the room.
Conclusion
The bay window created using the technology will delight its owners with its original appearance and reliable protection from external influences. If you are not confident in your own abilities, then it is better to invite professional builders who will create a solid structure that can last for many years.

Sergey Novozhilov is an expert in roofing materials with 9 years of practical experience in the field of engineering solutions in construction.
Modern projects of cottages and country houses include a large number of a wide variety of structural elements necessary to solve all sorts of functional tasks. Often, construction companies offer for construction options for a house with a bay window - a small space inside the building that extends beyond the facade of the building. From the point of view of technology, a device of such a design does not cause problems, but here special attention should be paid to the roof.
Usually, a bay window is presented in suburban housing construction as a covered balcony. At the same time, its walls are integral parts of the floors of the house. The shape of the bay window structure depends on the design solution, but in most cases it is semicircular, multifaceted, trapezoidal. In addition, one can distinguish types of roof forms, usually installed in private houses above the bay window:
- Multi-pliers;
- Hip;
- Decorative;
- In the form of a hemisphere.
Important! A hip roof with a bay window is more often preferred, because it is the easiest to perform in the opinion of professionals.
Such a design does not need serious financial and labor costs, and it is also quite technological and reliably protects the room inside from various negative influences.
Preparation process

You need to decide on the choice of a roof over a bay window at the design stage of planning a house. The roof is mostly multi-pitched, so you will definitely have to make various skates, gutters and other related structural elements designed to drain precipitation and debris.
Initially, it is worth noting that the construction of an end roof is a rather complicated process, it requires a lot of labor, so it is best to entrust this task to highly qualified specialists. It is not recommended to do this work on your own. As with any modern roof, here you will definitely need a reliable rafter system, and it is quite difficult to do it yourself without proper experience and skills.
At the initial stage of preparing the roof device above the bay window, you need to make a reinforced belt. It is made from cement mortar and reinforcement rods or metal mesh. This belt performs the following functions:
- It acts as a support for the beams that support the rafter system. It simply cannot function without such beams.
- It also strengthens the brickwork and relieves the lintels of the window structures.
- In addition, the belt is required to strengthen the walls of the bay window, which is achieved by tying them to the walls of the house.
Important! When choosing a material for a roof, it is worth starting from economic opportunities and personal preferences, while not forgetting about its functional qualities.
According to experts, in the role of roofing for bay windows of private houses, the most optimal solution would be to choose one of the types of modern tiles (natural, bituminous, metal, and so on). This type of roof can be in perfect harmony with the structure of the bay window.
The device of the rafter system

A rafter frame is a must for most types of roofs, and bay window roofs are no exception. A bay window rafter system can be built from wooden planks and beams. They are connected to each other and to all other structural elements by means of self-tapping screws, screws and other fasteners. The rafter system should consist of beams of the required dimensions, it is worth choosing the dimensions with a margin in order to cut off the excess directly during the installation process. The principles of performing work on creating a frame of rafters in the case of a bay window are not much different from ordinary work when installing a rafter system of a hip roof. The Mauerlat is laid along the reinforced belt, and the rafter legs are attached to it.
The installation of rafter legs should be carried out at the initial stage. They need to be brought out of the plane of the walls. So further it will be possible to easily form eaves overhangs, which will not allow moisture flowing down the roof to have a negative effect on the material of the walls. To fix various wooden roof elements, traditional self-tapping screws or special fasteners that are resistant to corrosion and covered with a layer of galvanized steel are usually used.
Important! The rafter system can be assembled directly on the roof itself, regardless of its design.
An option is possible in which some of the individual elements of the rafter system will be assembled on the ground. It depends on the constructive solution and project - whether the roof with a bay window is a sufficiently independent structure, or whether it acts as a continuation of the roof of the house. In situations where the rafter frame for the end roof is assembled by separate trusses, then after lifting them to the roof, they need to be attached not only to the Mauerlat, but also to the ridge. They are usually attached to the latter using steel plates.
Now you can find on the Internet many photos of various hip roofs with a bay window, get detailed information about the rafters for any of them and read a large number of tips on the process of their construction. But before starting work, it is still worth consulting with knowledgeable people in order to avoid unnecessary waste of money, time and nerves.
Among roofs for a private house, hip roofs have a good self-cleaning ability and withstand strong wind loads. In addition to excellent technical characteristics, the appearance of such structures is impeccable. However, the rafter system of the hip roof has a rather complex structure and requires the correct calculation of all components. The presence of a competent project and painstaking installation will be the key to a beautiful and solid design.
Small holiday home with hip roof structure
Hip roofs: photos of structures of an interesting design
Hip roofs are a type of roof consisting of four slopes and, due to their design features, are highly resistant to strong gusts of wind. This is due to the fact that hips (inclined triangular slopes) are used instead of gables in houses with a hip roof, thanks to which the shape becomes more streamlined and the roof itself is strong.

Wooden house with hipped roof
The absence of gables makes the height of a house with a hip roof visually smaller, however, in general, housing construction with such a roof looks organic. Photos of one-story houses with a hip roof indicate that often the space directly under the roof is used to equip a cozy attic room. To illuminate the attic, full-fledged window structures are installed in the roof.
A photo of houses with a hip roof illustrates the neat external outlines of the roof, in which dormer windows are often equipped. This makes the roof colorful and interesting in terms of design. Gable roofs are usually used for houses of a large area, the base of which forms a rectangle. If the perimeter of the house is square, then another type of hip roof is used - hip roof.

One-storey house with hipped roof
The main feature of the hipped roof is that all of its slopes have the same isosceles triangle shape and an identical angle of inclination. All the faces of such a structure converge at one upper point. Hip roofs are also appropriate in houses with a regular polygon shape. How many sides are in the polygon, so many symmetrical slopes will be at the roof. From an architectural point of view, such designs are no less attractive.
Another subspecies of the hip roof is the semi-hip roof. This is a combination of a gable and a hip model in one design. To give the roof a streamlined shape, the pediment is covered with a small triangular slope (half-hip), the length of which is shortened along the slope. This option contributes to the fact that the ridge element of the roof becomes inaccessible to the action of wind currents. When using the space under the roof as an attic, it is possible to equip full-fledged windows in the gable part.
Related article:
The rafter system of a half-hip roof: design and installation features. Calculations and stages of construction. The choice of insulation, insulation layer and roofing material. Algorithm for installation and finishing of a half-hip roof.
Hip roofs with a bay window look exceptional. Bay window roofs add romance and sophistication to all housing construction. You can find roofs with bay windows attached to the main structure or separately erected above the ledge of the wall. The main disadvantage of such roofs is the complexity of the design and rather expensive installation.

House with a semicircular bay window
Almost all modern roofing materials can be used to cover the hip structure: slate, corrugated board, metal tiles, ceramic and bituminous tiles and other materials. The roof covering is selected taking into account the slope of the roof, the characteristics of the climate of the region, the characteristics of the material. In addition, the durability, aesthetics and cost of the coating itself play an important role.
Note! The use of sheet roofing material as a covering of the tent structure will entail a fair amount of waste.
Getting acquainted with the structure of the hip roof, you can find that it is quite difficult to coordinate all the slopes with the same slope with each other. Accurate calculations, competent design and theoretical advice from professionals are required. But, despite the complexity of the frame construction, hip roofs are undoubtedly popular among private developers.

Modern house with hip roof
The main advantages of a hip roof
In addition to the original design, hip roofs have a number of advantages that distinguish the structure favorably from other models:
- the absence of gables makes the structure invulnerable to strong wind loads. The smaller the slope of the roof slopes, the less impact the wind pressure has on the rafter system;
- the streamlined shape of all four slopes contributes to the stability of the structure to any type of precipitation;
- as for the efficiency of energy saving, such a structure is in many ways superior to gable roofs;
- insulating the hip roof is much easier, since the thermal insulation cake is located under the slopes. In models of roofs with gables - special insulation of the vertical facade is required, which is more susceptible to wind force;
- the system of mullion, central and extension rafters provides a reliable structure that is resistant to deformation under the influence of external loads;
- depending on the slope, there is a possibility of rational use of the space under the hip roof for the attic and the arrangement of windows in the roof.

In addition to its special appearance, the hip roof has a high degree of reliability and strength.
The main disadvantages of four-slope models remain the complexity of the structure of the rafter system of the hip roof and the impossibility of arranging the attic in models with a slight slope. However, with due study of the drawings of hip roofs and thought out to the smallest details, construction measures, the construction of such structures becomes a realistically feasible task.
Hip roof rafter system: main elements
The hip roof frame is a ridge beam and a system of various rafters. Taking into account the fact that the slopes and hips have a different slope, there are several types of rafter legs. The main components of the design include:
- corner rafters (oblique) - the main load-bearing structural elements located at the corners of the frame. Slant rafter legs have a smaller slope relative to other intermediate rafters;
- central rafters - they are attached to the ends of the ridge beam: three elements on each side. They are called center intermediate rafters;
- intermediate rafters - located between the central rafters, originating from the strapping and ending at the ridge;

Installation of the rafter system of the hip roof
- short rafters (rafters) - the elements are attached at one end to the mast rafters, the other to the strapping. Popular rafters differ in length, but have the same slope;
- ridge girder - a horizontally located crossbar, which serves as the upper support for the slant and central rafters;
- mauerlat - a bar fixed on top of the outer walls. It serves to evenly distribute the concentrated load of the rafter legs. The Mauerlat is a kind of base for the truss system and connects the roof frame to the walls of the house. Since the roof area is large, such an anchoring allows the roof not to "fly away" in case of strong gusts of wind;
Note! When choosing the parameters of the Mauerlat, it is necessary to take into account the ability of the support bar to ensure the stability and reliability of the entire rafter structure.
- strut - an inclined beam used as a support for rafters of a large span, taking horizontal loads. By using struts, you can cover a significantly larger span and save the cross-section of the main bearing beams. In the construction of hip roofs, the angle of inclination of the struts is 45 or 60 degrees;

Hip roof rafters
- babaka - a vertical support on which the rafter legs rest;
- tightening - a wooden beam that acts as an additional support for the rafter legs and prevents them from moving apart. For tightening, a bar of a smaller section is usually used than for rafters;
- sprengel - horizontal elements laid diagonally in the corners of the walls. The sprengel acts as a support for the rack for the nesting rafters. Such an element is used in the case when it is not technically possible to install the rack on the floor;
- lathing - a layer of boards of a small section, which are laid perpendicularly on top of the rafters. Serves as a base for roofing. Sheathing boards are laid in small steps (approximately one board). In the places where the valley or cornice is located, the crate is made continuous;
- counter battens - elements installed on top and parallel to the rafters to the battens. Serve to create a ventilation gap between the crate, waterproofing and roofing material;
- filly - a small piece of board, with the help of which the rafter leg is lengthened to create a cornice overhang. It is designed to drain rain and melt water from the walls of the house, as well as to protect the basement and slopes from oblique rain.

Hip roof rafter system
In the photo of the rafter system of the hip roof, you can see that the ridge girder is located strictly in the center and parallel to the load-bearing walls of the house. In addition, the start and end of the run must be at the same distance from the end walls. This arrangement will ensure an even distribution of the load, and, consequently, the stability of the structure.
Diagram of the rafter system of the hip roof
Hip gable roofs surpass conventional gable models in terms of the complexity of construction. This is due to the difficulty of accurately joining all four slopes at the required slope. These roofs have two large trapezoidal slopes and two end slopes in the form of a triangle. When forming the rafter system, the main difficulties arise in the device of the hip roof.
The project of a house with a hip roof takes into account that the slope of the slopes should be in the range from 10 to 60 degrees. The choice of the angle of inclination is influenced by the amount of precipitation, the material of the roof covering, as well as whether the under-roof space will be used for the attic room. In regions with a lot of precipitation, the slope should be at least 45 degrees.
The hip roof scheme should provide for the section shape, dimensions and exact location of all structural elements of the frame. In addition, in the drawings of the rafter system of the hip roof, the length of the ridge girder, the height of the roof, the angle of inclination of the slopes, the width of the spans, methods of strengthening the structure and the specifics of fastening the elements are reflected.

Schematic structure of a hip roof
Considering that the slant rafter legs are of great length and are supporting for the handlers, they need reinforcement. To do this, use a sprengel, the beam of which is cut into the Mauerlat, and the support leg is supported with a stand. To strengthen the rafter system, the use of a wind beam is practiced. It is fixed from the inside of the central rafters diagonally, mainly from the windy side of the house.
In the case when the rafters have a length of more than 4.5 m, diagonal struts are used to strengthen them, the use of which allows you to choose a beam of a smaller section for the rafters. The braces rest against the puffs (floor beams), which do not allow the rafters to part. If the braces are attached closer to the ridge ledger, they can serve as a base for the attic ceiling sheathing.
Helpful advice! The closer the tie beams are attached to the ridge girder, the more powerful the rafter system must be fastened.
In the scheme of the rafters of the hip roof, the expediency of using layered or hanging rafters, as well as the use of additional reinforcing elements, is substantiated. If in the calculations it turns out that the parameters of the timber do not correspond to the required load, it is possible to use glued or inlaid rafter beams. These modified elements are much more massive and can be longer.

Rafter system of a house with a hip roof
If the house building does not have an intermediate bearing wall, then hanging rafter legs are used, which rest on only two supports (on two walls of the house). In this case, the rafters are subjected to compression and bending loads. Due to the fact that the rafter legs create a bursting force on the walls, a wooden tightening is used, which connects the rafters to each other. Usually it is installed at the bottom at the base of the rafter legs.
When the building has an intermediate load-bearing wall or middle support pillars, a layered rafter pattern is used. In this version, the rafters with one end rest on the outer walls, and for the middle part of the legs, the columns or the inner load-bearing wall are the support. With this design, the rafter elements work in bending, like a beam.
Compared to a roof where hanging rafters are used, the structure with layered rafter legs is lighter. For the construction of such a roof, less materials are consumed, which reduces construction costs. It is possible to use a combined rafter system in one structure. This happens when one part of the house has an internal load-bearing wall and the other does not. For the construction of a roof over such a structure, both rafters are used.

Diagram of wooden layered rafters with an emphasis on one run for a hip roof
The scheme of the rafters of the hip roof with the extension is used when it is necessary to increase the cornice. In this case, the rafter legs will rest against the floor beams. When installing a hip roof with the rafters resting on the floor beams, an element such as a Mauerlat can be completely excluded from the structural scheme. Instead, the use of wooden leveling pads is proposed.
Hip roof rafter system with bay window
Quite popular in private construction is the construction of walls of houses with bay windows (ledges). This is a very interesting architectural solution, however, the projects of such houses are distinguished by the complexity of the design and construction of the structure. A bay window can be erected not only during construction, but also attached to an existing building. The ledge can be single-storey or multi-storey.
It is worth noting that the most difficult thing in the construction of houses of such an architectural form is the design and installation of a hip roof with a bay window. The basic rule is that the roof of the bay window should harmoniously support the main roof of the structure, forming a general style. It is very difficult to build a bay window, so not everyone decides to build such a house. The slightest inaccuracy in the calculations can lead to the fact that the design will be unreliable.

The structure of a hip roof with a bay window of various shapes
The shape of the roof for it depends on what shape the protrusion has (rounded, multifaceted, rectangular). It can be a hip, multi-gable, gable structure or a hemispherical roof. Sometimes a steeple-shaped roof is erected over the bay window.
There are two versions of the roof over the bay window: an independent roof of the ledge or combined with the roof of the main structure. For the bay window rafter system, a material with a smaller section is used than for the rafter legs of the main roof structure. This is due to the fact that these elements will perceive less load.
The technology for laying the roof covering above the bay window is identical to the method for covering the main roof. It is recommended to use shingles, as a small area with several slopes requires a material that would leave a minimum amount of waste. This requirement is met by bituminous or ceramic tiles. To calculate metal tiles for a hip roof, you can use a special calculator.

Installation of metal tiles
When erecting roofs with a bay window, special attention should be paid to valleys. They are used in two types of construction - the upper valley bar and the lower one. One closes the unaesthetic sections, while the other will be covered with sediment. In addition, professionals do not advise saving on fasteners (screws, nails, studs, plates). They must be purchased in the right quantity and of good quality.
Helpful advice! To increase the reliability of problem areas of the hip structure with a bay window, a sealant and sealant should be used in these places.
You can find out about the features of the construction of the structure from the video of the installation of a hip roof with a bay window.

Metal tile for hip roof with bay window
Do-it-yourself hip roofs: drawings and photos, sketches and design calculations
Before proceeding with the construction of a hip roof with your own hands, it is necessary to complete the drawings and make the correct calculation of the entire structure. It would not be superfluous to seek help from a specialist who has experience in this area and will be able to optimally select the angle of inclination and make a calculation. Considering that the roof structure may contain broken lines and irregularities, it will be difficult to accurately calculate all the constituent elements.
Before making a hip roof with your own hands, even the simplest design, you will need to develop a project for a hip roof with drawings and sketches. This will help determine the shape of the roof and make it possible to correctly calculate the required amount of materials for construction. To complete the design, you can use the following recommendations:
- the height, length and width of the house should be measured. According to the data obtained, sketch the facade and the end of the house on a convenient scale. Several copies of such sketches must be made;
- when determining the optimal height of the hip roof in relation to the house and the slope of the roof slopes, it is necessary to display several options for the roof contour in one of the sketches. Next, you should choose the most successful one, and with the help of a protractor, determine the angle of inclination of the slopes of the future structure;

Hip roof project, where A1 - base width, A2 - foundation width, B - rise height, C - overhang length, D - base length
- the next step will be to mark the position of the layered rafters on the marking scheme - in these places we mark the points. We divide the length of the wall indicated in the diagram into equal segments - this will be the step between the beams. It can be from 40 cm to 2 m. But it must be borne in mind that quite often installed rafter legs will entail excessive consumption of material, and a large step between the rafters will cause the use of structural reinforcement elements;
- when determining the length of the ridge, it is necessary to take into account that the girder must connect the paired number of rafter legs. On one of the sketches, you need to mark equal lines from each edge of the wall;
- the resulting schemes are transferred to the general scheme, after which you can calculate the amount of material required. The length of the rafter legs is determined on the outside, based on the length of the eaves (about 50 cm).
Helpful advice! In order for the roof structure to be strong and durable, it is necessary to purchase well-dried lumber.

An example of the layout of the rafters of the hip roof
By the number of rafter legs, you can calculate the number of fasteners. All nodules will use nails. There are two mounting angles for each rafter leg. When procurement of material, you should make a small margin in case of damage to the material. If the house is made of bricks or blocks, it is necessary to purchase a bar for the Mauerlat device.
The choice of the angle of inclination of the slopes
When determining the angle of inclination of the hip roof, the climatic conditions in which the construction is carried out should be taken into account. If the climate is hot, dry and windy, the slope should be minimal to prevent overheating and avoid additional stress. In areas with heavy snowfall, the slope is increased for unhindered snow melting.
In addition, when choosing the angle of the hip roof, one should take into account the roofing material, each type of which has restrictions on the slope of the slopes:
- slate - the coating is used when the roof slope is from 13 to 60 degrees. If the angle of inclination is less than 13 degrees, then moisture will seep into the joints, and in winter - snow will fall. This will lead to a significant reduction in the life of the roof;
- ceramic tiles - the optimal slope for this material: from 30 to 60 degrees. When installing roof tiles with a slope of less than 25 degrees, measures should be taken to improve ventilation and waterproofing;

The choice of the angle of inclination of the roof slopes
- metal tile - when laying this material, the maximum angle of inclination is not standardized, the minimum is 15 degrees;
- bituminous shingles - the coating is used for roofs with a slope of over 12 degrees. The maximum angle of inclination is unlimited. The material perfectly matches the shape of any surface;
- bituminous slate - sheets of this material are used with a slope of 5 degrees. There is no maximum value, however, the pitch of the lathing will depend on the angle of inclination, and with a slope of 5 to 10 degrees, you need to equip a continuous flooring;
- steel seam roofing - fits with slopes of 20 degrees. There is no maximum tilt angle limitation.
An increase in the angle of inclination increases the roof area, which will entail additional costs of building material. Therefore, if it is fundamentally important to save materials, then this should be taken into account when drawing up drawings.
Features of calculating the area of the hip roof
To determine the required amount of roofing material to cover the hip roof, it is necessary to calculate the area of the covered surface.

Calculation of the area of the hip roof of a private house
The calculation will require the following data:
- the skylights and chimney pipes available in the roof are taken into account, since their presence obliges to increase the consumption of roofing material;
- the length of the slope from the bottom of the ridge to the edge of the eaves overhang is determined;
- calculation of firewall walls, parapets, overhangs and other elements;
- the calculation does not take into account the abutment of the canvases, standing folds, protruding elements of the bars.
Helpful advice! If roll material or metal tiles will be used for the covering, when determining the surface area, it is necessary to reduce the length of the roof slopes by 70 cm.
To get accurate data on the roof area, you can ask for help from specialists or use modern programs that will make the most accurate calculation. But if, nevertheless, you decide to do it yourself, it is necessary to conditionally divide the entire surface into separate elements, the area of which is easy to calculate mathematically, and then sum the obtained values.
The more accurately the area is determined, the lower the likelihood of acquiring unnecessary material and waste of finance. The amount of materials required for construction must be fixed at the stage of the project of a one-story house with a hip roof. The cost of these materials also includes roofing, therefore, the cost of building a house as a whole depends on the correct calculation of the roof surface area.

Two-storey house with a hip roof
To calculate the area, you must use the hip roof plan. You should also take into account the technical characteristics of the roofing (thickness, length) and methods of its installation. The thickness of the material affects the weight of the coating, and knowing the length and width of the material can be used to position it with the least amount of waste and joining lines.
For clarity, you can analyze the use of ceramic or flexible tiles as roofing material. Ceramic tiles - the material is heavy and weighs 5 times more than flexible. Under the installation of shingles, a rafter system and frequent lathing are not required, however, solid plywood or other material must be laid under it. Therefore, in order to determine the cost of the entire construction and choose the most profitable material, it is necessary to perform the calculation of the hip roof.
The total cost of construction, no doubt, will be influenced by the area of the hip roof, but at the same time it is worth considering the complexity of the construction of the structure itself, especially when it comes to arranging the attic room. The complexity of the calculation will be influenced by such elements as dormers, ventilation openings, chimneys, etc.
For example, you can calculate the area of a hipped roof. With a roof drawing, calculations are much more convenient and the required values will be more accurate. The diagrams show that the base for the roof is a rectangle, two slopes are an isosceles triangle, the other two are trapezoids.

Diagram of the device of a hipped roof, where L1 is the length, L2 is the width
In this case, the tangent of the angle of inclination of the triangular face is equal to the ratio of h (height of the roof) to ½ of the value of b (length of the base of the triangle). So, the height of the roof is determined by the expression:
h = (b tan α) / 2.
The length of the side rafter leg (e) can be determined using the angle of inclination:
e = b / 2 cos α.
Using the Pythagorean Theorem, you can determine the length of the rafter rafter legs (d):
The total area of the entire roof is calculated by summing the areas of all constituent elements of the surface of the hip roof, namely four triangles and two rectangles:
S = 4 (eb / 2) +2 (a-b) e = 2e (b + a-b) = 2ea.

Hipped roof device
Hip roof area calculator
In view of the fact that not everyone can independently calculate all the parameters of the roof, the websites of companies specializing in the construction of roofs and the sale of roofing materials suggest using an online calculator. With its help, you can find out the exact amount of lumber, insulation and roofing materials, as well as calculate the length and section of the rafters for the structure of the selected type.
Using an online calculator with drawings and diagrams to calculate the hip roof, you can determine how optimal the slope of the slopes is relative to a particular roof covering, whether the section of the timber is capable of withstanding the current wind and snow loads on the rafter system in your region.
Before calculating the hip roof using the program, you must fill in the proposed fields of the calculator: the length and width of the base, the slope of the roof, the length of the side and end overhangs, the width, thickness and pitch of the sheathing board, indicate the type of wood and the pitch for the rafter legs. In addition, to calculate the load, data on the region and type of terrain are entered.
Helpful advice! While working in the program, pay attention that opposite each filled field there is a “?” Icon. By clicking on it, you can find explanations for a specific input parameter.

Hip roof design
After processing the entered data with an online calculator, you will receive information about the compliance of the slope you specified with the norms of the roofing used. If a discrepancy is found, the program will offer replacement options. In addition, you will receive data on the lifting height, the length of the hip roof ridge, the weight of the roof covering, the amount of roll material taking into account the length and width of the roll, as well as the required overlap during installation.
The calculator's conclusions also include the surface area of the roof (this will include the sum of the areas of all slopes, including overhangs of the required length), the amount of roofing and under-roofing material that will be required to erect the roof. The calculated value of the maximum load on the rafter system takes into account the roof structure, the weight of the roofing cake and the entered data on snow and wind loads.
In addition, the program will calculate the rafter system of the hip roof: it will give information about the number and dimensions of side and diagonal rafters, and also suggest the recommended size of the minimum section for the rafter system, the choice of which will provide the structure with proper strength.
With the help of the calculator's data on the optimal number of rows and boards of the sheathing, you can avoid the possible waste of material, as well as the time spent on unnecessary trimming of sawn timber. In addition, you will receive information about the number of boards in cubic meters and kilograms.
Using the program for calculating a hip roof, you will not only save time and money, but also receive practical recommendations based on the norms of SNiP "Loads and Impacts" and TKP 45-5.05-146-2009 (Wooden structures. Building design standards).
How to mount a do-it-yourself hip roof step by step: video installation
Assembling the rafter system of the hip roof is not an easy task, but with strict adherence to the project and the practical advice of professionals, you can cope with the construction yourself. The key to high-quality installation is the most correct calculation and an accurate scheme, following which you can make the correct cuts of the rafter legs and install all the structural elements. For example, you can see the video of the installation steps by finding it on the Internet.
Instructions for the construction of a hip roof with your own hands
Before you make a hip roof yourself, you should familiarize yourself with useful recommendations, adhering to which you will not have to doubt the reliability of the structure:
- the intermediate rafter legs have a steeper slope than the slant rafters. In this regard, a board with parameters of at least 5x15 cm is used for them;
- fixation of short rafters is done not to the ridge girder, but to the nipple elements. The angles of inclination of the short and intermediate rafter legs are the same;
- lumber used for the ridge run and rafter legs must have an identical cross section. It is when this rule of construction is observed that proper strength will be ensured. Otherwise, there is a high probability of deformation;
- intermediate rafters are attached to the edge of the ridge beam and to the top of the strapping;
- the height of the hip roof can be any, however, if the slope is very insignificant, you should use additional support racks;
- in order to extend the life of the hip structure, it is necessary to use sawn softwood, pre-dried and free from defects in the form of knots and cracks. In addition, before starting work, all wooden elements are treated with antiseptic compounds.

Installation of the rafter system of the hip roof
Marking the future structure
The construction of a hip roof begins with the marking of the object.
Step 1. From the side of the end of the housing construction, it is necessary to outline the axis along the upper trim of the walls.
Helpful advice! To avoid errors when marking the object, it is recommended to use a special measuring rod, on which all the necessary dimensions will be marked. It can be cut, for example, from a strip of plywood. Recommended rail width 5 cm.
Step 3. Attach the batten with one end to the marked line, and place the other along the side wall. So you can outline the point of location of the intermediate rafter leg.
Step 4. To determine the length of the rafter overhang, it is necessary to place the bar with one end on the outer corner, and the other on the roof overhang.
Step 5. To determine the location of the central rafter leg, it is necessary to move the marker strip to the edge of the side wall and fix the location of the central element of the rafter system.
This procedure should be applied to all four corners of the structure. Thus, the places for the installation of intermediate rafters and the ends of the ridge girder will be outlined.

Hip roof rafters
Calculation of the rafter system
After marking, it is necessary to calculate the rafter system.
Step 1.Using the rail, it is necessary to determine the horizontal projection of the intermediate rafter leg. From the table of standards, find the appropriate roof slope for your application and multiply the values.
Step 2. Measure the length of the rafter leg, while the measurement should be taken along the bottom line from the sampling site on the ridge run to the sampling at the base of the leg.
Step 3. To determine the length of the overhang, you need to multiply the value of the horizontal projection of the rafter by the correction factor from the table of proportions.
Table of proportions and correction factors:
| Roof slope | Coefficient for corner rafters | Coefficient for intermediate rafters |
| 3:12 | 1,016 | 1,031 |
| 4:12 | 1,027 | 1,054 |
| 5:12 | 1,043 | 1,083 |
| 6:12 | 1,061 | 1,118 |
| 7:12 | 1,082 | 1,158 |
| 8:12 | 1,106 | 1,202 |
| 9:12 | 1,131 | 1,250 |
| 10:12 | 1,161 | 1,302 |
| 11:12 | 1,192 | 1,357 |
| 12:12 | 1,225 | 1,414 |
Helpful advice! When calculating, you can use the Pythagorean Theorem, in which c² = a² + b², where a and b are the vertical and horizontal projections, respectively.
Step 4. Next, you need to calculate the corner rafters. To attach the rafter legs to the ridge beam, oblique cuts are made at the ends of these elements. In turn, the ridge girder also has a double bevel, thanks to which the corner rafters are securely attached to it.
The calculation of the slant rafters is performed in the following sequence:
- from one of the corners of housing construction, the length of the rafter leg is determined;
- a projection is calculated, the value of which is equal to the sum of squares, the projection of the central rafters;
- the resulting number is multiplied by the correction factor from the table. This will be the length of the roof rafter.

Hip roof wooden rafter system
Installation of rafter legs
Step 1. First, a ridge bar is installed, which is fixed on the support posts. The elements are fixed to the central beam by installing struts.
Step 2. When installing the slant rafter legs, check that the length of all elements is identical. Carefully join the hips, rafters and ridge bar together.
Step 3. After the slant legs are installed, you should proceed with the installation of ordinary rafter legs, which are positioned in increments of about 60 cm. The ordinary rafters are fixed to the Mauerlat and the ridge by cutting. To make the fastening reliable, use ties and crossbars.
Helpful advice! When installing ordinary rafters, avoid their contact with the pins that secure the Mauerlat to the ends of the walls.
Step 4. Next, short rafters (rafters) are attached to the rafter legs. The rafters will be connected to the Mauerlat by means of extension elements. The position of ordinary and outdoor rafters should be perpendicular to the ridge bar.

Installation of rafter legs of a hip roof
Strengthening the structure of the rafters of the hip roof
There are several options for strengthening the rafter structure:
- at the corners of the structure, trusses with a vertical rack are diagonally attached, which will act as an additional support for the rafters. The sprengel is fixed to the Mauerlat;
- racks are placed on the tightening board, which will serve as supports for intermediate rafter legs;
- if the rafter rafter is long, use glued or stacked beams for its manufacture.
Ventilation device
An important stage in the construction of a hip roof is the ventilation device. The roof is exposed to destructive influences not only from the outside, but also from the inside, where moisture condensation can take place. This is due to the temperature difference between the outer and inner surface of the roof. High-quality ventilation of the under-roof space will preserve the roof surface for many years.

Roof ventilation scheme
To ensure adequate ventilation of the space under the roof, it is necessary to arrange a hole in the windscreen for air inlet. It should be located at a small distance from the ridge girder. When used for winding a tree, it is laid with a gap of up to 3 mm. In the case of using plastic material, perforation is practiced.
For those cases when the roof wind protection is mounted without a gap, you can cut into it ordinary ventilation grilles with a diameter of 50 cm. They should be placed along the entire length of the wind protection at a distance of about 80 cm from each other. After completing these works, you can start arranging insulation, waterproofing and laying roofing material.
The device of the hip structure is a technically complex and painstaking process. It is worth doing the work if you have enough time, experience and knowledge in this area. Any inaccuracy can lead to unreasonable consumption of materials and higher construction costs. If you doubt your abilities, it would be appropriate to seek help from real professionals.
(hipped, hipped) roof - one of the design options, when additional slopes are constructed in place of the gables.
Nevertheless, hip designs are widespread especially in areas with frequent wind direction changes.
It turns out a roof with inclined planes on all sides, which creates a lot of profitable positions:
- The absence of gables makes the load on the foundation less, moreover, it is distributed absolutely evenly.
- The wind load on the slope is much lower than on the vertical plane.
- The cost of finishing the gables is excluded from the general repair estimate.
- In a decorative sense, the hip roof looks more solid, assembled.
The disadvantages of this design are:
- The increased complexity of the structure of the rafter system.
- Higher consumption, which creates additional hazardous areas of possible leaks.
- The presence of bursting loads on the load-bearing walls, necessitating a bundle of the lower foundations of the slopes.
The main design feature of the tent-type rafter system is the presence of diagonal edges connecting the corner points of the roof with a ridge beam, which has a shorter length than the entire roof (the classic hipped roof does not have a ridge at all, the ribs converge at one point).
In the rafter system, these ribs are called angular, or diagonal. Their presence requires installation as full-fledged rafters. going from to the base - Mauerlat, and shortened elements- rafters connecting the base and diagonal rafters.
Hip roof scheme
Gable roof: elements of the rafter system
The elements of the rafter system of the hip type have a more numerous composition than with a gable structure. The rafter system consists of the following parts:
- Mauerlat... A beam laid along the perimeter of the load-bearing walls and is the basis for the entire rafter system.
- Sill... A horizontal beam of the same section as the Mauerlat, located along the longitudinal axis of the roof and serving as a support for the purlin struts. A layer is required between the overlap and the bed.
- Sprengel... An element that connects and reinforces the corner joints of the Mauerlat beams. It is made of the same timber as the Mauerlat and is installed diagonally to it.
- Tightening... Ties connecting the parallel bars of the Mauerlat on the long side. Remove the bursting load from the load-bearing walls.
- Rack... A vertical element supported by a brace and supporting a ridge bar.
- Run... Ridge bar.
- Diagonal (angular, oblique) rafter... Connects the corners of the Mauerlat with the ends of the purlin, forming ribs - the joints of the roof planes.
- Rafters... Inclined elements resting on the Mauerlat from below and on the girder from above.
- Narodniks... These are the elements that rest on top of the diagonal edges. In fact, these are rafters, cut to the length required at a given point.
- Braces... Reinforcing elements, spacers located perpendicular to the rafters and supported at an angle by the puffs.
The designs of all elements may have deviations from the generally accepted scheme. due to the necessity caused by the features of the design of this structure, but the scheme as a whole almost always consists of the named parts and does not have any radical changes.
Hip roof rafter system: diagram and photo below.

Truss system diagram

Photo of the rafter system
Diagonal rafter legs
The elements of the rafter system that form the edges of the connection of the planes of the slopes are called diagonal (slant, angular) rafter legs.
Strictly speaking, diagonal and oblique - not quite identical elements, since the first are attached outside the corners of the Mauerlat, and the second - from the inside.
Otherwise, all properties are the same.
Corner elements have certain features:
- The length of the diagonal rafter legs is much greater than the length of straight rafters.
- Diagonal rafter legs serve as a support for the wedges on both sides of the planes to be connected.
The presence of such features creates an increased - about one and a half times - load on the rafters in comparison with the usual ones. Their length exceeds the usual length of the boards, from which the rafters are made, therefore, for the manufacture of nakosny boards rallying - they are connected along the face in two layers.
Thus, several problems are solved at once.:
- You can make beams of any desired length.
- The ability to use one modular material size.
One or two supports must be installed under the diagonal rafter(depending on the length), and the point of location of the support is not in the middle, as it would seem at first glance, but at a distance of one third or a quarter of the entire length of the slant rafter, counting from the top point, since it is in this section that the place of the greatest stresses is located.

Diagonal rafter legs
Supports for diagonal rafters
As a support for diagonal rafters, either struts or vertical posts made of timber or twin boards can be used. The stand can rest directly on the floor, through a layer of waterproofing and wood lining.
This requires sufficient stiffness and strength of the overlap. If such conditions are not available, then a strut is used, resting on the bed and supporting the slant rafter at a given point.
The angle of inclination of the brace in this case does not matter, the main thing is the connection point, i.e. place of concentration of the load. With a rafter length of up to 7.5 m, a brace from the upper point of maximum load is sufficient, and with a length of more than 9 m, an additional stand is required at the bottom.
This can be either support on the floor, if it allows, or support on the truss - the so-called. truss truss - a rack, reinforced with struts on the sides.

Supports for diagonal rafters
The device of the wives
In the lower part, the rafters are the same rafters, have a completely similar method of attachment to the Mauerlat, the same installation step. Installed strictly at right angles to the base, the upper part - to the corner rafter leg.
Fastening is made for at least two nails or other elements... The upper part of the rafter is cut at the desired angle to the horizontal and to the diagonal rafter to provide a tighter fit and guarantee resistance to stress.

The device of the wives
Hip roof over the bay window
The bay window is a solid looking structure that decorates the building, which is a small extension, a ledge in the wall, performing mainly decorative functions. The section of the roof above the bay window can be of any type, but most often the option that is most suitable for the shape and section of the bay window is used.
The hip roof over the bay window can have an adjoining shape, i.e. be a half of a hip roof, a complex of three planes. Alternatively, there may be a dominant dome over the bay window, towering over the main roof.
Anyway, erecting such a structure is a difficult task, and the complexity is not in the technical sense, but in the design and calculation work. Combining several planes into one ensemble is a complex problem that requires precise and careful thoughtful work.
ATTENTION!
Lack of experience, combined with haste, can cause inconsistencies or miscalculations leading to violations of the tightness of the roof and a decrease in the strength of the structure.
There are important points that play a significant role - for example, the angle of inclination of the bay window slopes should correspond to the angle of inclination of the main roof, the length of the fillies should also be in harmony with all the overhangs of the roof.
The main feature is the combination of hip elements with valleys, therefore the construction of the main rafter system should be carried out in parallel or before the bay window to avoid unwanted discrepancies in the geometry of the system.

Hip roof over the bay window
Step-by-step instructions for installing the hip rafter system
 The description will begin from the moment the Mauerlat is laid, all previous operations are considered completed, the overlap is completely ready.
All design and design work has also been completed.
There is a prepared (dried) material - beams and edged boards from conifers, as the most suitable for the construction of a rafter system in all respects.
For the correct installation of the elements of the rafter system, you need to stock up on connecting elements allowing some movement of parts in relation to each other.
This is necessary to compensate for the shrinkage processes of the walls, foundation and the system itself. This is especially important for some load-bearing elements based on the Mauerlat..
Base movements with fixed connections of the main units can lead to loosening of the connections and the formation of leaks.
Consider the stages of constructing a hip rafter system:
- Mauerlat installation... The beam is laid on a waterproofed base, secured with pins. If necessary, the segments are connected along the length of the "half-tree", with reinforcement of the connections with nails. Tightens are installed immediately.
- Mauerlat corners are reinforced with sprengels and.
- Installation of the bed... One or two (depending on the project) logs are laid on a waterproofed base.
- Racks are installed on which the purlin is attached. Thus, the supporting skeleton of the rafter system is created.
- Installation of diagonal rafter legs... Immediately, depending on the length, struts and (or) racks are mounted.
- Rafters are mounted according to design data... Immediately, the length / angle are adjusted and the beads are installed. All elements, if necessary, are reinforced with struts.
- The rafters at the points of attachment to the base and to the girder are additionally reinforced with staples, wooden blocks and other fasteners.

Actually, the installation of the rafter system at this stage is completed. Further work consists in the creation of a roofing cake, the construction of the sheathing, roofing, etc.
Consideration should be given to the impossibility of full and detailed coverage of all the nuances and trifles., on which the high-quality and reliable structures of the rafter system depend, since there are many of them and they are all worthy of separate consideration. Nevertheless, the general sequence is reflected in sufficient detail.
The creation of a hip rafter system is not so much a difficult process as it is responsible and dangerous in that mistakes made in the early stages become noticeable much later.
That's why it is very important to draw up a detailed work plan before starting work, ensure full compliance with the project and do everything as accurately as possible. Everything rests on the joints of wooden parts, so it is advisable to have experience and skills in working with wood.
Without possessing this knowledge, it is better to turn to specialists for help, since the responsibility of the rafter system for the preservation of the functional qualities of the entire building is too great.
Hip roof: the drawing of the rafter system is below.

Rafter system drawing
Useful video
In this video you will learn everything about the hip roof rafter system:
In contact with
This box of the house (11x13.5 m) must be covered with a gable hip roof and the bay window overlap is provided with a hipped roof. A bay window is located on the side of the end wall.
On the upper level of the wall of the 2nd floor, an armored belt is arranged, to which the Mauerlat will be attached.
Installing Mauerlat
First, you need to install the Mauerlat and the bed. It is made from a bar with a section of 200x200 mm.

Installing Mauerlat and Legney
The Mauerlat is installed along the perimeter of the box, and the bed is installed along the inner walls. Between the armopoyas and the Mauerlat, it is necessary to install waterproofing in the form of two layers of roofing material or other waterproofing material.
After that, it is necessary to rigidly fix the Mauerlat and lie to the armored belt.
Installation of the main beams of the hip roof
The main roof beams are installed with a section of 100x200 mm. On the side of the bay window, a beam from a bar of 200x200 mm is installed. It is necessary to support the hips from the side of the bay window.

Installation of bay window beams
Bay window beams are installed.

At this stage of work, it is necessary to ensure the same overhang of the cornice from the side of the bay window and from the side of the main house, which should be equal to 0.5 m.
Roof eaves filing

Eaves filing
Installation of support frames and hip roof truss system
Then you need to install the support frame. The height of the support frame matches the height of the roof.

Installing the base frame
At the top there is a ridge run made of a board with a section of 50x200 mm. It must be said that the roof can be installed both elementwise and complex installation.

Roof truss
When a truss is assembled, which is then installed in a design position in a rotary way. But for this, it is necessary to have a sufficient number of workers (min - 4 people), and with element-by-element installation, 2 people are enough.
There is also a ridge girder and strut on the bay window side, and the center pillar of the bay window has a centering core on which all the bay window rafters will converge.

Ridge run from the bay window
This centering element has a width of 30 cm and a height of approximately 50 cm. It is very important to provide this element as part of the roof, as it greatly facilitates installation.
In the next step, the rafters of the main roof are installed.

If the rafters are more than 6 m (standard lumber size), then they will have to be spliced. This is done at the top where there will be least effort.
The next step is to install corner rafters - two on one and two on the other side. Further, the wives are installed. Rafters and rafters on the main slopes have a cross section of 50x200 mm. Section of the hip cuffs 50x150 mm. These slopes are steep, there will be no snow, therefore there is no need to provide for particularly massive structures.
Then the bay window rafters are installed. Their upper edge converges at the centering core.
Setting the stiffness ties of the hip roof
At the next stage, the stiffening ties are installed - struts, props, puffs. These are all kinds of roof elements that ensure the rigidity and stability of the roof.

Setting Roof Stiffness Bracing

Roof stiffness ties
Inside this farm there is an opening measuring about 2.2x5.5 m and this is quite enough for a comfortable attic. At this stage, the roof frame can be considered complete.

All roof elements must be rigidly connected to each other, and all wooden structures must be treated with fire retardants and antiseptics to increase their fire resistance and durability, i.e. their resistance to decay.
Roof lathing
The next step is to install the crate. First, the main roof is battened, then a valley bar is installed to mate the main roof and the bay window roof.
