How to make a piggy bank with your own hands: original gift ideas. How to make a piggy bank with your own hands at home from paper, a jar or a box How to make a piggy bank from paper for money
Little son came to his father
and the little one asked:
— How to make a piggy bank for coins?...
The little one is already 6 years old, so he made the piggy bank from plaster almost entirely with his own hands, with a little help from his father. My son wanted a piggy bank in the form of a safe.
We managed to make this piggy bank from plaster with our own hands at home:
So that money could not be taken out of the piggy bank whenever you want, we did not make holes for “emptying savings”, like in most purchased piggy banks.
For making a piggy bank as a safe at home will be needed approximately 2 kg of plaster, paint, varnish, preferably acrylic primer and a little imagination.
To make such a piggy bank, you first need to assemble a form (formwork) to fill the walls of the safe. You can make a mold from scrap materials.

To make the mold, we used children's construction sets and plasticine.
So that later we would not have to cut a hole for coins in the piggy bank, we decided to make it immediately when casting the top cover of the safe; for this we used plasticine. To prevent the plaster from leaking out of the mold, plasticine was sealed around the perimeter of the mold, but as it turned out later, this was not necessary; if the gypsum solution is not too liquid, then it will not leak out anyway.
The gypsum solution must be made according to the instructions on the gypsum packaging. For greater strength, we added a little PVA glue (You can read more about ways to give plaster strength). By the way, it is better to weigh the ingredients for mixing gypsum mortar and use an equal amount of mortar on all walls so that they are the same. To simplify the process, we did everything “by eye”, so the walls turned out to be different in thickness.

One by one, we cast the walls of the piggy bank from plaster.


In this way you need to make 4 walls, only the remaining 3 without holes.


After the glue has dried, you need to make another wall of the piggy bank; to do this, pour the gypsum solution directly into the assembled “box”. The remainder of the solution can be used to strengthen the joints of the walls of the safe and also to cover up cracks and irregularities.

While the poured plaster is setting, you can make a decorative part of the piggy bank-safe, i.e. lock and handle.
First we wanted to make a keypad with numbers in the form of a combination lock. They planned to cast a thin rectangle from plaster and scratch buttons on it, but then the son changed his mind and wanted to make something like an old spinning castle. For this we used plastic cup from jelly.

Then you need to make the last wall of the safe. To do this, we make the shape a little larger size, than was used for the walls of the piggy bank, pour the mixed gypsum solution into it and place the previously made piggy bank body into it with the hole down.

When the solution begins to set, you need to disassemble the formwork and remove excess gypsum. Uncured excess can be used to cover and smooth out remaining uneven areas.

After the base of the piggy bank has dried, you need to sand off any uneven surfaces.

Because All the walls turned out to be smooth, next we need to make an imitation of the safe door. To do this, we drew the outline of the door and scratched it with an ordinary awl.


All that remains is to glue the “lock” and cover the piggy bank acrylic primer, paint and varnish so that the paint does not peel off.
For painting we used silver and black acrylic paint, and covered it on top acrylic varnish.


This is the piggy bank-safe we made from plaster at home and without the use of specialized tools:

A little crooked, but it was almost entirely made by a six-year-old child :).
,It often happens that people receive flowers and don’t know where to place them. Therefore, the first instinct is to restore any object that may contain them. Glass bottles are always the most commonly used. Who doesn't have it? at least, one glass bottle at home? Stored in boxes or basements, these containers often take up precious space and are rarely used.

Now the paint should dry completely. It will take about 5 hours. In the meantime, you can start decorating the lid of the piggy bank.
Decoration of the piggy bank lid with coins, semi-beads and seed beads
First of all, you need to make a bill and coin receiver from the lid. To do this, simply cut a rectangular hole with a knife. To equip the piggy bank with locks, cut out round hole on the sides of the lid and on the piggy bank itself.

Now let's glue the coins using Titan glue. We apply glue to the coins and place them on the surface of the lid in a random order, in a slightly disorderly manner. We decorate the hole for the money with beads, gluing them in the same way as coins. We fill the gaps between the coins with black beads.


The penultimate stage of making a piggy bank with your own hands from tin can is the application of gold acrylic paint. To do this you will need a hard wide brush.
There is no need to dilute the gold paint!
The gold decor is applied to the surface of the folds of the piggy bank's trim with light brush strokes, lightly touched with paint. When dry, the gold decor on a black background creates the effect of old red gold, glitters beautifully in artificial light, and looks expensive!
piggy bank- a special container where you can put money so as not to spend it in the near future. Often this is a closed container with a small hole so that money can be inserted into it. In most cases, it’s just a jar where people put change from their pockets so as not to rush around with it, and after a while, when the jar is full, they can please themselves with some kind of gift. There are many ways to make a piggy bank, and today we will talk about some of them.
Before that, we talked about it, now we’ll look at other types of piggy banks!
How to make a piggy bank with your own hands?
We have prepared for you the simplest and most quick ways, materials for which every home has, this can be carton, can or plastic bottle. The choice is yours. Let's get started!
How to make a piggy bank out of paper?
Very interesting craft, available even small child. Great idea For various lessons and activities for children. By making a piggy bank, they will have a very good time and receive a useful gift.
To make such a piggy bank, print out the diagram below:

In the upper left corner you can see a diagram of the folds, this is where you need to glue it.
How to make a piggy bank from a bottle?

Unnecessary plastic bottles Everyone has one. Encourage your child to do original craft, learn something new and acquire a valuable thing.
Let's prepare the materials we need:
Plastic bottle.
. Stationery knife.
. Pink paint.
. Corrugated paper pink and black.
. Glue gun.
. Eyes for a pig.

1 . Take the bottle and cut it into three parts. Try to make all cuts neatly and evenly.
2 . Lower and top part We connect the bottles together. The middle one can be thrown away.
4. Paint the form in pink. It is advisable to use a spray can. Then we decorate our pig with eyes from black cardboard and cut out a nose, legs and a tail from pink materials.
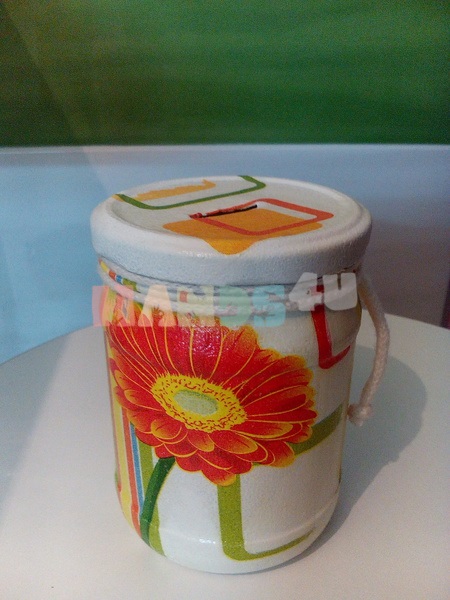
Very detailed master class on making a piggy bank from a jar using decoupage technique.
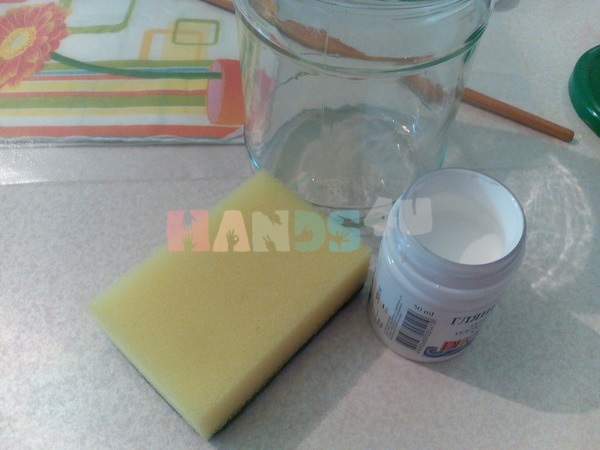
If iron money operates in the country's economy, the piggy bank is irreplaceable thing! Of course, you can go into it paper bills fold, but it's not that interesting. You can buy a piggy bank in a store, but it is much more interesting to make it yourself using the decoupage technique. For work you will need glass jar with lid. If you don’t have a screw-on one, you can roll up a regular one. Also take white acrylic paint, a sponge, PVA glue, a file, a spray bottle with water and a napkin with any design.
How to make a piggy bank from a jar with your own hands:
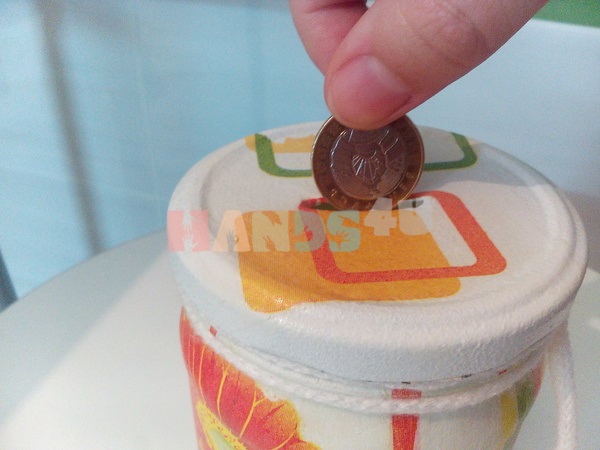
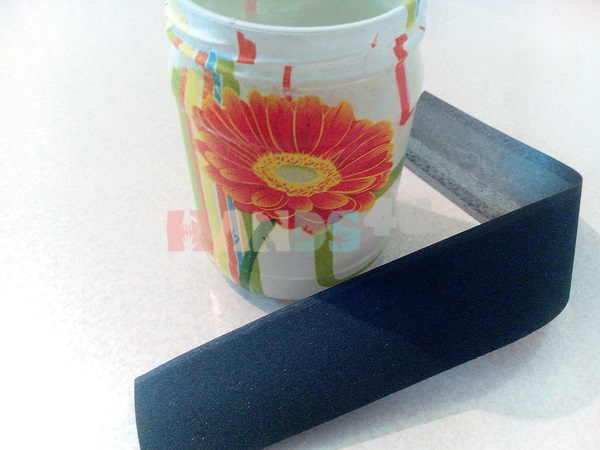
1. You need to wash off traces of glue from the jar, remove the label, and degrease the surface with alcohol. Make a slot in the lid for coins. It’s better to use a grinder, but an ordinary kitchen knife will do.


2. Dip a sponge into acrylic paint and apply it to the surface of the jar and lid using “smacking” movements. It is important to paint the entire surface evenly, just make sure that the layer of paint is as thin as possible, otherwise it will not dry well. If necessary, you can repeat the procedure 2 times. The main thing is to wait until the paint is completely dry each time! It is optimal to paint the jar and lid in the evening.


3. We tear out the motif we like from the napkin. It is better not to use scissors, but to carefully tear out the design, because... torn edge less noticeable on finished product. From the torn out drawings we separate the top colored layer. Napkins come in two or three layers. We are only interested in the one on which the drawing is applied. Be careful not to tear it.


4. Place the drawing face down on the file. Spray generously with water from a spray bottle. We dilute the PVA glue by half with water and grease the drawing with the resulting mixture. At this stage, the napkin will increase significantly in size, take this into account when gluing the pattern.


5. Apply the file with the napkin to the surface of the jar and gently press it with your fingers along the perimeter. Separate the file. The design should remain on the surface of the jar.

6. Using a dry brush, smooth the design from the center to the edges. It is important to remove all folds and air bubbles, but do not tear the napkin. If there are still any creases or air bubbles left on the surface, you can get rid of them at the next stage.

7. Let the jar dry completely. You can dry it with a hairdryer, you can leave it near the radiator, you can turn on the oven for a while, then turn it off and leave the jar there until it cools completely. The main thing is that the napkin is completely dry. If any defects remain after drying, remove them using sandpaper“zeros”.
8. Cover the jar and lid with acrylic varnish. You can apply 2 layers, but apply the second only after the first has completely dried. This is important.

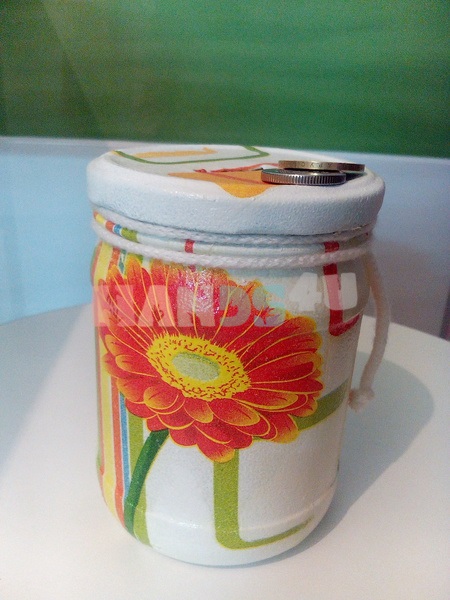
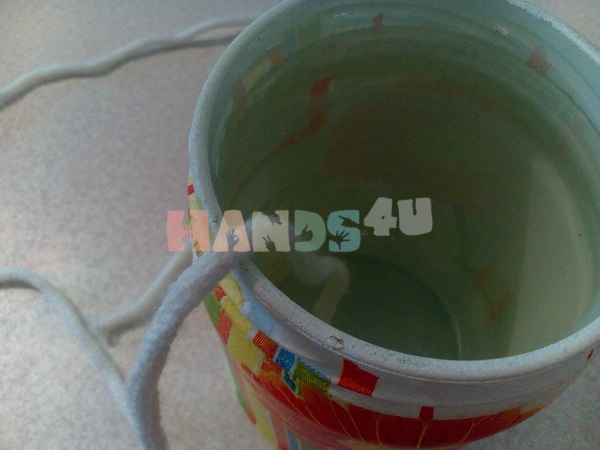
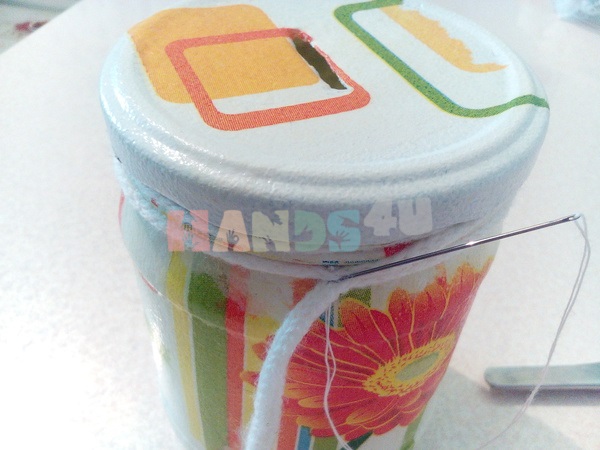
We decorate our jar with lace. To prevent the coins from clinking too much and damaging the jar, you can put a piece at the bottom soft fabric or cardboard.


The piggy bank is ready! You can collect coins!