How to make a round chandelier with your own hands. DIY lamp: decor master class and creative ideas for decorating lamps (105 photos)
Every person wants to decorate their home decorative items. This brings something lively and completely unconventional to the interior of the house. This transformation also affects lighting, lighting fixtures made by yourself - this is an excellent option to transform your life. This article will tell you how to make a lamp with your own hands.
There are countless ideas, this applies to both the design itself and its appearance. This could be a floor lamp or a chandelier shade, or even a table lamp.

Materials
It is worth paying attention to safety precautions and using non-flammable materials. You should not use paper, plastic and similar materials that have a fairly low combustion temperature.

As for the lamps themselves, it is worth using led lamps, since they have many advantages such as long term operation and are not subject to overheating. It also has several shades and, of course, saves energy.

Ideas for lamps
Recently, it has become fashionable to create interesting lighting fixtures from completely useless materials; a striking example of this are lamps made from empty glass bottles.


There are countless ideas, however, if you have a desire to do something similar, but the idea is not ripe, then you can look on the Internet for photos of lamps made by yourself.

The simplest and in an efficient way to make original lighting, it will be to create a lamp from an ordinary glass jar with screw cap.

Place the jar in hot water, in which dilute detergent, in order to clean it from labels and dirt. The next thing you need to do is drill a hole for the base. Now you need to insert the base into the cover and secure it.

The main thing is not to forget to solder the wire with a 220V plug, otherwise you will not have a power source. Finally, screw in the light bulb and screw on the lid of the jar. Done, now you have a very easy to implement lighting fixture, which stands out from the general concept of classical life.

By the way, you can decorate the jar with painted engravings or a knitted thread pattern. This is a very original and beautiful solution; for example, you can make a lamp with a knitted pattern in the shape of a flower.

Wooden lamps
This type of lighting is completely different from simple designs. After all, a lamp made of wooden driftwood will look truly extraordinary. However, the work requires more time and care when handling tools and materials.


But at the same time, almost anyone can do such work. And wood can be found in forest plantations. The technology is quite simple; you need to clean the wood and sand it with sandpaper.


Now drill holes for wiring in the necessary places, but this must be done where wood harvesting will be installed closest to the ceiling. For greater effect, you can make small grooves in the wood where the wiring will be installed.

After laying the wiring, part of the wood with the wire can be puttied, and after waiting for the putty to dry completely, sand these places and open the entire driftwood with colorless varnish.

All that remains is to install this lamp. Of course, after the work done, the skill and understanding of this will appear, and now, with a high degree of probability, you will be able to repair the lamp yourself.

Lamp made of planks
Not everyone is happy spotlight, however, you can assemble structures from scrap materials. When working with wood, in particular with boards, there are often scraps left over, and even they can be used. You can make an excellent decorative lamp from them.

The best thing about this design is that you don't need to use nails. To create such a lighting device, you need 17 planks that will be the same size.

Now, each plank needs to be shaped into a wedge and a base is made where the cartridge needs to be installed. The next thing, using a drill, we will make a pair of holes in the base for each plank and, accordingly, in the blanks.
Let's take wooden pins and fasten the structure. This lamp is very easy to make and looks very impressive.
If these ideas do not suit you, then online you can special effort find master classes on making a lamp in video format.


Photos of DIY lamps


Handmade items fill the home with special warmth and comfort. In addition, they turn out to be exclusive. We offer an overview of lamps that will completely change the atmosphere in the room, turning into an object of envy from the groans of friends and relatives. Moreover, they are made from everyday items that are usually thrown away.


Cardboard bags for juices or other drinks are a fairly common thing in most homes. Most often it is thrown away. But Malayan designer Edward Chu spent a lot of time cutting them into hundreds of strips and making amazing lamps from them without a drop of glue, a simple origami principle.

Yaroslav Olenev proposed making lamps from disposable plastic spoons and became the winner in the Ecology and Design category from the Future Now magazine.

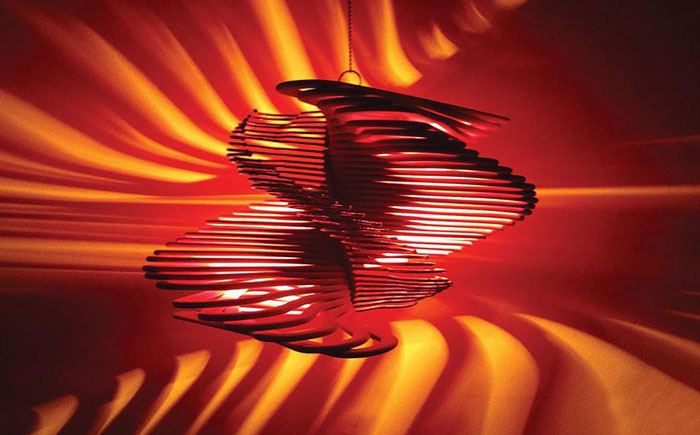
No less original application I also found Natalie Simpson for ordinary wooden hangers. But they look amazing in the form of a chandelier.


Kevin Champeny must be given his due; not everyone has the strength and patience to string 14 thousand bears to get a chandelier.

Tira Hilden and Pio Diaz have their own vision of the problem of housing lighting. Their lamps make the room look like a forest. All the walls come to life and turn into trees.

A talented welder, Matt Ludwig also turned out to be an excellent designer. For the restaurant "JJ's Red Hots" he made an incredible original chandelier from the old one drum set.

Texas artists Joe O'Connell and Blessing Hancock used parts from old bicycles to create stunning lamps and hang them in a tunnel under the highway.

It will probably be difficult to find a more original chandelier than one made from a pumpkin by a Polish artist. He carves stunning patterns into the peel that never repeat.

Lampshades made from felt hats from Jeeves & Wooster look original and stylish.

One day, Heather Jennings saw an amazing Rhododendron chandelier in a store, but it cost more than $800. Then the designer decided that she could do no worse with her own hands. For this she needed paper cupcake liners.
11. Chandelier for the kitchen

A chandelier made from ordinary metal tetrahedral graters will look incredibly beautiful.

Vases and candy bowls made from openwork napkins are still fresh in my memory. Now it's time to knit chandeliers.

A strange option is proposed by Fansua Lego, he believes that the most best way storing cutlery is a chandelier.

A large cloud is cut out of wood, but the rest and the switch are made of cardboard.

Several globes can make a wonderful cascading chandelier, great way illuminate the staircase.
Many designers recommend using multiple light sources in a room, ranging from chandeliers to lamps and floor lamps. This will allow you to illuminate certain areas in the room or create a special spectrum of lighting depending on your mood. But in order to realize this plan, significant financial investments, because they are creative and cost a lot of money. In this regard, you can make your own floor lamp and without spending a lot of money. You can assemble it from scrap materials; such a product will look good in country house, apartment or country house. Next, we will tell you how to make a floor lamp with your own hands, providing instructions with photo and video examples.
Step by step instructions
Preparation of materials
In order to make a homemade lamp you will need the following tools and materials:
- lumber and wood glue;
- hacksaw;
- drill and pliers;
- knife, screwdriver;
- fasteners;
- copper cubit;
- wooden beam for the frame (approximately 140 cm);
- copper tube for the frame (about one meter);
- lamp and electrical cord with plug;
- plastic trash bin (openwork).
You should make a floor lamp yourself step by step. First of all, you need to start making the base of the structure.
Making the base
So, the foundation is made as follows:
- First of all, you should cut two planks from the board. One should be 35x5x20 cm (length, thickness, width, respectively), the other - 30x2.5x15 cm. Other sizes can be taken, but it is necessary to take into account that the base must support the weight of the entire structure and not allow it to tip over.
- Then you need to glue the two bars together with glue. To do this, the smaller board needs to be greased with special glue and attached to the larger board. This must be done so that it is in the center. Using clamps, secure the bars until the glue dries completely.
- After this, you need to measure 5 centimeters from the edge and make a hole with a diameter of 3 cm. And since the base is relatively thick, you will need to periodically remove the wooden parts from the hole. As soon as the hole becomes through, all edges should be sanded.

We make a frame
A stand of almost one and a half meters was chosen for the frame. This height was chosen taking into account that a homemade floor lamp can be placed near the sofa and the light will fall on it from above. But you can choose a different height.
Before you start making the frame, you need to wipe copper pipe alcohol. This will remove any remaining stickers and grease.

Then you need to do the following:

Assembling the lamp
To assemble a homemade floor lamp you need:

We come up with a lampshade
Making a lampshade is very easy and simple. To do this, it is enough to have a regular office wastebasket for papers and follow these instructions:

The floor lamp is made by hand. Now you can put it near your favorite chair, open a book and enjoy reading. Photo finished product pictured below:

A floor lamp for your home can be assembled from a variety of available materials. For example, you can simply modify an old light fixture by adding a new leg or lampshade. For lovers of coziness and comfort great solution there will be a lampshade made of threads and beads. For this you will need mesh and thread. Satin threads are wound onto the mesh, and the lampshade is installed on the stand.
The lampshade can also be constructed from plain white paper or fabric. The homemade frame is wrapped in fabric or paper and given its own style using special paints. And the decorations self made beads, shells, rhinestones or buttons will give the lamps their own individuality and unusualness.
We recommend watching videos that demonstrate master classes on assembling a floor lamp from scrap materials. Find out how to do beautiful lamp floor-standing drum washing machine, as well as a tabletop model made from paper plates:
Such unusual ideas will allow you to create a lamp to suit any room interior. The advantage of a homemade floor lamp is that no one else will have such a product. It will be special and individual. Moreover, you can make not only floor lamps, but also build a tabletop lighting fixture that can be placed near the bed.
So we looked at how to make a floor lamp with your own hands at home. We hope you liked the photo and video examples provided, as well as the master classes and inspired you to make homemade lamp from scrap materials!
A chandelier in any room is no longer exclusively a lighting device. It would not be an exaggeration to say that this is the piece of furniture that is the main decoration in any room.
Of course, a DIY chandelier will be especially valuable thing. This will not only highlight the special taste of the home owners, but also their creative mind.
Despite the fact that if you decide to make a lampshade for a chandelier with your own hands, you will need to spend quite a lot of effort, because the process requires special concentration - surely the work time cannot be considered wasted, since the work will bring incredible pleasure and will even leave a pleasant aftertaste, and in the future you will definitely want to repeat this kind of work again.

If you are thinking about how to make a chandelier, then you have probably already seen that today you can use the most various materials and sometimes completely unusual. For example, very often the lampshade for a chandelier is made of wood or glass.
However, if you want something even more incredible, then you can also use cardboard, wooden skewers, and even wine bottles. The choice here depends solely on the ideas that the creator has, as well as on various kinds wishes of the apartment owners.

In addition, a chandelier from scrap materials must also be created taking into account the overall interior of the room.
Chandelier made from plastic spoons
Disposable spoons, which most people are used to using exclusively for picnics, can actually also be one of the simplest and yet easily accessible materials for creating an interesting chandelier option for any room.

If you look at a photo of a chandelier of this type, you will be struck first of all by the variety color range, and in the future it will be easy to understand that the material will last a long time.

Moreover, in order to create such interesting subject interior, you will need a minimum of financial and material investments.

What materials will be needed?
- Any empty plastic bottle. The only condition is that its volume cannot be less than five liters.
- Any plastic spoons. Their number depends solely on the chosen size of the future chandelier.
- Glue that allows you to glue plastic together.
- A socket from an old, no longer working chandelier.

The process of creating an original chandelier
Prepare plastic bottle. First of all, you need to get rid of the label and bottom, and also dry it properly.

Remove the spoons from the plastic and use a knife to remove any handles that are not needed. The only thing you need to do is leave a couple of centimeters above the so-called “scoop” level.

Glue the blanks to the base of the prepared bottle. On the “tail” that remains, you need to apply as much glue as possible and then press it to the surface.
It is very important to continue to cover the entire bottle in this manner directly in a circle until the entire prepared perimeter is “occupied” with plastic spoons.

It is best to arrange them in a classic checkerboard pattern and move them together a little.

This way it will be possible to reduce the number of “free spots” to a minimum.
- The shade is removed from the old prepared chandelier and placed in a dried bottle.
- If desired, decorative ones can often be done in a similar way.

That's it. All that remains is to install the chandelier in the chosen location, and also check its operation by connecting it to the power supply.

One more interesting option chandelier is a chandelier with decorative butterflies. It is worth noting that when going to almost any master class on making a chandelier, designers always offer to learn how to create one, which is not surprising, because it can fit perfectly into almost any interior of the room.
Pay attention!

Besides the fact that this option looks truly luxurious and expensive, even a child can do it with the help of an adult, so its popularity is easily explained.

DIY chandelier photo


Pay attention!


