Examples of required practical work in Photoshop. Photoshop lessons for beginners - step-by-step course How to make interesting work in Photoshop
Good day, dear readers. Do you seriously want to learn how to work in Photoshop and hope that you will succeed? Hundreds of people every day, inspired by video miracles in three-minute videos, open this program and forget about it a week later.
“At school they teach and teach, but here, in adult life, they pile on!” - a quote from a Soviet cartoon appears in my head. After a week, everything is forgotten, the person begins to think that he already knows how to do everything and how much further, you still won’t be able to apply it anywhere.
As a rule, all this knowledge remains unfulfilled by useless talents No. 7463. Why do you think that you will succeed? Well, by at least, you still haven’t stopped reading this article and that’s already good. This means you are partly a realist, this is wonderful, which means we have something to talk about. Then, let's find out how to work with Photoshop, or rather, from which side it is better to approach it, so as not to give up everything halfway.
How not to stop there
Motivation is the most important thing in life, especially for beginners in learning anything. You can start writing a book and quit after a month, leave cross-stitching after a week, as a rule, people forget about the work of creating websites after about six months. Why is this happening? Initially, the wrong approach to the matter.
You must constantly work on your own motivation. How to do this? First of all, let's find out what you want from Photoshop?
Play and edit a couple of your own photos?
Don't even bother with training. Find tutorials on YouTube for dummies or dig into Photoshop yourself, at random. These are the kind of interesting designs you can get when working with just a few buttons.

Which ones exactly? "Image" in the top toolbar. Special attention pay attention to corrections. There are a lot of gizmos here that can surprise your friends and diversify your leisure time.

Some of the most interesting tools here, in my opinion, are “Curves” and “Richness”.

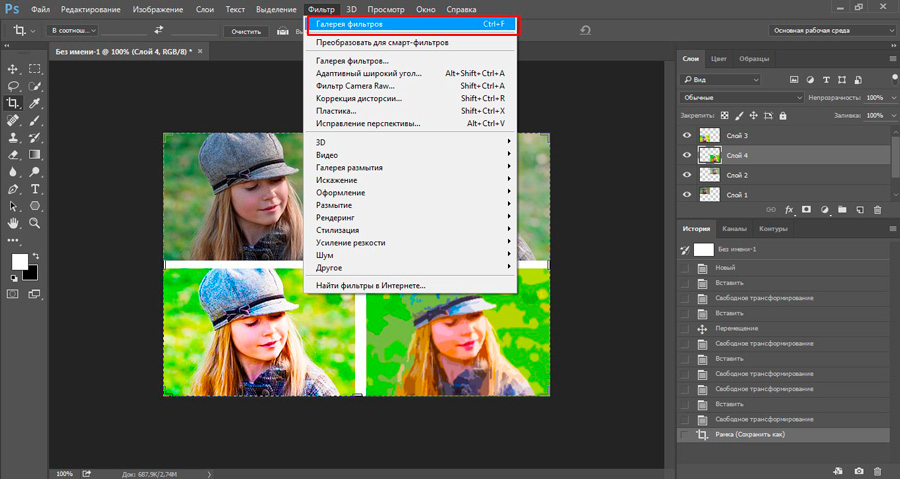
You will also definitely like the “Filter Gallery”.
You don't even have to download the program itself and spend money on it. There is a wonderful online service with a program in Russian ( https://editor.0lik.ru ), it is less functional when it comes to work, but is ideal as a toy. In addition, you can work with it for free. Create.
You tried it, got interested and want to move on
Wait. It’s too early to work with layers and other advanced functions. First, decide why you need it, otherwise you’ll just waste time.
If you don’t mind the days, weeks, months, that’s good, but when you start one thing, don’t finish it, take on a second or third, then in the end you get nothing.
How many more roads do you have to go to make real money from your hobby? Don't you really need this? Many people take on something stupid and create something incredible, earning millions from the project. And in the end, you will remain the person who knows a little more than others in each area.
How can you make money through Photoshop?
- Sell cool photos own production through photo banks.
- Create your own page and offer photo processing services.
- Create illustrations for books, of which there are about a million now in print.
- Make logos for companies.
- Web design.
Don't believe that someone will actually pay for this? Pfft, no doubt about it. You can find a bunch of offers on the Weblancer website ( https://weblancer.net ).

Don't worry that you don't have enough strength or experience. Take more time to complete the project and less money so that the complaints against you are not too serious. You can always justify it later own actions: “What did you want for 1,000 rubles? If you don’t like it, don’t take it, I completed the work on time, and it’s up to you to decide whether to refuse or take the results.”
You're a newbie and that's great. Keep your ambitions to yourself as long as possible. For corporate identity professionals can take at least 5,000 rubles. Don't think about big money while studying while you gain experience. Over time, good orders will come and then you will be able to set your own prices with full responsibility. In the meantime, set yourself tasks and solve them through educational articles and videos, of which there are a million on the Internet.
Start creating projects as early as possible. Make them for yourself, create projects for any money. No one will know how much you were paid, but you will have an excellent portfolio. Over time, you will learn to cope with tasks faster, which means you will be able to complete more orders.
Ambition is very strong and you want to earn a lot of money
If you are observed to be hardworking and have an impressive capacity for work, then you need to make money from it and start doing it as soon as possible. There is a lot of money in design. For good project they can pay about 80,000 for a website, 30,000 for a corporate identity, 1,000 for a cool illustration. But to get that kind of money and find clients you have to really try.
Of course, you can’t get by with training videos, articles, or the random method. Real, professional training will be required. You will need to understand the intricacies of art, quickly learn the wisdom of business, see how specialists work, what they use when creating, study, so to speak, the business to the maximum and do it quickly.

Talent alone is not enough; experience is also needed. No matter what industry you start working in, you need to grow into a professional. We don't have time for this yet! If you are very hardworking, that means you are ambitious, and if the earnings don’t come, you, again, will abandon what you started without completing it. You need to do everything to ensure that others, and especially customers, like the work you do.
I recommend you the course of Zinaida Lukyanova ( https://photoshop-master.org/disc15 ). It costs about two and a half thousand rubles and provides everything you need for work. All knowledge in 18 hours. Not a day will pass before you reach good level. Of course, you will have to improve it, but at least you will know the basics. Then it’s a matter of technique; all that remains is to look for your options. No one will tell you where to put this or that element, but you will know how this can be done and will not waste time on the technical side. It’s not difficult to figure it out; if you’ve already seen how a master uses this or that tool, you’ll be able to pick up a lot of useful tricks.
You will know specifically what can be done in Photoshop and what you can do, and therefore you will be able to find quick ways creation. Why spend an hour perfectly highlighting a shape if you can quickly and easily insert it into another object?
Which Photoshop to choose
Naturally, in this case there will not be enough online versions. It is only interesting as a toy. On your own you can install your own gradients, brushes, stamps, fonts. By the way, the last time I managed to download as many as 4,000 options. Take a look at some of them. Can you imagine how they simplify the life of a designer?

Naturally, you can install them on any version. By the way, let's talk about software. First came Photoshop CS5, this version is slightly less functional compared to latest version CS6.
And the coolest one is CC 2015. I have it. Of course, it is better for a designer to choose this one. There are a bunch of additional features that you probably won't need. For example, support for 3D printing. But what does she do to you? Does it make you feel bad? There is and there is. But in addition to this, you benefit from smart sharpening, perspective deformation, and improved layer correction. CC just can’t dance!
Don't think that you won't understand such a cool version or that it will be more difficult. All Photoshops are basically the same. It's just there somewhere additional features and buttons that you are not required to use. But what options do the new versions perform a little better? For example, they add glow or sharpness.

Learn one Photoshop - you will understand all the others. The main thing is to understand the logic of the developers, and understanding further will not be difficult at all.
Finally, I’ll leave you with a motivational video, where would you be without them? It's cool, they turn a girl into a robot. Great, by the way, if you remove the acceleration, I think it took him from two to eight hours to work. Agree, not so much. Just a day, and this is the result:
If you liked this article, subscribe to the newsletter and receive more useful and necessary information that will help you do right choice and earn money more money on the Internet, even if you don’t know how to do anything yet.
Photoshop is a very feature-rich program that gives us amazing capabilities. However, if you are just learning this software, you probably still don’t understand which techniques are best to use. In this publication, designer from Hungary Martin Perhiniak shares his experience and talks about how NOT to work in Photoshop. Your attention 10 bad habits, which would be nice to get rid of!
1. Work in one layer
No matter what you do in Photoshop, try to do it in additional layers. If you make all the changes directly on the original image layer, you will run into problems sooner or later. In particular, with the ability to cancel or edit changes. The basic principle of the so-called non-destructive method of working in Photoshop is based on working in new layers. In this case, making changes to the work done becomes incredibly easier.

2. Removing and erasing instead of masking
It is also a bad habit to erase and delete parts of the image. This is the most destructive method of work! Use masks instead. For example:
- Pixel Mask
- Vector Mask
- Clipping Mask
The easiest way to hide part of an image is with a mask. At the same time, you hide the unwanted part only for the time you need. If you change your mind, you can always edit the mask or cancel it altogether.

3. Wasting time on extra clicks
Using Photoshop without hotkeys is like eating soup with a fork. This is possible, but very long and inconvenient. A true Photoshop master should have one hand on the mouse (or tablet) and the other on the keyboard. Here are some of the most common keyboard shortcuts you'll find useful:
- Cmd / Ctrl + T - free transformation / Free Transform
- Cmd/Ctrl + Enter – accept text/Accept typing
- Cmd/Ctrl + S – save document/Save document
- Cmd/Ctrl + A – select all/Select all
- Cmd/Ctrl + D – deselect/Deselect
- Cmd / Ctrl + I - invert colors / Invert colors
- Cmd/Ctrl + Shift + I – invert selection
- Cmd/Ctrl + click on the layer icon - cause selection from the object in this layer
- Cmd/Ctrl + Option/Alt + A – select all layers
- Option/Alt + click between two layers - Clipping Mask
- Cmd/Ctrl + G - group layers
- Cmd/Ctrl + Shift + G - ungroup layers
If you are interested in more Photoshop hotkeys, check out this picture:

4. Transforming raster layers
Many Photoshop users have heard about how useful Smart Objects are, but not everyone uses them regularly. But it’s in vain, because when you convert a raster layer into a smart object, Photoshop starts working with it as a separate file. And this is what it means:
Thanks to the technologies introduced in Photoshop CS2, we have the ability to transform Smart Objects as much as we want without losing the quality of the file they contain. Try to do the same with a raster file, and after reduction you will not return to the previous quality.

5. Ignoring adjustment layers
Working in Photoshop without using adjustment layers/Adjustment Layers is similar to working in one layer. This is a big mistake. If you apply adjustments from the Image menu directly to an image, you will not be able to edit the changes later. And when using adjustment layers, you can change the selected parameters at any time, as well as experiment with opacity and blending mode.

6. Disorganization
When working in Photoshop, it is very important to organize your work. If you have already learned, or already used the first tip about working in new layers, then you definitely need to get into the habit of naming each new layer according to its content. This may seem like a waste of time, but believe me, it will save a lot more time for you and especially your colleagues if you work in a team.

7. Using destructive filters
Filters in Photoshop can be applied non-destructively using Smart Filters. In this option, you can turn filters on and off, change parameters, opacity and blending mode.

8. Suboptimal navigation
Some users drag the vertical and horizontal scroll bars to move around the document. This is instead of pressing Space, thereby activating the Hand tool and moving around the document in any direction. There are several keyboard shortcuts to help you navigate.
- Space – Hand tool
- Z + drag right and left - zoom in and out
- Hold down H + click - bird's eye view mode
- Cmd/Control + 0 - Expand to screen size
- Cmd/Control + 1 - Actual size

9. Not using Bridge
Adobe Bridge is a program that has been included with Photoshop since version CS2. The software helps you structure and not get confused in the files you work with in Photoshop. ( However, Adobe Bridge is still an amateur program. It is quite possible not to include it in the list of mandatory software. — approx. ed.)

10. Not saving PSD
Never forget to save your PSD file. Also, ALWAYS save your document as you work. This should become a habit at the reflex level. There is nothing more offensive than loss large quantity work done because your computer froze. Always save PSD files. You don't need to show it to anyone, but if you suddenly need to make changes, the file will be at hand.

Translation – Desk
(examples of work taken from the training portal http://www.photoshop-master.ru/)
Task 1
Create an abstract gold ring in Photoshop Final image.
Step 1. Create a new document of any size with a black background. Create a new layer and take EllipticalMarqueeTool(Oval selection) (M) with the following parameters:
Hold down the SHIFT key and draw a circle as shown below:

Right-click on the selection and select Stroke(Stroke):
 -
-
We circle the selection with the following parameters: ( white, width 2 px)

Reduce Opacity(Opacity) of the layer to about 40% and we get this effect:

Step 2. Now let's use the Smoke brushes to add texture to the circle. Create a new layer and select one of the brushes from the set, then paint as shown below: (reduce the brush size before working)

We use Edit-Transform -Warp(Edit - Transform - Warp) to transform the smoke along the contour of the circle:

Soft eraser(E) carefully remove the end of the smoke so that it smoothly turns into a circle:

Duplicate (CTRL+J) the smoke layer several times and place each copy around the circle.
Tip: Use FreeTransform(Free Transform) (CTRL+T) to rotate each layer and adjust its shape.

Merge all the smoke layers together (CTRL+E) and duplicate (CTRL+J) the resulting layer several times. Then using FreeTransform(Free Transform) (CTRL+T) transform the duplicated layer to add more effect:

Create a new layer and draw smoke inside the circle, then make it smaller Opacity(Opacity) of the layer to about 20%:

Add a Levels adjustment layer above all previous layers:

Edit the Levels adjustment layer mask:

We get this result: (as you can see, by adding an adjustment layer, we increased the depth and contrast of the smoke)

Step 3. Now let's add a simple light effect to the circle. Create a new layer above all the previous ones and with a soft white brush make one click, as shown below:

Deform this layer using Warp(Deformation) according to the shape of a circle:

As you can see, we now have a light spot:

Duplicate (CTRL+J) this layer several times to enhance the effect:

We repeat this process on the opposite side of the circle:

And we get this effect:

Step 4. Now we will add a cloud effect around the circle. To do this, create a new layer and draw a selection using EllipticalMarqueeTool(Oval selection) (M) (feather (feather) 40 px), inside the selection we generate clouds using a filter Filter -Render-Clouds(Filter - Rendering - Clouds):

Press CTRL+L and apply the following parameters for the layer with clouds:

Then we use Warp(Warp) to transform the clouds as shown below: (this will create a small effect of the sphere moving)

And we get the following result:

Step 5. We're almost done! Let's add the finishing touches in the form of additional effects. I added more smoke at the top and bottom of the sphere:


To add a golden hue, I created an adjustment layer ColorBalance(Color Balance) above all previous layers:


And finally, we flatten all layers Layer-FlattenImage(Layer - Flatten), then apply a filter Filter -Noise-ReduceNoise(Filter - Noise - Reduce Noise): (this will increase the sharpness of the effect and reduce the color noise of the circle)

Is Photoshop new to you? We will help you figure out what's what!
Learning Photoshop can take a long time, and there are a lot of things that I unfortunately didn't know about when I started. Therefore, today I present to your attention ten useful notes that will make working with Photoshop much easier! You will learn about the most important tools and tricks that even a beginner can master.
1. Get to know the Tools
This is the Photoshop toolbar.
Click on the double arrow to arrange the tools on the panel in one or two rows.
Did you know that you can customize it for yourself?
Although many useful tools will always be in your sight, you may miss additional tools, hidden behind the triangles in the lower right corner, using only what is located “on the surface”.
So customize your toolbar as a useful reminder to try new tools!
Click Edit > Toolbar(Edit > Toolbox…) to manually select tools. Group them according to priority levels - for example, one group could be tools that you have yet to master, and another group could be those that you use all the time.

Don't overload your panel with tools you don't use; Instead, put your favorite tools in it!
Decide on a Basic Tool Set
All tools won't be needed for every job, and so it's important to build a strong base, with a few flexible tools that are good at different types works
Here you see two different projects: drawing on a tablet and photo manipulation. Notice that the tools for both projects are identical?

While the first project is entirely a drawing, the second is very dependent on my illustration skills. So don't worry if you're not familiar with these tools yet! Your core set should reflect your interests, be it design, photography or illustration.
And don't forget that many of Photoshop's tools can be used for different purposes. For example, a tool Pen(Feather) can be used both to separate the model from the background and to create a vector illustration.

There are other tools you'll need, but consider them minor. For example, tools Pen(Feather) and Move(Move), at first glance, do not seem particularly creative, but they are needed (and sometimes needed very often) to improve the workflow.
What are your main tools?
In the beginning you will always have favorites. But as your skills improve, challenge yourself to try new tools and creative effects.
2. Introducing the Layers Panel
Simultaneous key press Control-Shift-N creates a new layer.

Layers panel very effective and useful. It will change the way you design, opening up countless possibilities in Photoshop.
But how?
Well, in general, the panel allows you to control several parameters. Opacity(Opacity), Fill(Fill) and Color(Color) are just a few of them. With these options you can modify your layers to create many cool effects.
Text effects, for example, are often created using incredible Layer Styles(Layer styles).

In the beginning, you may be using the Layers panel for its primary purpose - to contain your work on individual layers, but I highly recommend getting to know it in more detail. Explore the panel as much as you can and you'll discover new ways to create detailed work.
Having problems with color? Try working with Layer Blend Modes(Layer Blending Modes). Want to get a brighter result? Perhaps your solution is this Adjustment Layer(Adjustment layer).
3. Save time with Layer Masks
It's time to have an important conversation - a conversation about layer masks.
For beginners, layer masks can be confusing, but they are vital to effective editing.
To use a layer mask:

Here I've drawn a circle in the middle of the mask to show the white background underneath the blue layer.
Use layer masks in any work! Implement them into your regular work so that any adjustments can always be painlessly undone.
Most of the time, difficulties with this feature arise from a lack of understanding of when to use it. Beginners will often just use the tool eraser(Eraser) since this is the fastest solution.
You can also use masks to create isolated objects and then insert them into your work.
4. Control-S Correct?
Quality matters, so before you save your work and close the program, consider this:
- Why do I need this file?
- Where can I store it?
- In what format do I need it?
- How to keep it in the best quality?

Above you see a comparison different levels quality, 1 - 83%, 2 - 1%. Image taken from Envato Elements.
What and Where
The answer to the first question is whether your work will be used online. In graphic materials for posts online quality not so important, while printed materials should be kept with high resolution. Research printing guidelines to understand important settings such as Color Modes(Color profile) and how to manage them.
Store your files in a place on your computer that you can easily access. Photoshop may throw an error if some elements (such as fonts) are missing from the file, so try to keep everything in order.
Format and quality
Now that you know what your work is intended for, you can move on to saving it in a suitable format. Many designers save their work in multiple formats - this provides additional flexibility.
Click File > Export > Save for Web(File > Export > Save for Web).

Check out what your work looks like with different compression settings. Avoid quality loss!
How good will your design look when printed?
It is also necessary to save work in different formats in order to understand the print quality. If, for example, your drawing, design or other work contains bright neon colors, you may be disappointed with the physical result.
Minimalist design is a huge trend, partly because it gives you more printing options. This design is often easier to print and is therefore used more often.

What looks good on screen won't always look as good on paper. There are many reasons for this, and one of them is how exactly the ink falls on the paper. This step also requires an understanding of the difference between color profiles. RGB And CMYK.
Work according to your situation. To open/edit Color Mode(Color Profile) of your file, click Edit > Color Settings(Edit > Adjust Colors...).

Test your work by printing it out! To achieve best result Find out the intricacies of how a specific printing printer works.
6. Sets! Sets! Sets!
In the real world there are things like tight deadlines and daunting tasks. So save valuable time by using built-in Photoshop presets!
There are sets of brushes, shapes, patterns and much more. You can quickly add a filter to a photo or create a brochure with abstract elements.
To view them all, click Edit > Presets > Preset Manager(Edit > Sets > Manage Sets).

Some of my favorite sets are brush sets. Brush sets from your favorite artists are cool too, but take advantage of the ones you already have!
These sets include different textures, beautiful gradients and much more.

In the screenshot you see an example of a set of Wet Media brushes.
Use kits to create amazing effects! They're already organized for your convenience, so all you have to do is download them and get started.
7. Easily change colors with adjustment layers
Create incredible lighting schemes with just a couple of clicks!
Adjustment Layers(Adjustment Layers) are just perfect for Photoshop beginners. They allow you to easily change many visual aspects of your work.
Need to save original photo? No problem. Tools that allow you to undo any changes, like adjustment layers, can help you create stunning effects without losing quality.
To use an adjustment layer Color Lookup(Color Search):
Click Layer > New Adjustment Layer > Color Lookup(Layer > New Adjustment Layer > Color Search). Select a set for the file 3DLUT File from the dropdown menu. Click OK and enjoy the result.

Photo from Envato Elements.
Adjustment Layers are one of my favorite tools and I'm thrilled that they work just as well for tablet illustration!
Artists who specialize in painting in Photoshop use these adjustments to try out different color palettes before you accept final decision. Explore different schemes lighting and much more with incredible tools like Curves(Curves).
8. Learn to organize your workspace
Chefs love to keep their kitchens clean as it keeps them tidy and productive. So why not create yourself a clean workplace in Photoshop?
The organization contributes to the creation of good working atmosphere. And even if it seems like being messy is very creative, an organized workspace can improve your work.
First, close all unnecessary tabs!

After this, there are still many ways to make everything even more accurate. For example, you can pin and unpin your favorite panels and toolboxes.
Then click Window > Arrange(Window > Arrange).

Choose from the following layout options to ensure all your documents display neatly. Keep sources of inspiration close at hand to make them easier to access.
The standard solution is Consolidate All to Tabs(Merge all in tabs) but you can also select e.g. 2-up Vertical(2 up, horizontal) to place the sample next to your work.
Need to return your workplace to its original appearance? Click Window > Workspace > Reset Essentials(Window > Workspace > Reset Primary Workspace).

Each artist's workspace will be different. Some people like to see more dashboards than others. For example, I am not one of them, since I prefer to minimize the mess. But whatever you personally like, you can always customize work environment the way you want.
9. Master the Pen Tool
Tool Pen(Pen) (P) can be intimidating at times, but with time you will be able to fully master it.
First, study the tool itself. Option Path(Outline) is needed to highlight an area, and Shape(Shape) allows you to create your own shapes.

Then get to know Path Operations(Operations with contour), Alignment(Outline Alignment) and Arrangement(Order the outline). Designers who are familiar with Adobe Illustrator may find it easier to get comfortable with this tool.

Most best way to master anything is to experiment! Create a bunch of lines and curls and then play with the settings like Blending Options(Blending Options). The possibilities are truly endless! Don't forget to use the Pen tool when creating text effects, illustrations, and more!

10. Remember Hot Keys
Hotkeys are not new.
However, designers sometimes have problems remembering them. Want to learn a little trick to help you remember those keys?
Try this old trick to help you think about tools. When you think of a hotkey, think of an image that explains what it is, or how to use it.
By pressing the letter B, which brings up the tool Brush(Brush), I automatically imagine this:

Remember these keys by priority. As in the first part of the lesson, it is important to figure out which hotkeys you need most. You will also need to remember additional keys related to your favorite instruments.
To increase the brush size, for example, click the right or left square bracket: [ or ] .
You'll easily remember your favorite shortcuts as you use them often, but it's worth exploring new options.
You won't master Photoshop in a day, and that's absolutely okay! Just think of it as a creative adventure that gets better over time.
Before you close this lesson, remember:
- Decide on your core toolkit
- Get to know the Layers panel
- Save time with layer masks
- Save files correctly
- Know the difference between print and web guidelines
- Use the sets...
- ...and adjustment layers.
- Organize your workspace.
- Explore the Pen tool.
- Remember the hotkeys.
Try these tips and tell us what worked best for you in the comments!
Here is a series of lessons that teach you how to use the Photoshop graphic editor - an incredibly popular and indispensable tool in web design, with the help of which not only buttons, banners and logos, but even entire layouts are created for the site. The design of almost any website you visited was originally drawn in Photoshop, so knowledge of this program will definitely be useful for a webmaster, although the skills of image processing and creating your own drawings will also not harm a simple PC user. Digitizing photographs, retouching old photographs, creating postcards and collages - this is only the beginning of a long list of useful actions that the editor allows you to perform, and a series of lessons will help you get used to it.
Add this page to your bookmarks so you don’t lose the table of contents and consistently study article after article, learning more and more new techniques for working in Photoshop.
But what will you learn in these lessons?
- 1 Getting started in Photoshop - quick selection and fill
Here you will get acquainted with the program interface, find out what the main interface elements are for, learn how to create documents and save them, and master selecting areas on the canvas. Also from the lesson you will understand how to fill areas with color, and you will understand the principles of working with the program. After mastering the information, you will learn how to perform simple actions and will be able to independently explore other editor tools.
- 2 Layers and text
All Photoshop images are built on layers. This is why editing in the program is so convenient. The lesson will tell you what layers are, why they are needed and how to work with them. In addition, it describes techniques for creating and processing inscriptions, as well as moving objects located on the canvas. After completing this lesson, processing multilayer documents will not be a problem for you.
- 3 Filters
You will get acquainted with a huge library of picture-changing scripts. The editor's filters can not only give the finished image a particular effect, but even create new objects and frame the photo.
- 4 Working with images
The article provides the basics of processing existing graphic files. Editing several images at once, moving objects from one picture to another, changing sizes and removing unnecessary parts - this is just an incomplete list of lesson topics.
- 5 Transformation
The lesson will teach you how to scale image elements, change proportions, tilt, distort and deform them
- 6 Drawing - brush and pencil
The first in a series of articles talking about tools for creating your own masterpieces. For a long time now computer technology have evolved to the point that they can simulate drawing on paper. You will learn to create using a virtual pencil and brush - sketches and watercolor paintings can now be easily drawn and shared on electronic media, making an unlimited number of copies and without worrying about the safety of your work.
- 7 Drawing - shapes
Creating objects by hand is one thing, but accuracy and speed are sometimes paramount. The lesson talks about tools with which you can create perfectly smooth images in just a few clicks. geometric shapes specified sizes. From a simple square to an ellipse, a star, and even a musical note, the article covers everything.
- 8 Drawing - outlines and bitmaps
You will remember once and for all how a vector differs from a raster, what the pros and cons of both approaches are, and you will also learn why shape contours are needed in Photoshop and what the pixel mode does.
- 9 Drawing - Pen tool
Continuing to work with contours, we study the tools of the Pen group. Purpose, method of application, description of parameters, and as a result you will learn to draw atypical contours and create complex geometric objects.
- 10 Drawing - Magnetic pen tool
The Magnetic mode of the Freehand tool has become so popular that it is called the Magnetic Pen, although there is no such separate tool in Photoshop. What this function allows you to do, why users love it so much and how it will help you personally - read the article.
- 11 Image Retouching Tools
To use these editor functions for the Internet, you don’t need to be a layout designer, a designer, a webmaster, or anyone at all. It is enough to be an active user social networks. How to make your face more beautiful, remove moles and freckles? How to process an old scanned photo so that the colors become brighter, and scratches, stains and specks of dust are not so noticeable? How to carefully cut an object, move it or clone it? Where is the tool that will help you remove the red-eye effect from a photograph in just a couple of minutes? Find answers to these and other questions in the article.
- 12 Image correction tools
You already know so much that learning new tools is not a problem. All I had to do was make a review describing the possibilities to improve the quality of pictures - lighten where it is too dark, darken where it is overexposed, blur and add sharpness, mix and smear colors. In general, additional information on how to make the image better awaits you in the lesson.
The pinnacle of creativity for the web is drawing website templates. When you have mastered most of the tools, and have enough skills to draw dividers with shapes, buttons for menus, logos, and beautiful inscriptions, nothing prevents you from creating a good one, complex layout. The article explains what a standard template consists of, describes the principle of creation, and also teaches how to cut a template using tools previously unfamiliar to you.
Having paid attention to each of the lessons, analyzing practical examples and experimenting on your own, as you master the course you will go from beginner to advanced user of Photoshop and will be able to go deeper into it yourself by switching to new level mastery, and a strong and reliable foundation laid by a series of our articles will help you in this.