Do-it-yourself Roman blinds - a simple and elegant solution
More than three hundred years ago, the inhabitants of Rome, protecting their homes from dust and bright sunlight, hung a rectangular piece of heavy fabric on the window, which folded, if necessary, according to the principle of an accordion - rose up, forming horizontal folds.
Since ancient times, Roman blinds have not lost their relevance, and today they are universal, but at the same time, a stylish and original element of window decoration.
Since the advent of Roman blinds, the design and principle of their operation have not changed at all, although There are also some varieties:
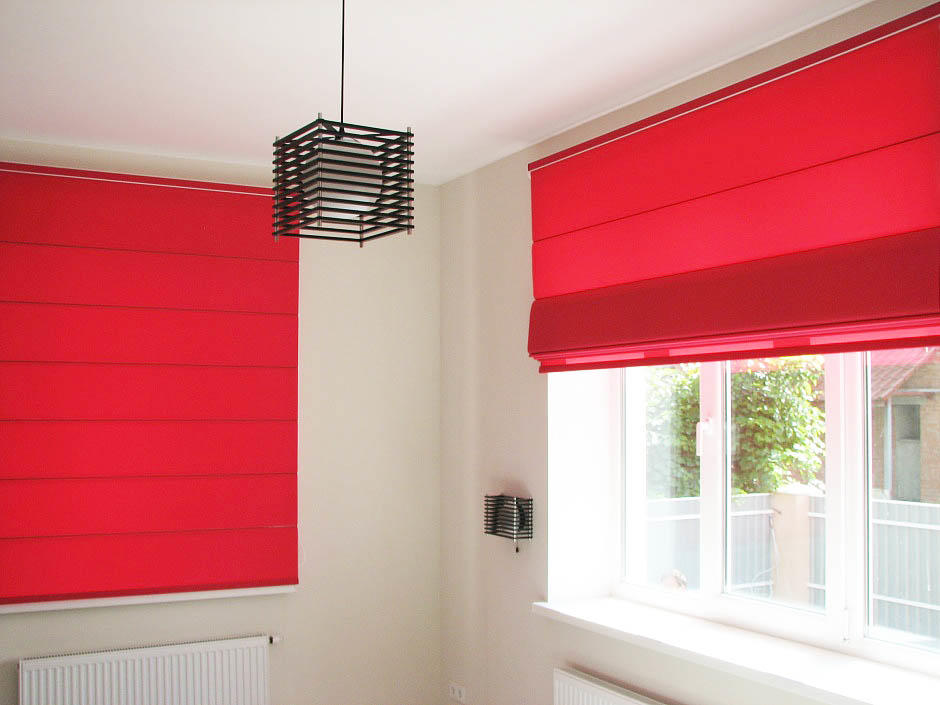
- Classic. A smooth and even web of fabric is evenly gathered into even folds. This is achieved by a frame of slats, plates or tubes sewn into the fabric.
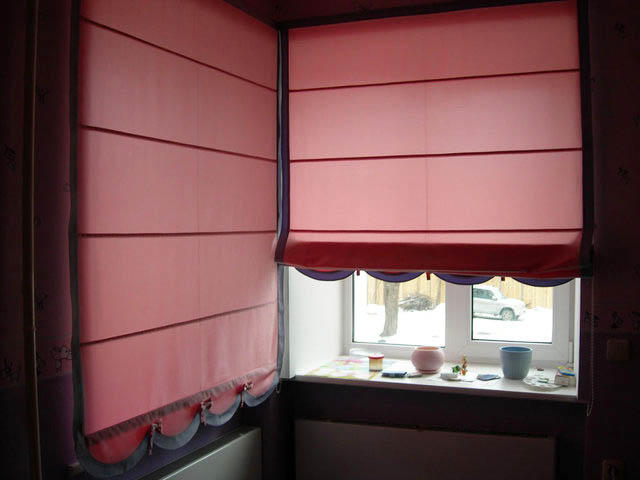
- Cascading curtains are folded even when open. These Roman blinds are more elegant and pompous, so they are appropriate for decorating large windows in living rooms, concert halls.
- Frameless Roman blinds once became the prototype of classic curtains. They are sewn without guides and are assembled in the center and sides, forming a kind of "ears", like a lambrequin.
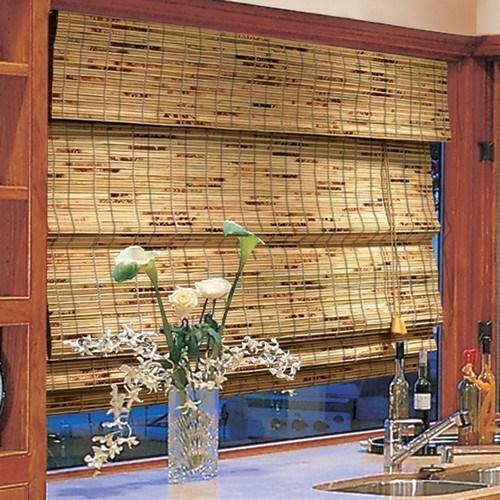
What is good in the kitchen
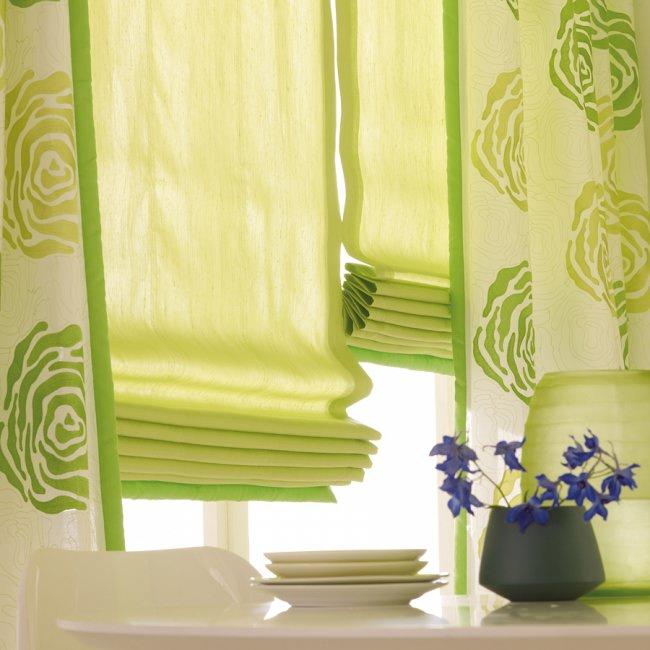
Romans, as designers like to call them, look elegant and impressive in the kitchen and in the children's room, in the living room and in the restaurant. In their functionality, these curtains are similar to blinds and roller blinds (they allow light from below the window), but when unfolded, they look like traditional curtains.
Such a constructive solution makes the Roman blind indispensable for the kitchen if:
- the work surface is located opposite the window. Sewn to the tabletop, the curtains will not crawl around the table and interfere with the workflow.
- the window is close to the fire source. The panel of a traditional curtain can catch fire from a breath of wind. Such a nuisance is completely excluded if a Roman blind hangs on the kitchen window.
- The kitchen is tiny. After all, this kind of curtains visually expands the room, and if you still choose a good color and texture of the fabric, then the curtain will become not only a functional thing, but also an original element of decor.
Classic roman blind design
Laconic design is one of the main advantages of Roman blinds. It occupies only the surface area of the opening, no draperies, frills and additional decorative elements are supposed here.

The simple form of the Roman blind allows you to make it yourself without fear of spoiling a significant amount of fabric, if something suddenly doesn’t work out. Even a novice seamstress can easily cope with this task. The most important thing in tailoring a Roman curtain is to choose the right fabric, make the right patterns and follow the instructions clearly.
Material selection
When choosing a material for sewing a Roman blind with your own hands, first you need to decide on the main task of the curtain: will it let in light or not. If it is necessary that the curtain saves from the hot sun, it is better to choose a dense fabric. Now materials are sold with black out treatment, which protect against scorching rays. In the case when there is no need to hide from the sun, light, translucent, well-draped fabrics can be used.
In order for the Roman blind to harmoniously blend into the design of the kitchen, it is necessary to take into account the color scheme prevailing here, or vice versa, to play in contrast. You can sew a curtain to match the chair covers. And you can take into account the color of the kitchen set and focus on it, choosing the material for the curtains.
Due to the simplicity of the design, the main focus is on the fabric. Therefore, when choosing a material for sewing Italian curtains with your own hands, you should remember some nuances:
- Striped patterns are not recommended for Roman blinds. With this coloring, all the shortcomings of the cut and tailoring will be obvious. If you like geometry, then let it be abstract.
- Also, you should not choose a fabric with a large pattern, because when you raise the curtains on the formed folds, it will become incomprehensible.
- Linen materials shrink significantly after washing. Therefore, you need to buy fabric with a margin, and before sewing, you should soak the material in hot water and leave it for a while. Thanks to this procedure, the shrinkage of curtains during subsequent starks will be negligible. These manipulations are recommended to be carried out with other tissues, so that later there are no surprises.
- Curtains for the kitchen should be dirt-repellent, do not absorb odors, wash well and be suitable for regular washing.
- Roman blinds are not made wide. Maximum 1.5 meters. If you want to have Italian curtains on a spacious window, you can install two or more cornices.
Do it yourself: the necessary materials
To make a Roman blind with your own hands for the kitchen, you will need the following materials:
- Main fabric and, if necessary, lining;
- Tape with a sticky layer (Velcro) along the width of the curtain;
- Finishing border;
- 7-8 rods with a diameter of 4-5 mm. They can be wooden, plastic or metal. Their length should be shorter than the width of the curtain by about 3 cm;
- Plastic rings (2-3 pieces for each drawstring), through which the cords lifting the curtain will be threaded;
- Nylon cord. It is necessary to make three cuts: the length of each lace should be equal to two lengths of the curtain and one more width;
- Plank-weighting agent;
- A wooden plank or beam with a section of 2.5x5 cm and a length equal to the width of the canvas for hanging the curtain;
- Handle or chain for lifting curtains;
- Nails, hooks with a screw night, shurpas.
Calculation of the amount of fabric
To the width of the window, add 2.5 cm on each side. Typically, a Roman blind is sewn to the windowsill, but floor-length variations are also possible. 12 cm are added to the length indicator for allowances: 2 cm will go into the upper seam, the remaining 10 cm into a double (5 cm each) hem of the bottom.

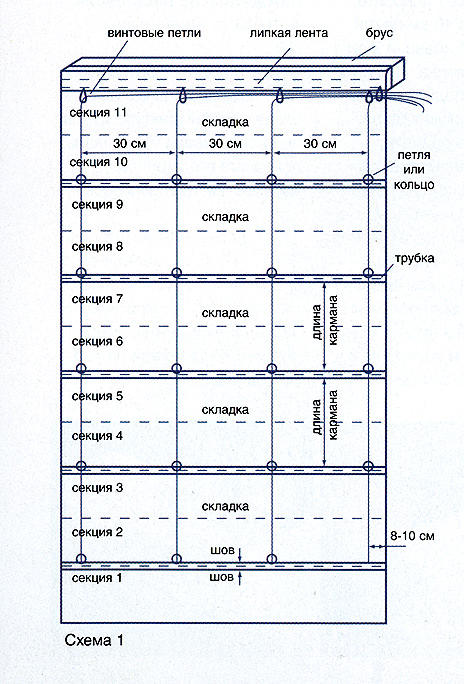
As such, patterns for making a Roman blind with your own hands are not required. It is enough to draw a rectangle on a piece of ironed fabric the size of the kitchen window and correctly mark the folds.
One of the main secrets of sewing a Roman blind with your own hands is to accurately calculate the width of the folds. For openings with a length of 145 to 220 cm, 7 folds are made.
Sewing steps
So, let's begin:
- On the wrong side, mark the lines of the collar, folds and places for installing rings for threading the cord.
- Trim the side edges with a double hem.
- With a furniture stapler or small nails, fix the Velcro on the underside of the beam, which will play the role of a cornice.
- Instead of a beam, you can use a ready-made cornice (lambrequin strip), which is sold along with Velcro and fastening material.
- Sew the remaining adhesive tape on the treated upper front edge of the curtain, which will allow you to remove the curtain for washing.
- On the bottom edge of the pattern, make a collar and a drawstring, a weighting agent will be inserted into it. An aluminum profile is used as a sinker, a couple of centimeters shorter than the eaves.
- From the inside of the curtains, sew a finishing border and insert rods into the resulting pockets. Sew up the sides.
- Manually sew the rings to the cornice or beam to install the lifting mechanism. Cord rings are arranged symmetrically, taking into account that the outer ones should be placed at a distance of 5-10 cm from the edges of the curtains.
- After fixing the pattern on the cornice with Velcro, the procedure for threading the cord into the rings begins: you need to tie a knot on the lower ring, fixing it with glue for strength, and stretch the cord through all seven rings in a vertical row. A similar operation is carried out with the remaining rings.
- After threading all the cords, bring them to one side, pull them tight. From such a manipulation, the folds are evenly distributed over the entire width of the pattern. With the help of a braid, you need to temporarily fix them in this position.
- A beam or cornice with a curtain is fixed in a designated place (ceiling, opening between frames, etc.). Now you can remove the tape fixing the folds - the curtain will lower. Having equalized the tension of all the cords, gather them together, tie a knot behind the last ring.
- Pass the cords through the handle to raise the curtains and tie tightly after 45-50 cm from the first knot. Trim the ends of the cords neatly. Roman blind for the kitchen is ready.
Following the instructions above, you can make an original Roman blind with your own hands in a few hours, which will become a real decoration of the kitchen. And if you sew several color options for this universal curtain, you can periodically update the interior, pleasantly surprising the household and guests.