Master class: how to make Roman blinds with your own hands
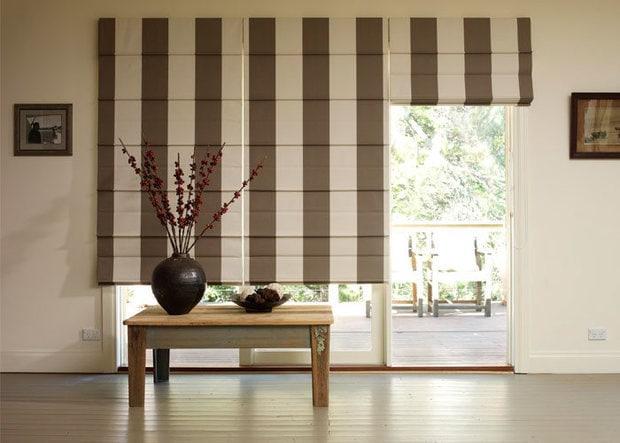
Roman blinds are a popular trend that is gaining more and more fans every day. Why are they so attractive? Those that look stylish, are compact and do not clutter up the interior, and are also easy to care for.
So, if you dream of Roman blinds, then it's time to pick up a tape measure and fulfill your desires, and today we will tell you how to do it right.
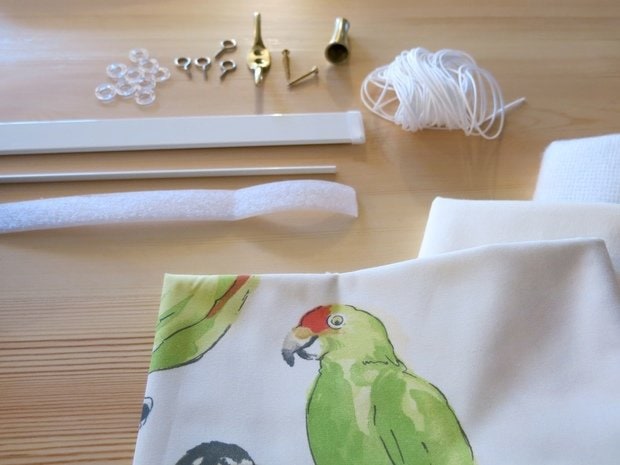
What will be required
- Fabric and lining for curtains
- Metal or wooden pins (3 cm shorter than the width of the curtain itself), 7-8 pcs.
- Velcro tape (according to the width of the curtain).
- Drill and screws.
- Chalk or soap for marks.
- Threads and needle.
- Sewing machine.
- Three pieces of cord, each of which should be twice as long as the curtain, and its width should be more than one length of the curtain.
- Plastic rings.
- Weighting bar and wooden plank for hanging curtains.
- Nails and hooks.
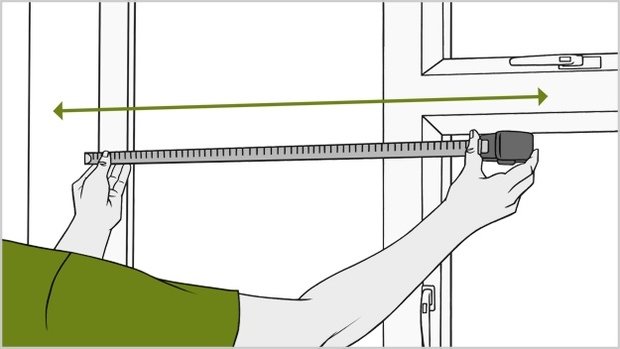
Step one
First of all, you need to measure the window opening, add another 12-15 centimeters to the results obtained for allowances from the bottom and top of the Roman blind, as well as five centimeters for the side seams.
Do not forget to take into account the number of folds when calculating the fabric. This parameter depends on the length of the curtain itself.
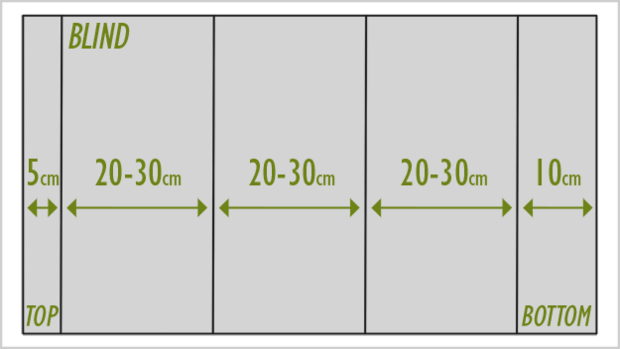
step two
Now, on the wrong side, with the help of chalk or a piece of dry soap, you need to mark the places for installing the rings, the lines of folds and the hem.
Make sure that the distance between the folds is identical, otherwise you risk getting Roman blinds with an ugly drapery.
Step Three
Now you can safely begin the process of sewing curtains. Here you can not do without a sewing machine. It doesn't matter if it's electric or mechanical, the main thing is your skills in handling it. If you do not know how to sew, then it is better to contact a friend or familiar seamstress. In the absence of skills, you can simply ruin the fabric and mood.
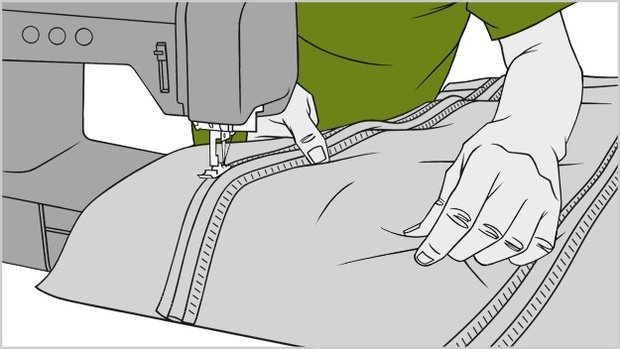
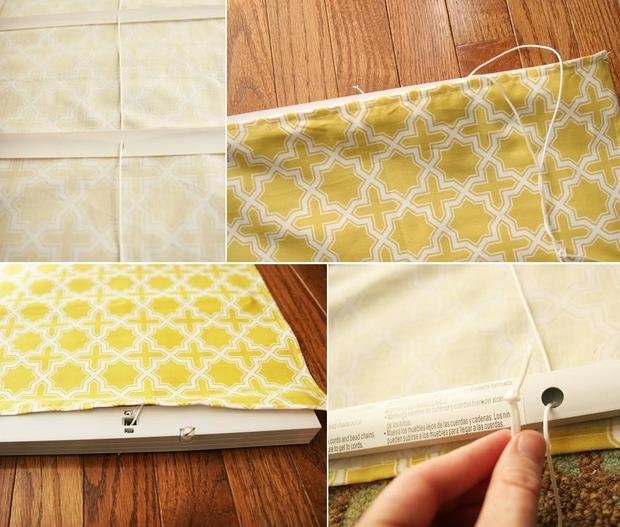
We decided to do the sewing of curtains ourselves - be extremely careful and attentive. First, process the side edges and the top section of the fabric or textile material that is intended for curtains.
Velcro must be sewn to the upper cut, on which, in fact, our curtain will be attached. Velcro is the most convenient option for care. So, it is easy to remove the curtains for washing and hang them back, and if you get tired of it at all, you can replace it with another one or remove it altogether.
Step Four
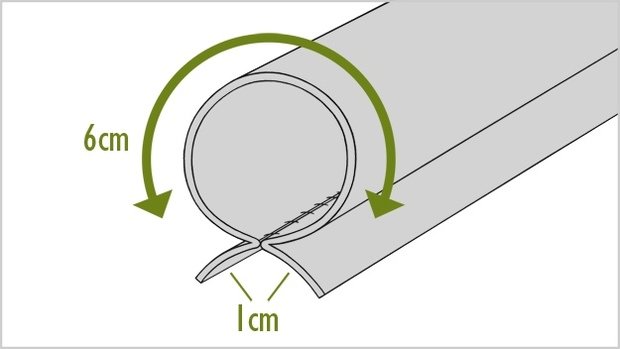
Tuck the bottom of the curtain in order to insert the weighting bar there. Then sew a finishing border along the wrong side of the curtain. It is now possible to insert slats into the formed "pockets".
Step Five
Using carnations or a furniture stapler, attach Velcro to the wooden beam (its lower part). Curtains will then be attached to it.
Step Six
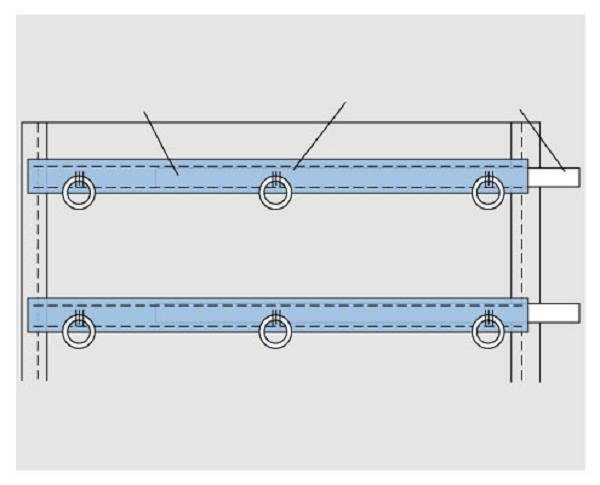
Move on to marking the position of the rings. Then sew them on by hand. They are attached to a wooden beam with nails. This is done to ensure that the lifting mechanism is well fixed.
step seven
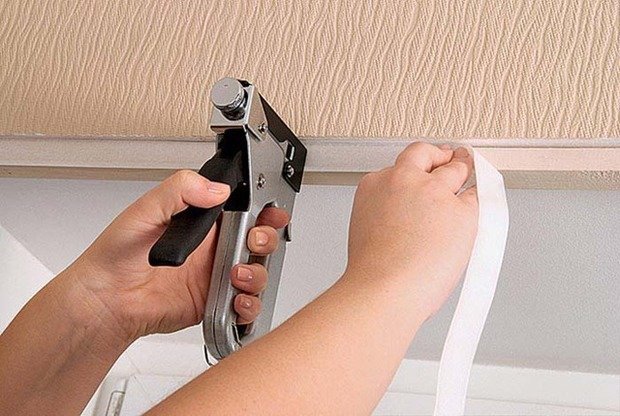
Fasten the curtain to the wooden beam using Velcro. Attach the cord fastener to the window frame. Next, wrap a cord around it that will fix the curtain. Now thread it into the rings starting from the bottom edge. On the lower ring, you need to tie a knot and fasten it with glue for strength.
Step eight
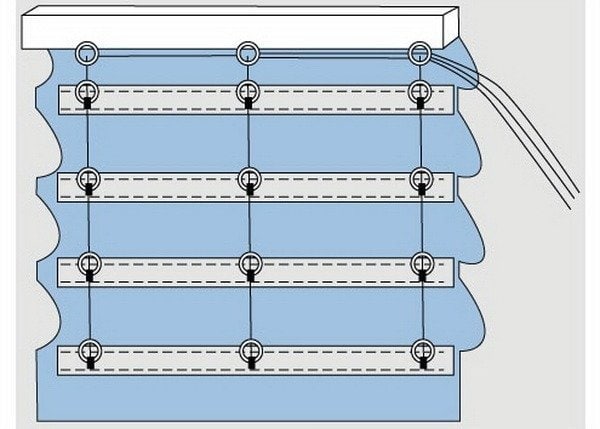
You need to thread the cord to the top edge of the curtain through all the rings and repeat this action with all rows of rings. In this case, you need to ensure that through the upper rings all the cords go out to one side of the curtain. Now pull all cords as tight as possible. So the folds can be distributed across the width of the entire curtain. They need to be secured with strings.
After you pass all the cords, they must be passed through the fastening rings so that they are on the same side.
Step nine
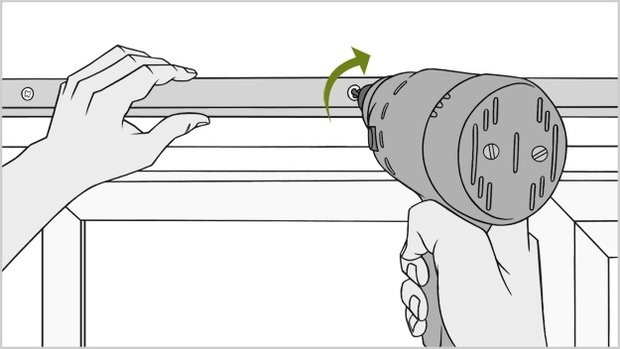
Now you need to install a wooden beam on the window frame. To do this, you will need a drill and screws. Then you need to remove the ribbons with which the folds were fixed. When the curtain comes down, you need to equalize the tension of all the cords. Hold them together until you tie a knot, which you then need to hide behind the last ring.
Now you need to thread the cords through the handle to open the curtain. Measure 46 centimeters from the first knot and make another one. Below the last knot, cut off the rest of the cords.
Well, our Roman blinds are ready! Of course, to make them with your own hands, you need to tinker a lot, but the result is worth it: your interior will immediately change, acquire a touch of exclusivity. Moreover, today it is fashionable to create interior and decor items with your own hands.