Correctly combine curtain rod and stretch ceiling
There are two simple ways to understand how to combine a curtain rod and a stretch canvas on the ceiling: a photo with the results of the work and a detailed description of all the actions. The correct sequence of operations and deliberate choice will lead to an ideal result. You will receive not only a new "home sky", but also a magnificently designed window opening.
Stretch ceiling is an ideal solution for renovation in terms of price / quality ratio. It hides significant defects of the main slab, minimizes labor costs, does not require numerous building materials, and its installation takes two hours or more.
If there is a window in the room where the renovation is being done, then even before starting installation, you need to choose what the decor will be for the opening- textile curtains and tulle or blinds on the sash. The ceiling cornice to the stretch ceiling can also be different.
Having given preference to traditional curtains, decide in advance what type of curtain rod to buy - with fastening to the walls or ceiling.
The wall version most often consists of 1, 2 or 3 wooden, plastic or metal rods on brackets. A less popular, but worthy variety is a string cornice made of fishing line stretched between two wall fasteners.
The size of the canvas depends on which cornices you choose. If you settled on wall mounting, you can safely order the product. No preparatory work is required. After tensioning the canvas, attach the rods to the wall and hang the textiles.
Ceiling cornices and stretch ceilings (video)
We hang curtains to the ceiling
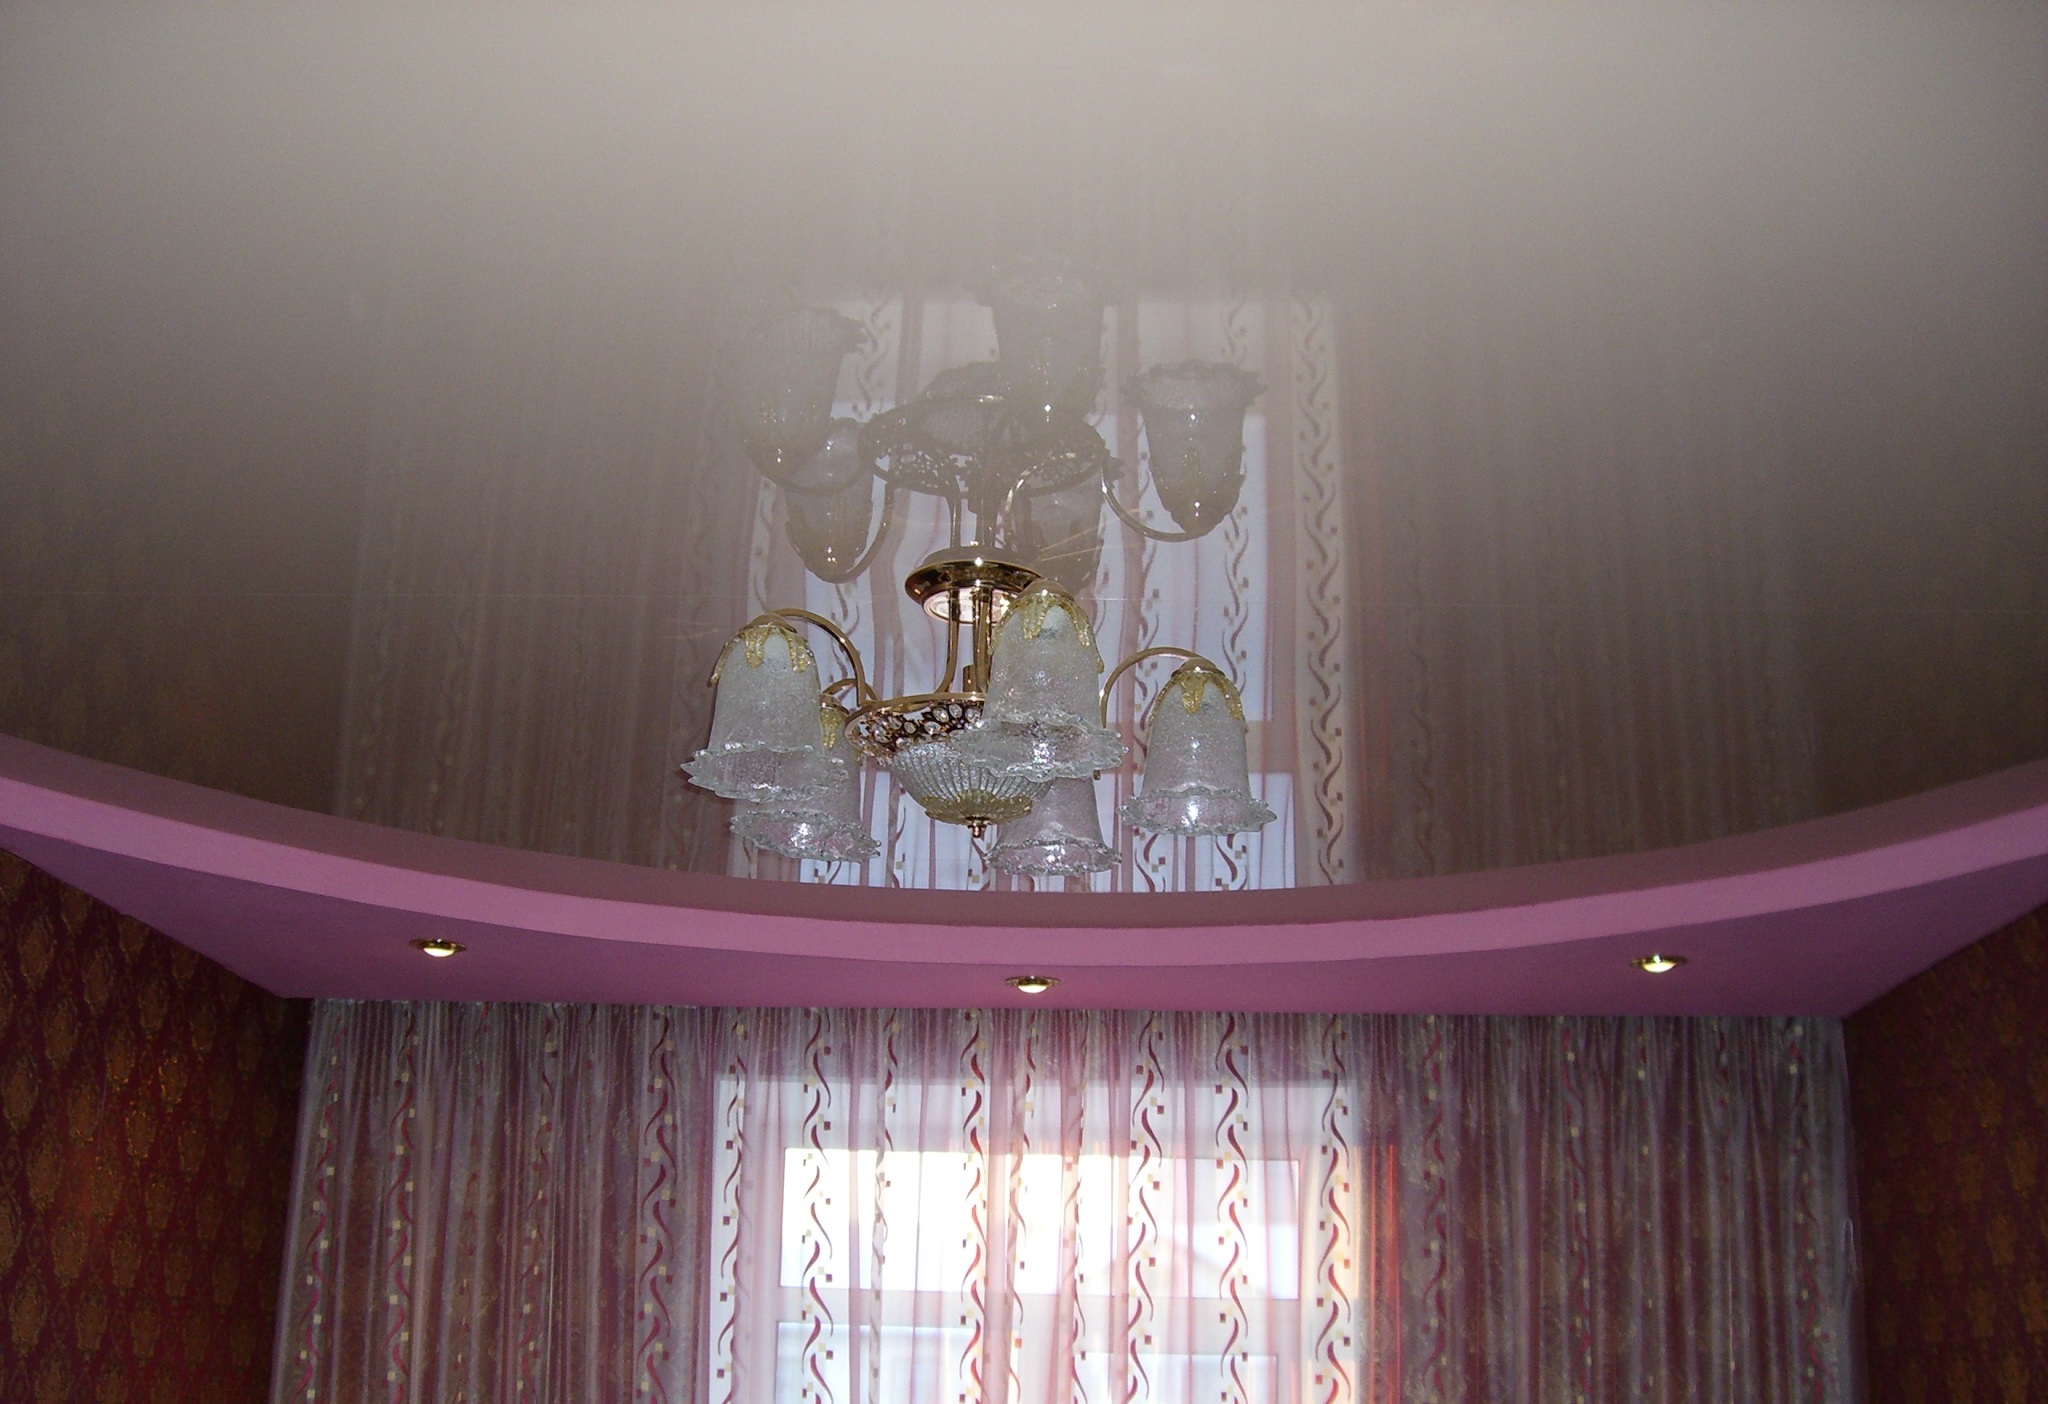
There are 3 main options for how to fix the ceiling curtain rod when using a stretch canvas in the repair process.
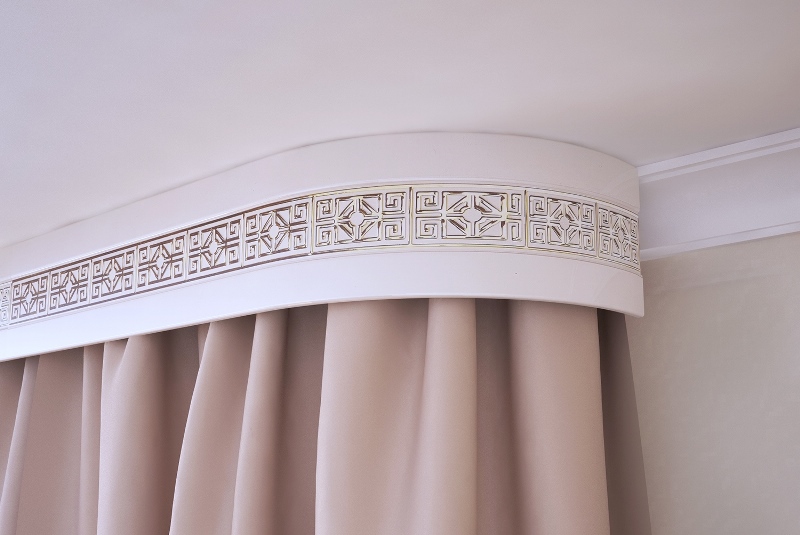
The first and most common is placing it directly on the product. Visually, it will seem that the cornice is fixed to the canvas. However, this is not entirely true.
Before starting the installation work, it is necessary to accurately determine and mark with the help of a level and a tape measure the place where the curtains will subsequently be located. A mortgage is screwed to this place to the main floor slab.
It can be a special plastic platform. But most often they use a regular wooden block with a section of 50 x 50 or 50 x 70 mm. Its dimension depends only on how much the height of the room changes after installation. When the block is secured, work can begin.
After the completion of the main manipulations with the tensioning canvas - its spreading and the installation of lighting devices - the cornice is attached to the ceiling.
It is screwed with screws to the very beam that was used as a mortgage. In the photo, in this case, curtains and tulle will hang from the ceiling.

We hide the design for curtains in a niche
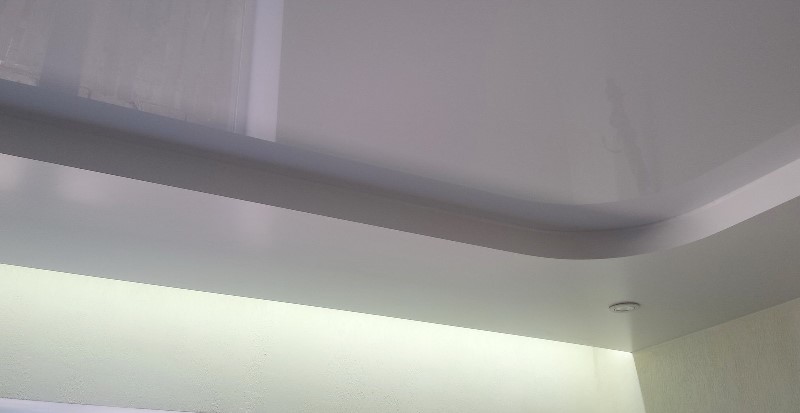
The placement of the ceiling cornice to the stretch ceiling can be different, creating the visual effect of floating curtains.
Determine the place where the structures for attaching the curtains to the stretch ceiling will be placed. Scrupulously measure the distance and mark the capital slab.
Step back from the marks some distance (usually 15-30 cm) deeper into the room. The interval should be such that you can freely hang and remove the fabric in the future. This place is the boundary of the ceiling. On it you need to fix a mortgage - a wooden block.
The distance between it and the window forms the very niche for curtains, in which the cornice structure will hide.
There are 2 types of niches: with an inflection and without an inflection.
A niche without bending is characterized by the fact that it combines both the structure on which the curtains are hung and the screwed mortgage. They are not masked by anything.
With this version of stretch ceilings on three sides of the room, the baguette into which the film is tucked is screwed to the walls. And to the bottom of the timber, a baguette is not attached to the wall, but to the ceiling.
Installation of a ceiling cornice for stretch ceilings (video)
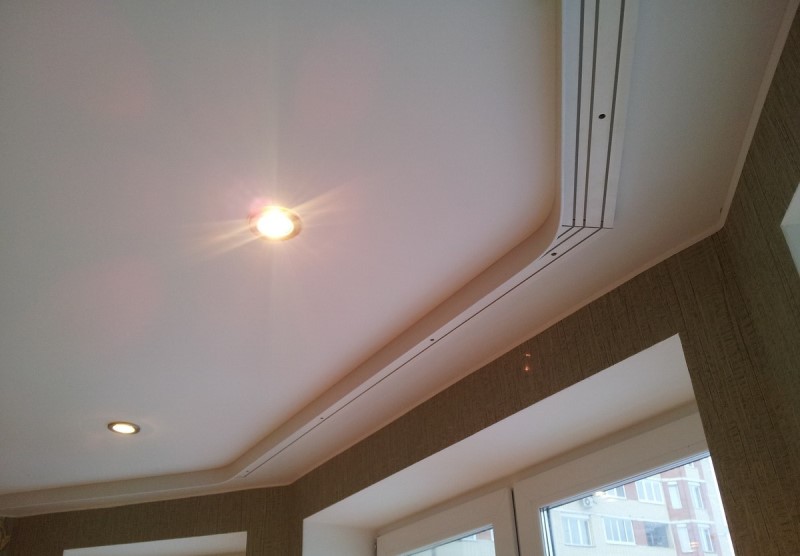
How to design a kinked niche?
Cornices hidden from the eyes can be decorated even more beautifully by ennobling the mortgage with the fold of the canvas. In this case, looking between the ceiling and the window, you can see the structure of the ceiling cornice. The beam will remain invisible, since it will be covered with a ceiling film or fabric (depending on which type of canvas you prefer).
To bring such an idea to life, you should use a smooth high-quality timber for the mortgage. This is necessary so that when bending around the bar, the canvas is not scratched or torn.
In this case, a wall baguette is attached to the three sides of the room, and in the recess, the ceiling baguette can be fixed to the slab in direct contact with the timber. It is also allowed to put a wall baguette to the upper part of the bar itself in a niche and carry out the installation in the usual way.
When the film is stretched, the bar will close, and you get the effect of "floating curtains".
If you provide for backlighting and, when installing along the mortgage, fix the LED strip in a niche, then its diffused, slightly dimmed light will only enhance the vaping effect. And your window will look fantastically beautiful in the dark.
And a little about secrets ...
Have you ever experienced unbearable joint pain? And you know firsthand what it is:
- inability to move easily and comfortably;
- discomfort when going up and down stairs;
- unpleasant crunching, clicking not on their own;
- pain during or after exercise;
- joint inflammation and swelling;
- unreasonable and sometimes unbearable aching pain in the joints ...
Now answer the question: does this suit you? How can you endure such pain? And how much money have you already "poured" on ineffective treatment? That's right - it's time to end it! Do you agree? That is why we decided to publish an exclusive interview with Professor Dikul, in which he revealed the secrets of getting rid of joint pain, arthritis and arthrosis.
Attention, only TODAY!